We use cookies to make your experience better. To comply with the new e-Privacy directive, we need to ask for your consent to set the cookies. Learn more.
Photolab
0
My Cart


The essence of photography is to utilise a camera to control light and time for a mere instant. We do so to capture a representation of the real world. Certainly you have heard the term that photographers "work with light", and this absolutely true. In every genre of photography, this is a fundamental concept. Macro photography is no different, and having the correct lighting for macro is essential, although it comes with some considerations not present in other genres. Whether you use natural lighting, ring lights or standard flash units, each approach comes with its own challenges when shooting in the macro world.
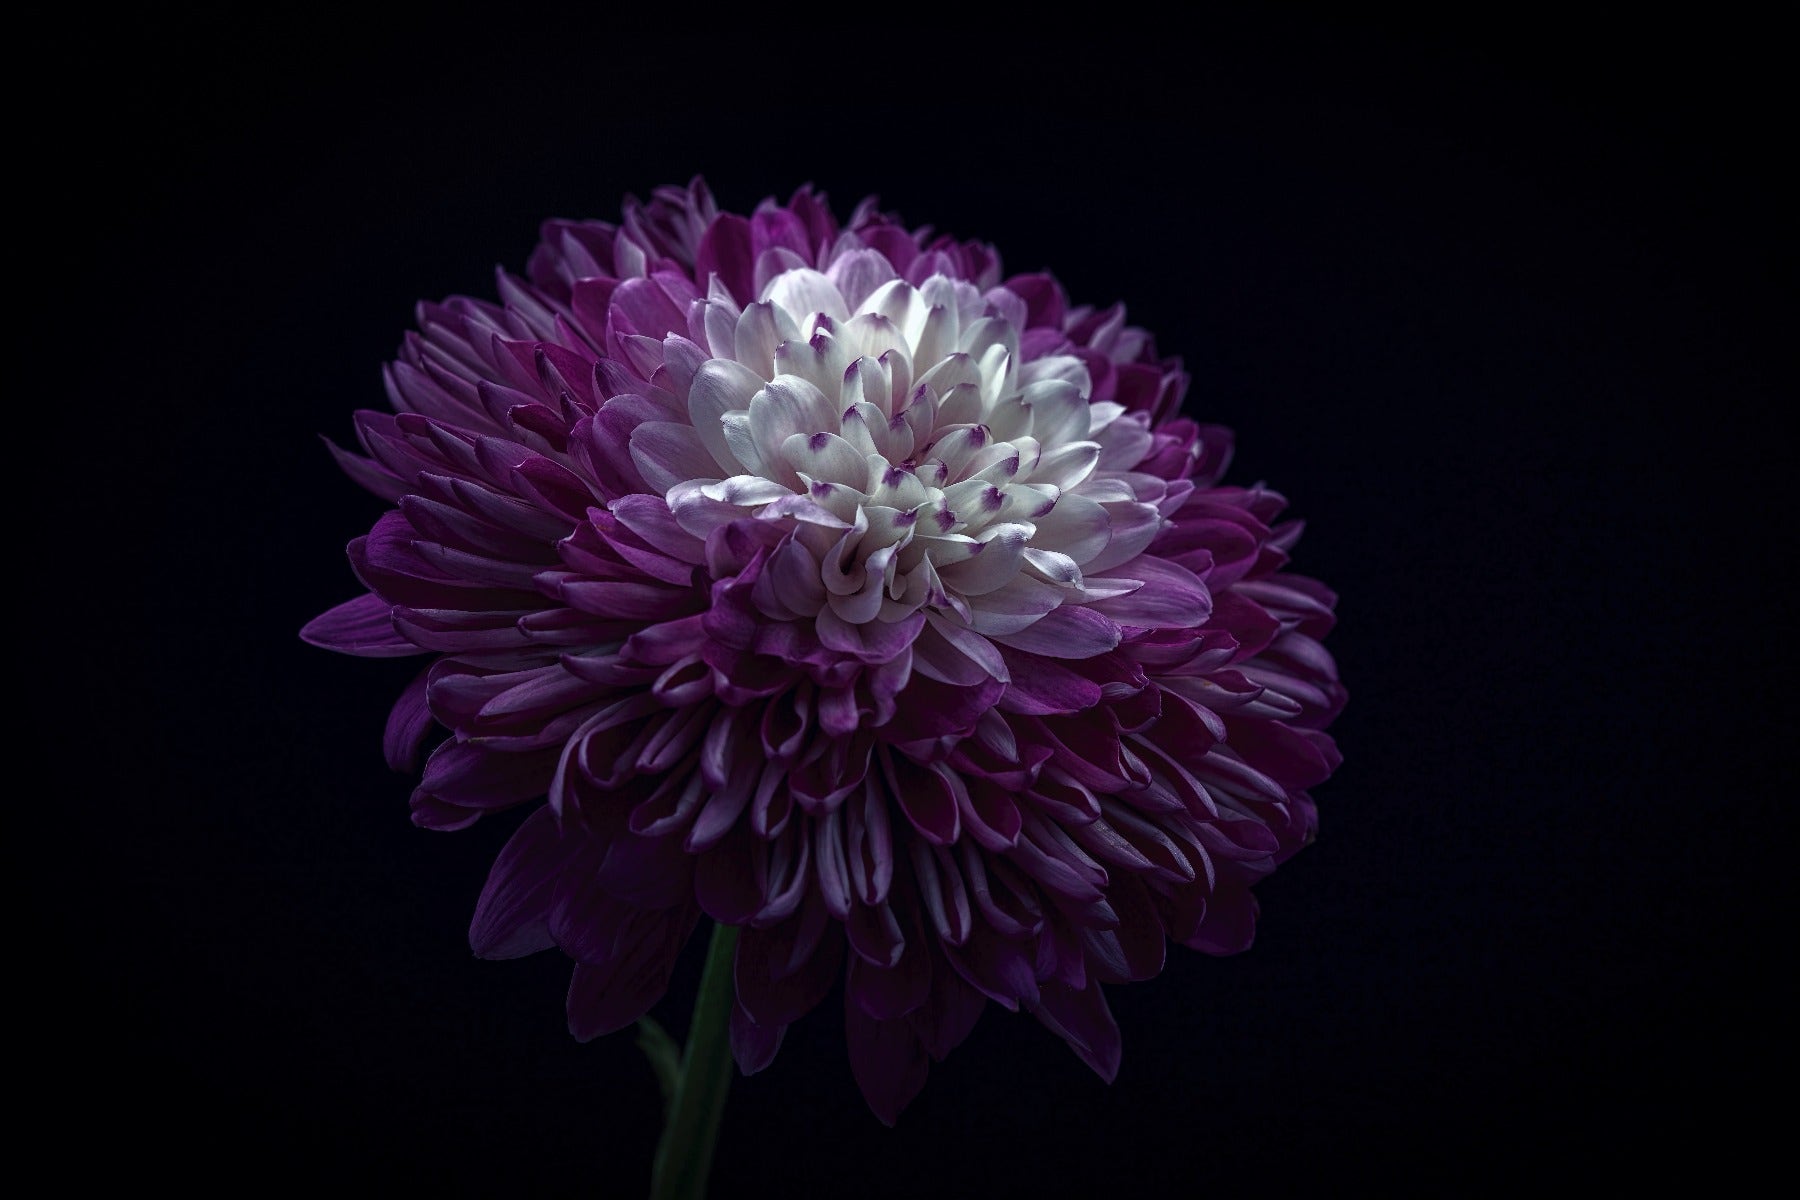
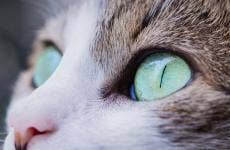
Creative use of lighting is a large part of the appeal of this image. Modelling lighting in this way is much easier in a studio environment, but you can apply the concepts here to outdoor shoots as well
When considering your lighting for macro photography, several options exist. Which one you choose will depend on your budget and your desired outcomes. It is important to give these solutions some thought as macro photography can present some issues that are not commonly seen in other genres of photography.
One of these is the impact on a subject's natural habitat caused by shadows thrown by foliage. When you need to get down low in a setting that has lots of bushes, tall grass and other foliage, you are likely to have trouble gaining enough natural light. Choosing a suitable location is always advisable provided you can find a subject. In addition, due to the small scale of the subjects, you yourself may also be a blocker of light and cause a considerable shadow to fall across your composition. Therefore, be aware of the direction of the natural sunlight. Position yourself in a way that does not block this.
With macro photography, you are likely to shoot with a faster shutter speed to capture your subjects for the brief moment they are still. Faster shutter speeds mean that the camera sensor opens for a fraction of a second. As a result, less light can hit the camera sensor.
The challenge when shooting with a 1:1 ratio macro lens is that your working depth of field is incredibly fine. The wider your aperture, the finer the slice of your subject that is in focus. This is exacerbated by the close quarters of macro work, to the point where shooting wide open essentially blurs out almost your entire image. Naturally, the way to combat this is to work with a smaller aperture. However, smaller apertures again result in less light that can hit the camera sensor.

Shooting with a shallow aperture in macro is an easy way to have your subject be out of focus
The final consideration is to manage light sensitivity with ISO control. However, you don't want to dial ISO up to its max purely to overcome the lack of light. High ISO will result in noise ridden images instead of crisp images of your subject.
As you can see, the general shutter speed and aperture settings conducive to most macro shooting mean that your camera will capture less light. While boosting the ISO can combat this, that will only go so far. This is why having good lighting for macro can be so important.
Happily, there are a number of ways you can address lighting in macro photography. Let's discuss the most popular options.
By far, the most sought after light source for macro photography is natural light. Many consider it the most pleasing source of light, and if you can harness natural light correctly your images will be very appealing.
To best use natural light, you will need to be able to control your camera to leverage the current lighting conditions. You will do so to make the most of the available light. More importantly, sunlight and shafts of light can play an essential role in making your image dramatic. Natural light is free of charge but can be more challenging to master.
Positioning is the most important element here. Since you can't control the light source (the sun), you need to be aware to position yourself in a way that takes advantage of the most flattering application of this light source. Is it high noon with harsh shadows? Or is it golden hour with heavy orange tones? Do you want the subject backlit? It's likely that natural light will always make up at least some of the lighting in your image, assuming you are shooting outdoors in daytime. So you will always want to keep these considerations in mind. But sometimes natural light is not strong enough, obscured by obstacles, or you simply want to modify the light with other options. This is where flash and ring lights come in.
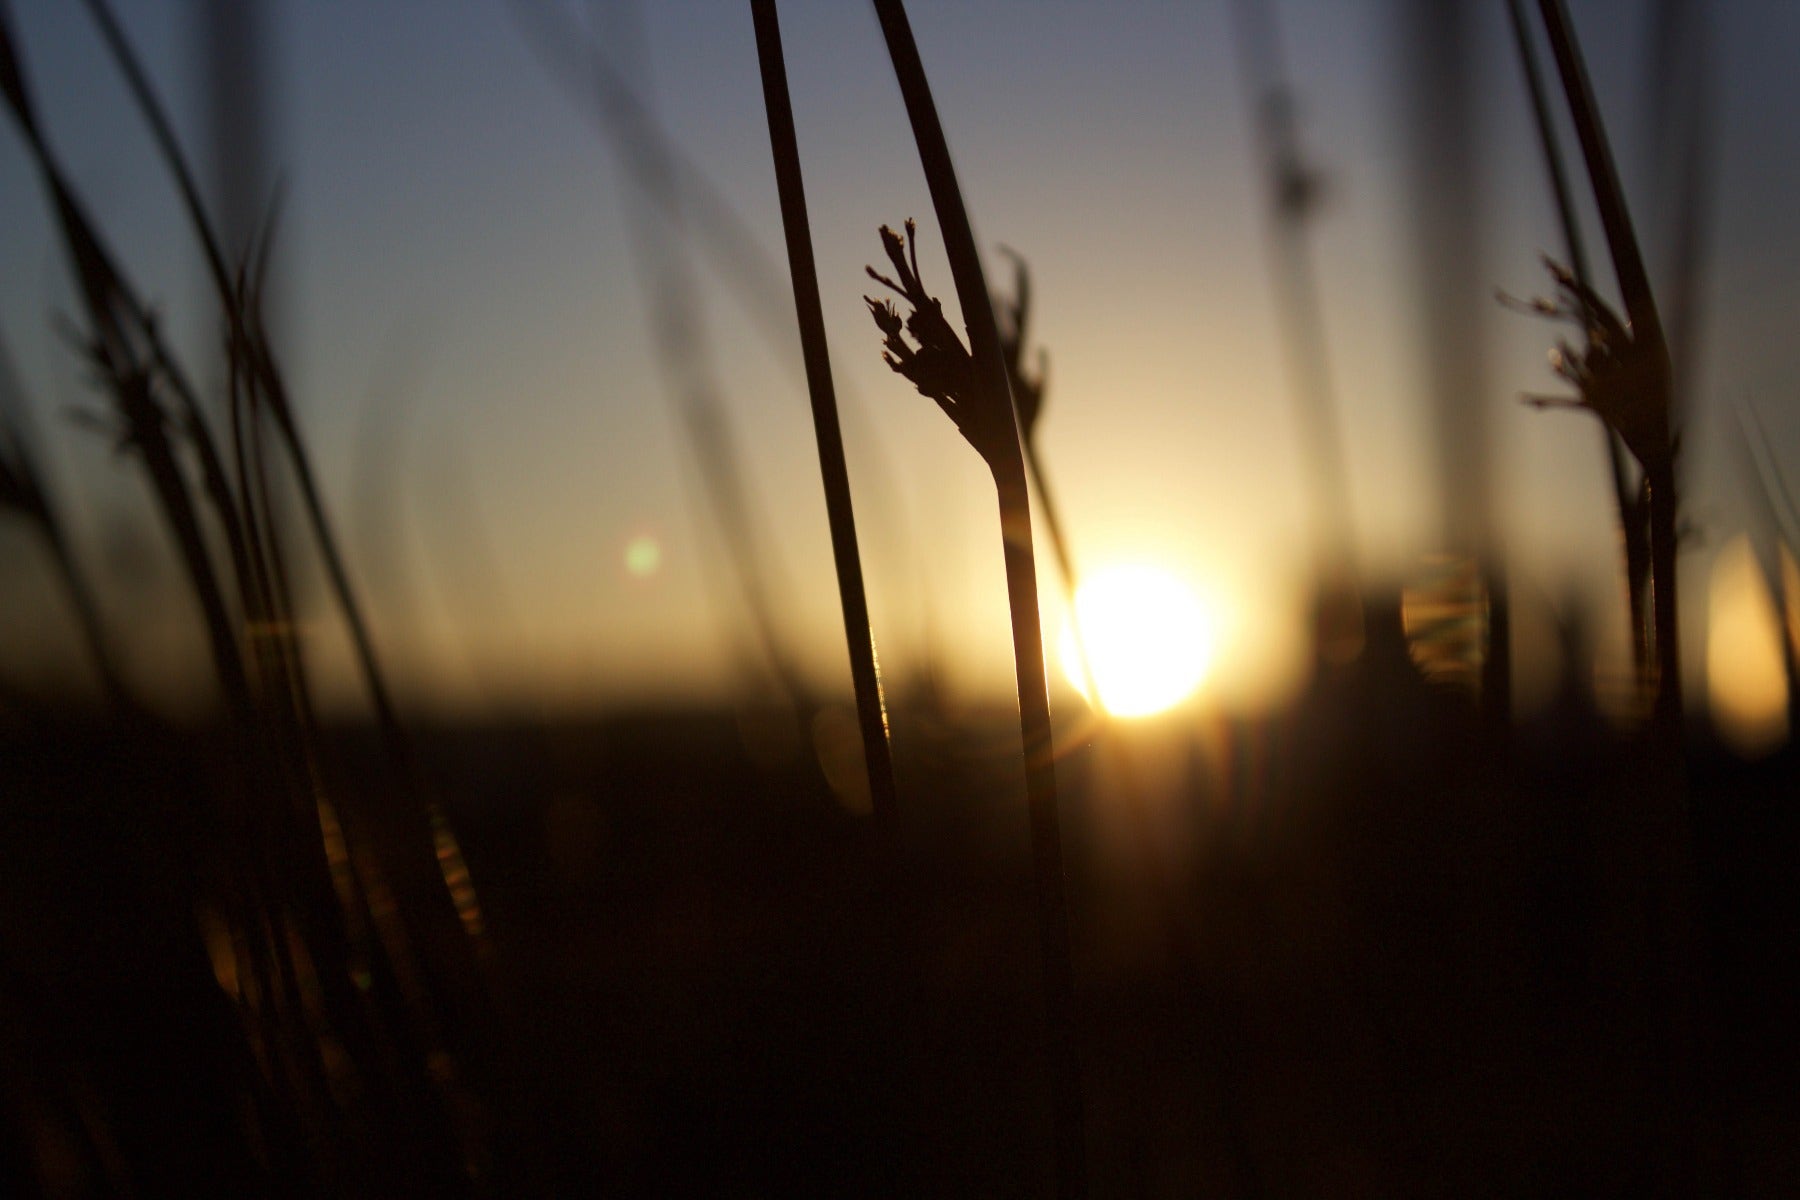
The positioning of the sun relative to your subject is a major consideration when shooting with natural light
A ring light consists of a mount that attaches to the front of your macro lens. This looks quite different than what you might normally think of when thinking of a camera flash. The ring light produces a solid ring of light that projects from the light to your subject.
A ring light attaches to the camera via a trigger. This trigger mounts to the hot-shoe on top of the camera (where a more traditional flash would typically be mounted). This way, you can control the amount of light each time. Some ring flashes feature a pair of small illumination lamps that assist with focusing on your subject. These lamps are especially helpful in low light conditions.
Ring lights are a cost-effective way to gain greater control of your lighting in macro photography. They provide a pleasing and even amount of light to illuminate your subject. We would recommend a ring light for someone just starting in macro photography. They are simple and easy to work with, although they don't always add as much extra light to the image as other flash solutions. A great example of ring light is the Canon MR-14EX II. This unit has two semi-circle flashes, and you can manage each independently to control the amount of light. This level of flexibility can aid in the dynamic look of your subject and composition.
The trigger unit is also capable of controlling additional off-camera flash units. With these, you maximise the amount of light you are creating and how you expose your subject. This ring flash also features a pair of lamps that illuminate your subject and help to capture focus, especially in very low light settings.
One essential to keep in mind is that this kind of ring light can produce light-rings in the eyes of insects. For a beginner, this may not be a big deal, and you may be happy with the outcome. However, for a professional macro photographer, this may be an unwanted feature.

If you look closely, you can see the light source at the top of the spider's eyes
With the above scenario, the ring light mounts to the lens and the actual flash component hugs tight to the barrel of the lens. Such a set-up can be limiting in the amount of creativity and dynamic lighting you wish to add to your composition.
Some ring lights still have a lens mount; however, they have two smaller flash units. These units articulate to move away from the lens and point in different directions. The benefit of such a ring flash is that you can make the light less direct and even more dramatic. You can control the amount of light in each of the two flash units separately. With more experience and practice, the move to this kind of set-up makes sense to those that want to elevate their output.
The most significant risk with this kind of unit is overexposing your subject and washing out your shadows. Shadows can add depth and drama to a composition and by lifting them too much your subject separation will suffer.
Another approach to lighting your macro composition is to employ a standard flash unit. Some would think that the use of a direct on-camera flash would be too harsh and thoroughly wash out your subject. And there is undoubtedly a risk of that occurring if you are not careful - due to the proximity of the subject it does require more care than when using a flash in other genres. However, if you familiarise yourself with the operation capacity of your flash, you will get the hang of it.
In order to manage the output, we would recommend using a diffuser or a bounce card. This can allow you to correctly expose your subject without the harshness of direct flash. Equally, using Manual Mode on your flash unit and experimenting with incremental exposure changes can be a great learning experience.
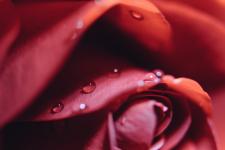
Using a diffuser or bounce card to avoid the harsh shadows visible in this image
A diffuser is a device that can mount over the head of the flash. When the flash fires, the light emitted softens and spread. Diffusing the light reduces the subject from being over-exposed. Diffusers come in all different shapes and sizes and can support on-camera and off-camera flash. One popular diffuser is the MagMod MagSphere, which you can get in a bundle with with their starter package.
A bounce card attaches to the top of your flash unit. Imagine the head of the flash pointing upwards, and the bounce card angled at around 45 degrees. When the flash fires, the light will travel up, bounce off the card and then hit your subject. Through this process, the light is not direct and is somewhat softened. The MagMod MagBounce is a popular and flexible flash bounce, although you'll need the MagGrip accessory that comes in the starter package.
Standard flash can be of great use when shooting in a studio setting. In this scenario, you can utilise off-camera flash units to light your scene and your subject. You can take the time to establish the light sources from one or more flash units. A trigger mounted to your camera hot shoe controls these additional units.
The Nikon SB-700 is a great example of a more traditional flash that mounts directly to your camera. This kind of flash is a suitable size for macro photography in either a studio setting or out in the field. It is lightweight and has a head that rotates, allowing for light to bounce off other objects.
The great thing about macro photography is that you can start with the most cost-effective lighting solution of all. Natural light is an excellent starting point for anyone new to this genre of photography. Equally, it is an excellent opportunity to learn about how your camera uses time and light to capture an image. Such an understanding is a fundamental photography principal and one learned with practice.
Shooting in a studio environment (and with a static subject) affords you the ability to be much more specific with your lighting
Thankfully, as you progress in your skills and capabilities, there are options available to you to step-up your image output. Through the use of ring lights and flash units, you can gain greater control of light. Further to this, you can create exciting and dynamic images through the use of highlights, shadows and contrast.
Once again, this will not result in instant success. But it will require further practise and experimentation to gain the right balance in your images. Fortunately for you, the pursuit is the most significant part of the prize in macro photography.
If you want some advice on which lighting options might best suit your setup, contact digiDirect. Our friendly staff can help you pick out the right gear for your needs, always at a great price.


Comments
No Comments yet. Be the first to comment.