Written by
Sharon Blance
Sharon Blance is an award-winning photographer focused on human-centred commercial and editorial photography. She's half of
Image Workshop, a Melbourne-based creative duo helping brands and businesses create experiences and tell their story. Her clients include Toyota Australia, Beats By Dr Dre, The University of Melbourne, and more.
I'm a commercial photographer by profession, so you might think when I'm on holiday I'd want to put down the camera and be 'off duty'. But I love travel photography, and my vacations are often spent camera in hand, seeing how well I can capture the feeling of the place I'm in. A lot of photography articles focus on gear, technical aspects and camera settings. But I'm going to give you concepts to improve travel photography without ANY mention of shutter speeds, apertures, or gear.
Because the most important piece of photography equipment is between your ears, and the way you think will change the way you shoot.
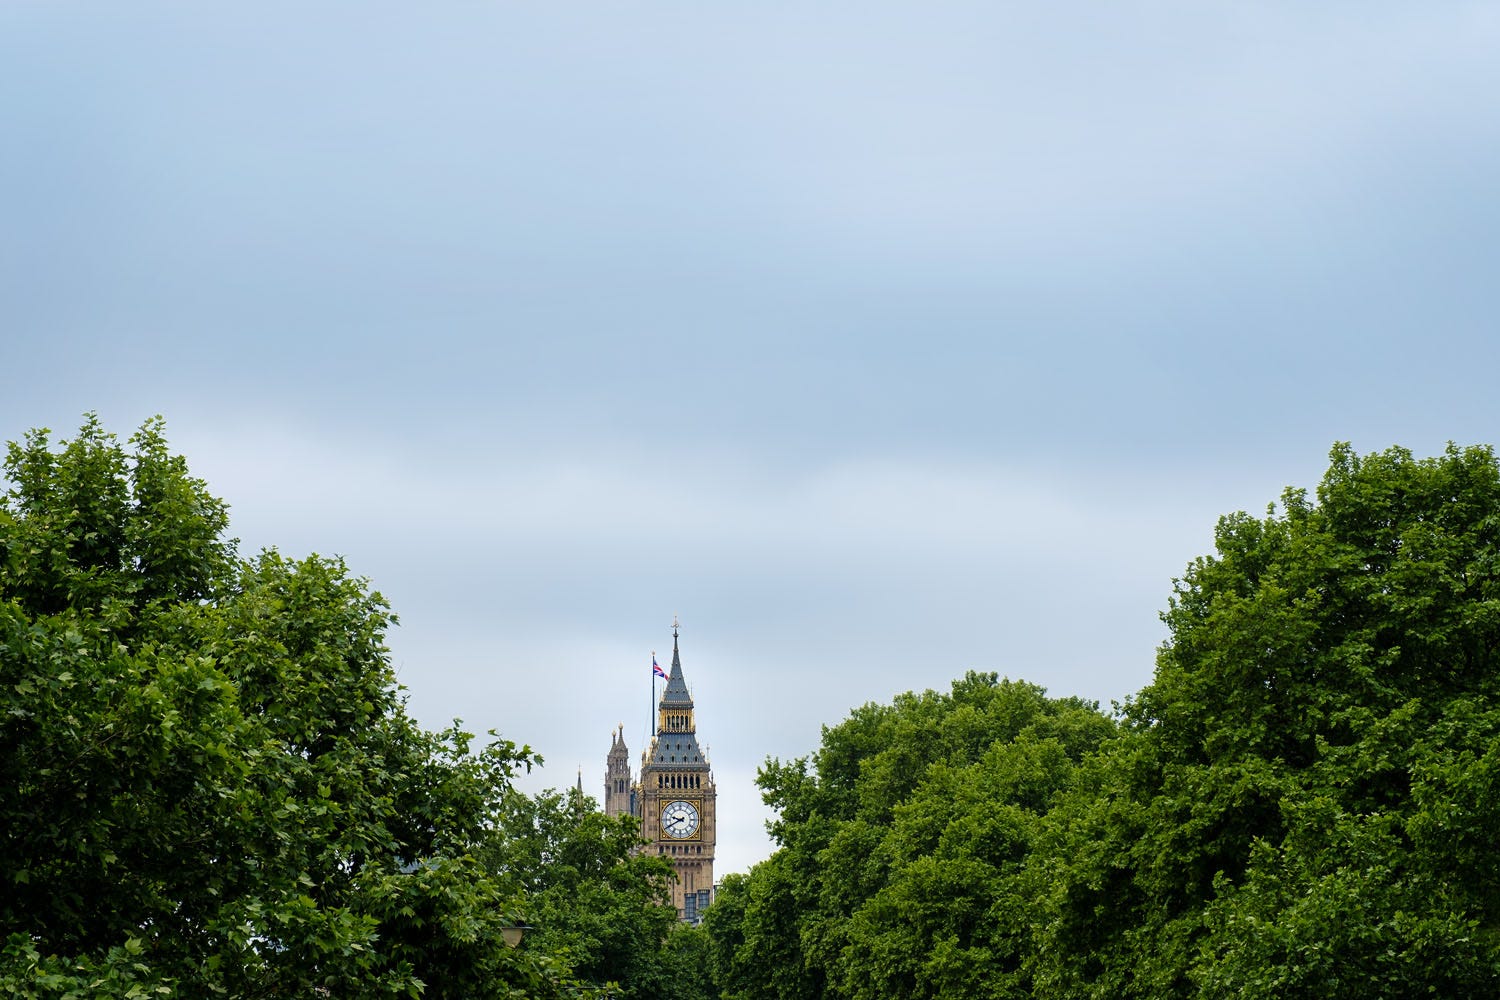
Shooting intriguing travel photos means finding your own viewpoint
So, what does 'Better' mean?
We say we want to take 'better travel photos' ' but what does 'better' mean? For me, it means creating more personally meaningful, emotionally resonant, visually compelling images that convey the sense of what it was like to be in that place. Seeing a place fresh, going beyond snapshots, clich├®s, and worn-out postcard views. If your purpose is to get more likes on Instagram, then your goal isn't actually to be a 'better travel photographer' ' it's to be popular, and that's a different game.
So ' I'm assuming if you're reading this you've got a desire to go beyond snapshots and put more craft into your travel images. Let's look at some ways to do that, regardless of if you're carrying a DSLR or just an iPhone.
1. Don't photograph a place ' photograph your experience of the place
Photos are the tangible results of choices. What to photograph. How to photograph it. Photos are essentially the photographer's way of saying 'Hey, check this out! I find this interesting'. In the excellent book A History of Pictures, artist David Hockey notes that we experience place not objectively but psychologically:
'We all see the world in our own way . When we go into a room we notice things according to our own feelings, memories and interests. An alcoholic will spot the bottle of whiskey first, then maybe the glass and the table. Someone else notices the piano; a third person sees the picture on the wall before anything else.'
Your personal filters of feelings, memories and interests makes your experience of that place different to what mine or somebody else's will be. An architect will see New York through a different set of filters than a fashion blogger.
Cities and places don't exist objectively 'out there', they exist through lived experience, and everyone's experience will be unique because of their internal filters. In this way all pictures have a point of view, according to when and how the camera was pointed. What subjects, angles, and juxtapositions are interesting to you?
In other words, don't just set out to 'photograph New York'. Photograph how you feel about New York. I know this can sound a bit hand-wavey and philosophical, but it's a subtle-yet-powerful mind shift that will help push you away from clich├®s and same-same postcard views. What about New York (or London, or Berlin) is interesting to you according to your feelings, memories, and interests? Photograph that.
2. Find common visual motifs
What are the distinctive characteristics that make this place, this place?
It's exciting to be in a new city or country because things look different to what you're used to. That's half the point of travel: exploring the different-ness. As you're tuning into the visuals of a new place, you'll notice certain things ' patterns, colours, objects and textures ' again and again. I call these 'Hallmarks of the Realm'. They are the distinctive things that make that place, that place.
Note that these common visual motifs can and do easily veer into the land of clich├®s: things that are already well documented (think gondolas in Venice). By all means shoot them anyway ' they ARE part of your experience after all and part of that place's personality. But do keep looking for other, less well documented things that resonate for you personally.
When I think about New York, of course I picture the Empire State Building and Brooklyn Bridge (and I have the usual photos of both), but I also think about water towers. I noticed them all over the place while walking around the city ' they became a 'New Yorky' thing in my mind.
In Vietnam it was old fans and walls washed with a colour I still refer to as 'Vietnamese blue'.
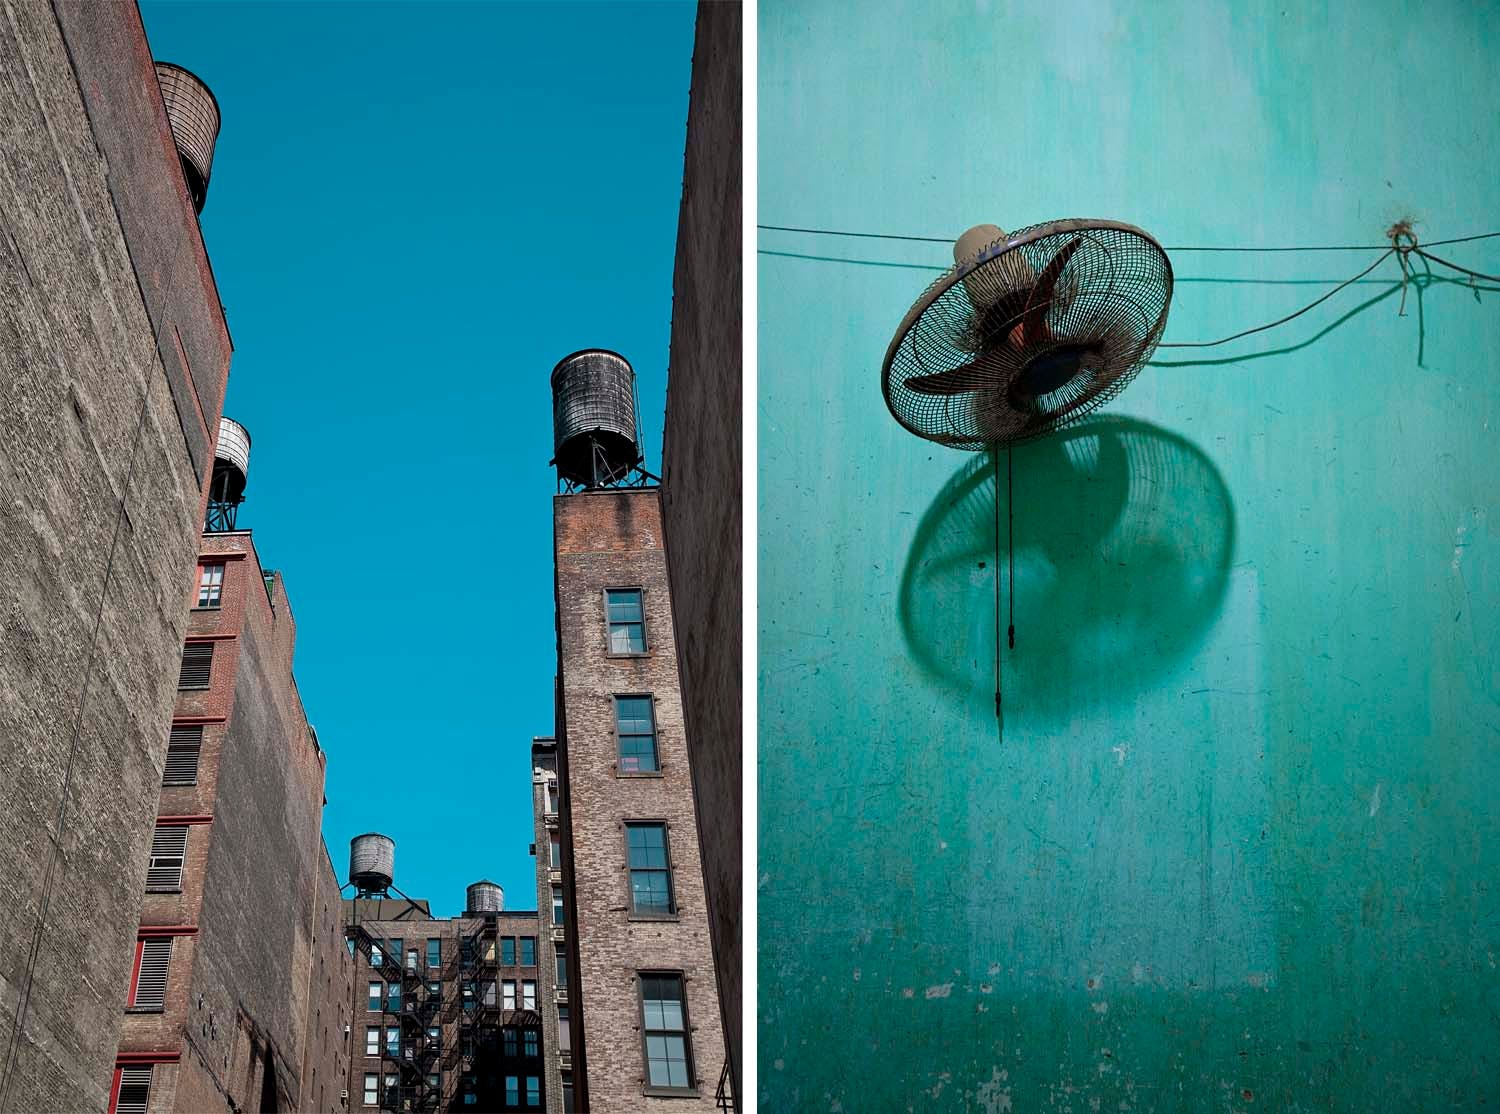 New York water towers; old fan on a blue wall in Vietnam ' the Vietnam image is framed in my apartment because its object/colour symbolism so encapsulates my memories of being there.
3. Look for 'Establishing', 'Detail' and 'Action' shots
Some years back I was reviewing thousands (OMG, thousands) of photos I took in Vietnam and noticed a trend: I'd been trying to take artful 'folio-worthy' images, but in doing so I'd gravitated to lots of tight views and details. The images were nice, but as a whole felt disjointed and lacking in 'flow'. I hadn't taken wider establishing shots to give context to the details.
Movies and TV use these to set the scene and tell us where we are. Here's examples of establishing shots of the prison in The Shawshank Redemption and of Hogwarts in the Harry Potter films
Now when I'm travelling, I look for three kinds of shots: 'Establishing', 'Detail' and 'Action'. This is a mental reminder to capture a range of 'zoom' levels (regardless of if you're using different lenses or 'sneaker zoom'), and helps you look for moments within the scene.
- Establishing shots are typically wider in view (e.g. taken from further back). They show more of the breadth and scope of a place and set the scene and context. These shots say: 'This is where we are.'
- Detail shots have tighter framing to isolate which aspects of the scene you find interesting: think patterns, colours, textures, key objects, etc. Detail shots can vary from medium-range views to really tight closeups. These shots say: 'Here are the bits within this place I find interesting.'
- Action shots are about a moment in time, and often (but not always) involve people. Framing can be wide or tight or whatever ' the concept is that you're showing something 'happening' rather than something that's just 'there'. The action doesn't need to be huge or grand ' it can just a small gesture or expression. These shots say: 'This is what happens in this place.'
Imagine a big outdoor fruit market ' an establishing shot could show a wide view of the market set up on the street, detail shots could be an individual market stall (midrange) or a fill-the-frame view of a pile of oranges (closeup). An action shot might be a smiling stallholder handing a bag of fruit to a customer. Together this mix of images tells the story of 'being at the market'.
Here's an example from Cuba:
 Cuban tobacco farm: Wide view of fields and drying hut = Establishing shot, Cowboy rolling a cigar = Action, Cigars on table = Detail
Capturing a variety of views from wide to midrange to closeup is more visually interesting than if all your shots are of the same 'zoomage'. And peppering Action moments through your images adds a sense of life.
Here's another example of a roadside shop in Laos:

If I hadn't captured the wider establishing shot, then the midrange view of the man sitting by the pot would have no context. And what's in the pot? We get to see in the tighter detail photo. Each 'zoom level' tells part of the story. Notice how the hand scooping out the egg makes that photos just a tiny bit 'actiony' ' it's more dynamic than if it was a view of the pot alone.
On your travels try to keep tabs on the range of views you're showing. Don't forget to establish the bigger picture before delving into the details, and to look for actions to add life to the scene.
(Side Note: this tip and Tip #4 below are a simplified introduction to building a photo essay ' google that term if you want to dig deeper)
4. Show a narrative
In travel journeys there's often a 'hero moment', which is the 'obvious' shot you're going to take anyway ' like on a fishing trip when someone reels in a big fish and holds it up for the camera. But surrounding that hero moment are additional story elements that show how the hero moment came to be.
Remember the old adage: 'It's not about the destination; it's about the journey'. Think of that visually - it's not just the photo taken standing triumphantly on top of Mt Everest, it's the extra shots that give it context: the preparations at base camp, struggling up the mountain, footprints in the snow, frozen moustaches ' you get my drift. Building a narrative means creating a series of images that work together to tell the story, not just waiting for the hero moment to occur for you to pull out the camera.
I spent a weekend in Tofino in Canada ' a gorgeous small town on the edge of a stunning nature precinct. I excitedly booked a bear-watching trip, where you get taken out on a small boat to see bears foraging along the rocky beaches. Of course, everyone on the boat starts taking photos as soon as we see the bear: it's the Hero moment. But in the lead up to the OMG THERE'S A BEAR SNAP SNAP SNAP moment I looked for extra shots, ones that would help tell the story of 'The Bear-watching Trip':
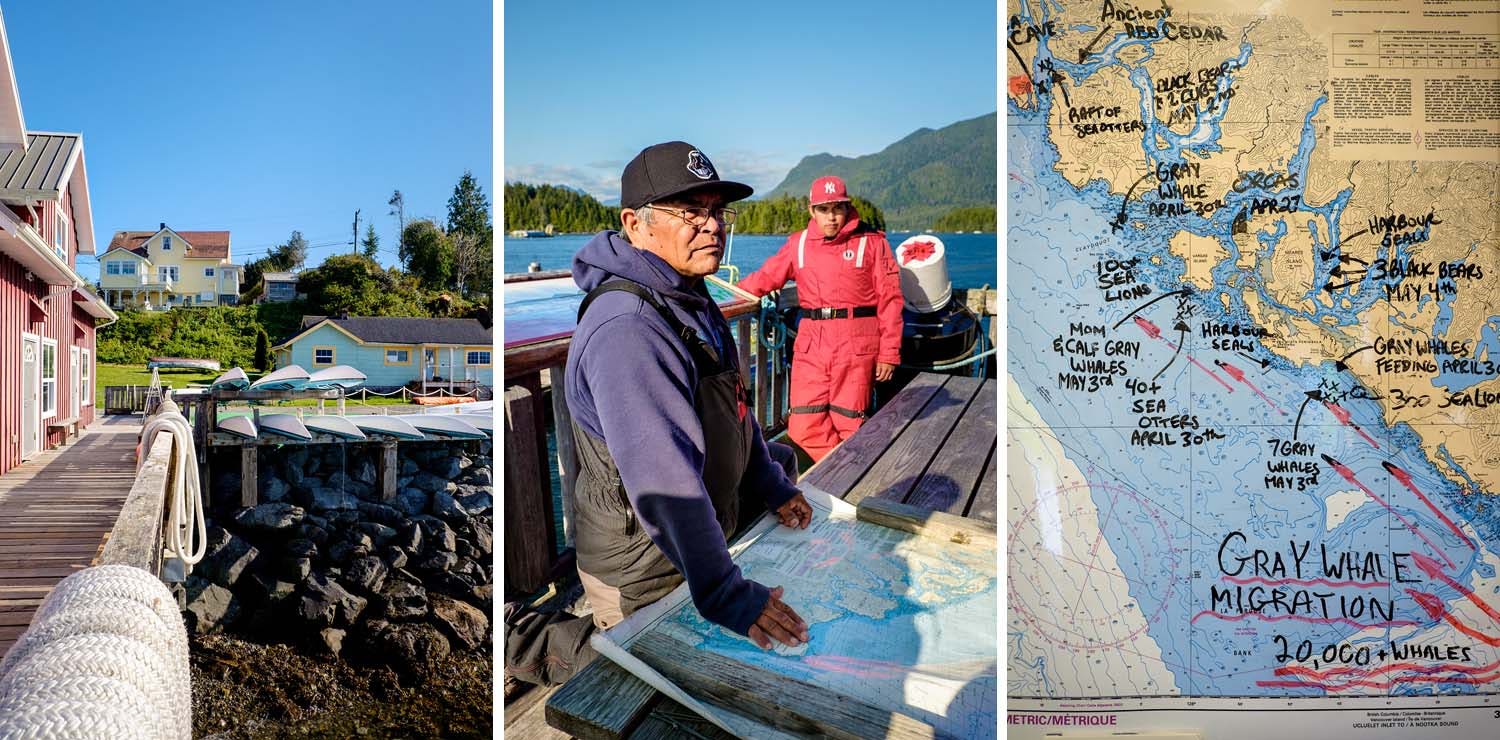

 Bear watching in Tofino ' photos from 48 Hours in Tofino
On your next trip when you're heading off to 'do a thing' or 'see a thing', try photographing what leads up to it. The preparation, the equipment, the signage, the journey to get there. Look for the story photos you can wrap around the hero moment.
5. Set yourself a themed mini-assignment
This is a piece of advice I've personally found is a lot of fun to play with. The idea is that in addition to shooting your regular travel photos, you also set yourself a challenge to shoot a set of images based on a specific theme ' something you personally find interesting. It could be literally anything: 'Hot dog vendors of New York', 'Traditional fishing activities in Norway' or even 'Doorways of old pubs in London'. Whatever sparks joy in you.
On a trip to Hong Kong I gave myself an assignment to shoot an image series of old neon signs. Before the trip I researched the streets and neighbourhoods where old neon signs were located, and once in the city I dedicated a few evenings specifically to walking around photographing them. It turned into my Hong Kong Neon image set, which got republished by Wired, MyModernMet, and other online art & culture sites.
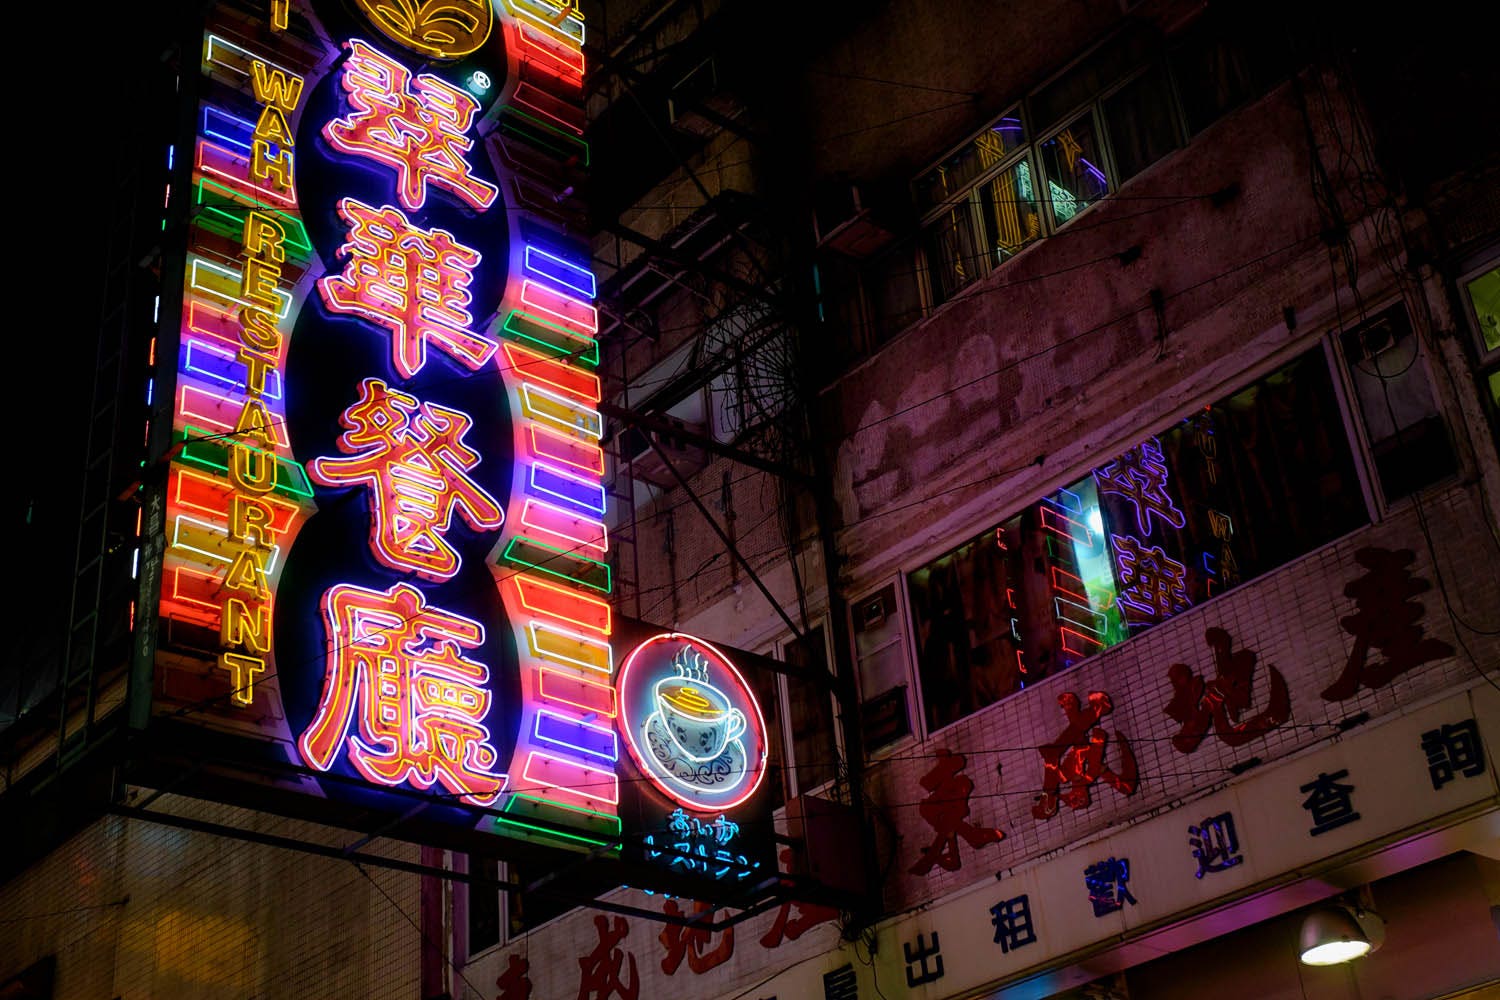 One of my favourite images from Hong Kong Neon
With the Neon series, I'd originally planned to shoot wider views showing more of the streetscape, but once I started work on the project the tighter, more isolated views are what I felt more strongly about. Don't be locked into your original idea, you can let it evolve on the fly (or on the editing table) if you need to.
You can pre-plan a theme before a trip (like I did for Hong Kong) or discover one once you're in a place, if you're open to your surroundings and seeing what resonates with you.
On trip to Cuba I noticed there were dogs, like, EVERYWHERE. I love dogs, so my 'dog noticing filter' was going nuts, and dogs became one my Hallmarks of the Realm. I decided mid-trip to photograph all the dogs I saw, and turned it into a Dogs of Cuba image series and short essay because it's a particular slice of Cuba that resonated for me.
Assignment themes can be fun or serious, large scale or completed in an afternoon. It gives you a different way of engaging with a place, and it's interesting to others because it shows them somewhere through a filter they probably haven't seen before.
6. Get off the beaten track
I know, I know, this one is a bit of a no-brainer. But it really does bear repeating: it's so worth getting away from well-trodden paths to find interesting things or different views that haven't been photographed a million times before.
Two great ways of doing this are:
Wander around on your own
Go down side streets, alleys and generally skulk around away from the main tourist sights. Be the person that says 'Hmmm I wonder what's over here?' and heads off down a random side track. Allow time in your itinerary for 'pootling around', meandering, getting lost and finding random discoveries. My partner and I know we'll typically spend twice as long as 'regular tourists' visiting places because of the necessary 'wandering around' time needed for photography. If a guidebook recommends 2 hours at a location, we'll plan a half day.
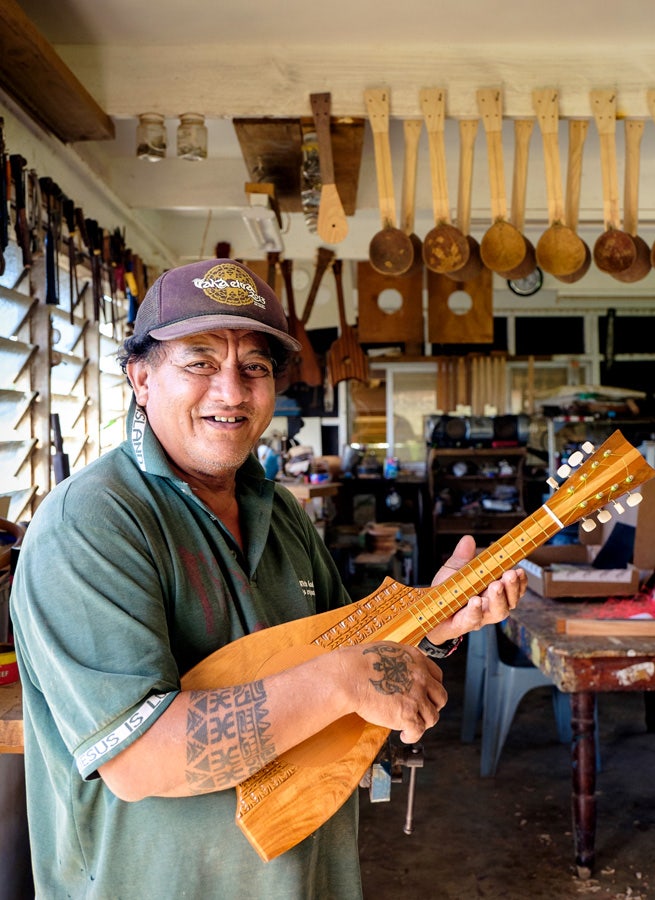 Randomly pootling around the inner village roads of Rarotonga led to stumbling across a guy who hand-makes beautiful wooden ukuleles and getting an impromptu private tour of his workshop, where I took this portrait.
Book a private tour with a local guide
Two of the best photo-op travel experiences I've had were with private guides, ending up in places I never would have found (or even known about) myself. You'll see things not on the main tourist radar, have more time to take photos, and get the benefit of your guide acting as cultural liaison ' chatting to the locals in their language and smoothing the way to go to more non-touristy places.
In Vietnam my partner and I spent a week on a private motorcycle tour with Hung of Phong Nha Motorbike Tours. It afforded some of the best and most meaningful photo opportunities of our 3-week trip. He took us way, way off the tourist track: 'If a road is big and straight ' we don't take it!' he would say gleefully. We watched rice harvests, met loads of locals, visited remote villages, got invited to share tea. and ended up in places barely any other tourists go.
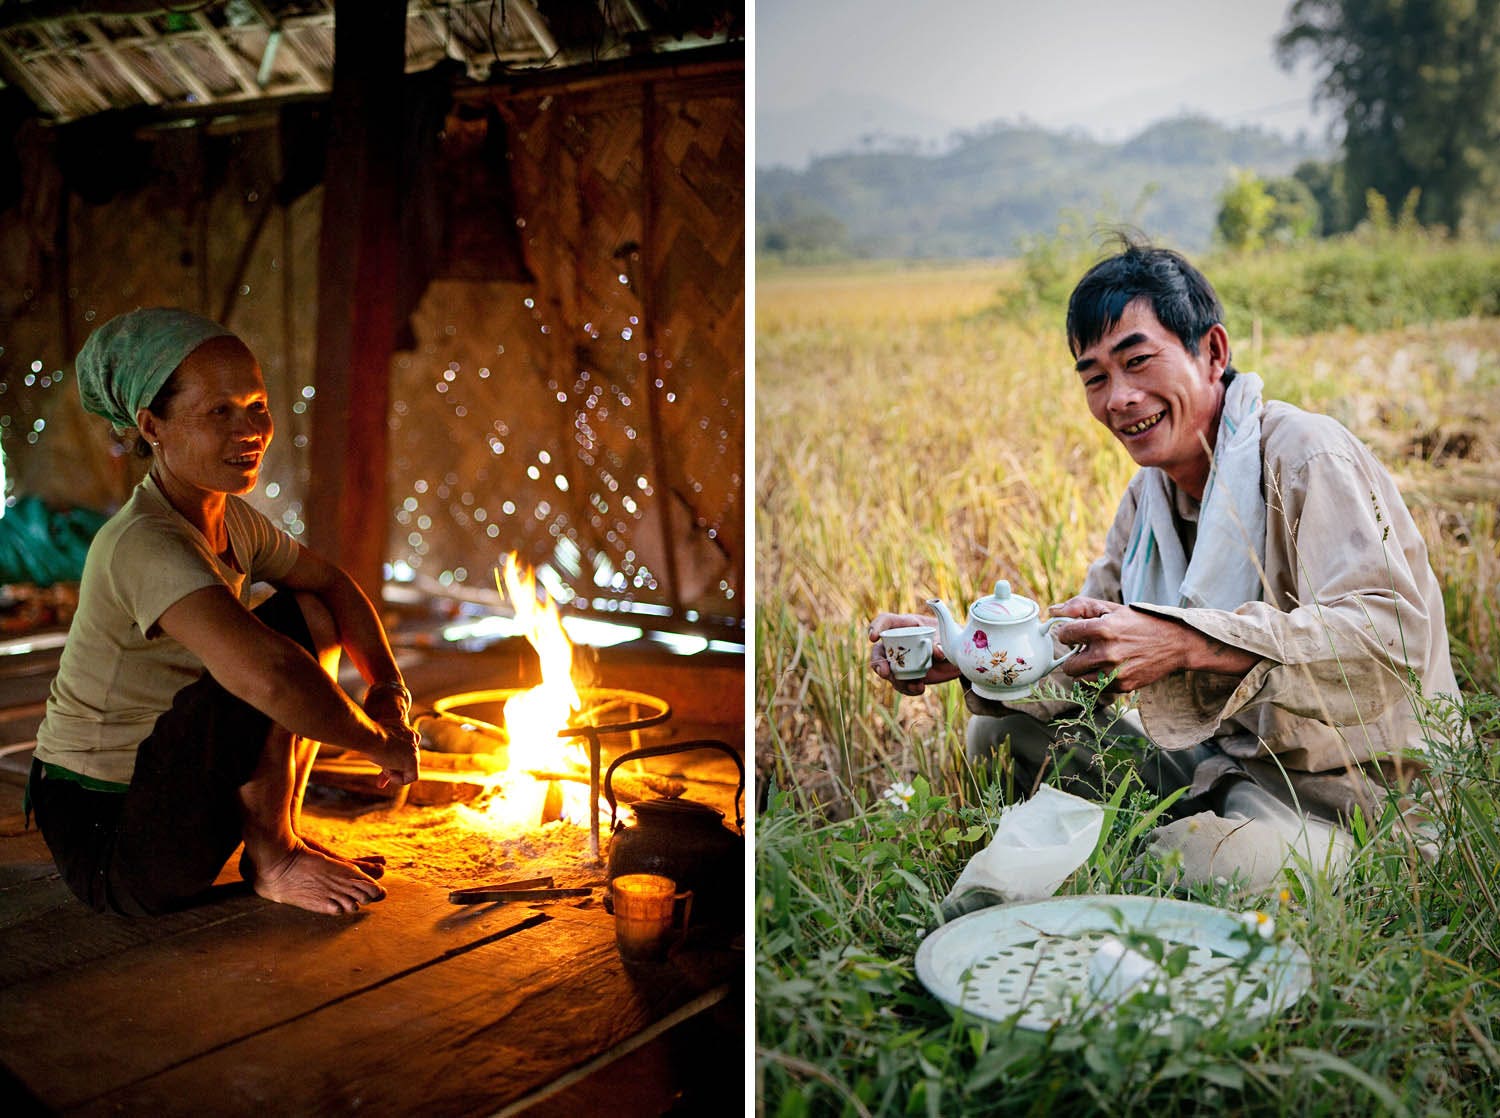 Sharing tea with locals in far north Vietnam ' experiences we wouldn't have had without a local guide
Likewise, in Hong Kong a private food tour with Ashley of Hong Kong Food Crawlers took us to an incredible and unique bakery, one of the last ones remaining in the city producing classic Hong Kong baked goods by hand with traditional methods. It was in a totally non-tourist area, many stories up in a nondescript industrial building ' we simply never would have known about it without Ashley's local knowledge and interest in showing us real Hong Kong food culture.
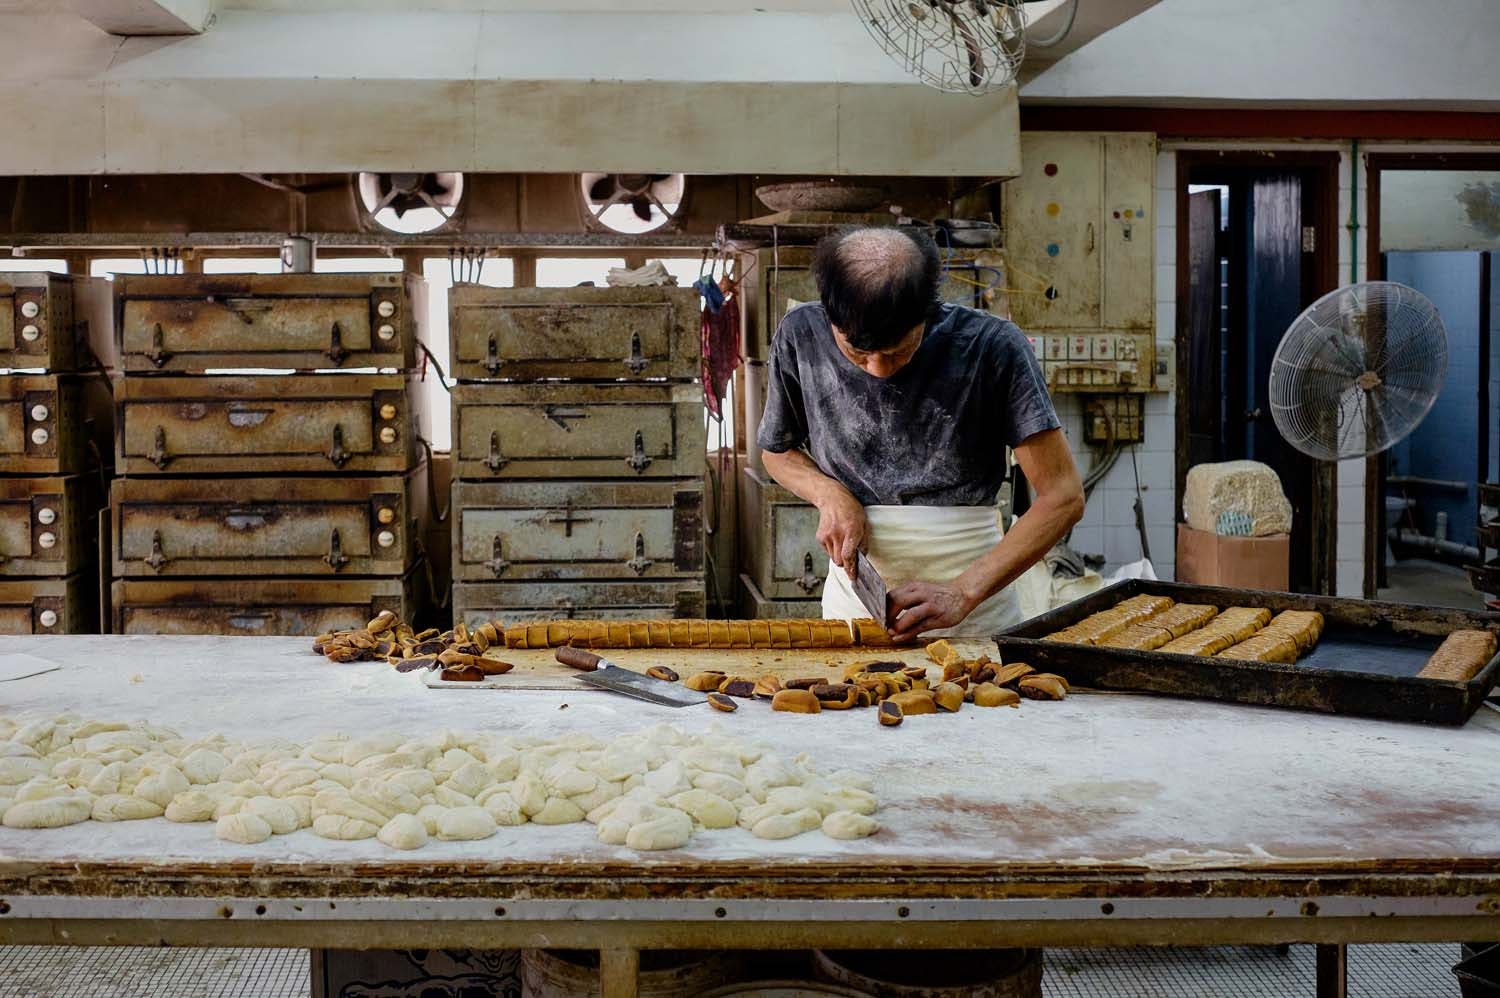 Inside a traditional Hong Kong bakery ' an unexpected visual highlight
7. Don't forget to put down the camera!
Sure, we want to capture amazing images of compelling places and moments in time. But if we go too far we can lose our connection to a place. It's a fine balance. Something that drives me nuts (like, #!@$%#! nuts) is seeing people on their travels (in a temple, a gallery, at an iconic building, whatever) with a camera up to their eye near-constantly, whose only view of that place is through the lens. Click click click click click click. Or people who visit a scenic or famous spot just to take a selfie and then immediately leave because they're 'done'.
Aaaaaagggghhh!! Don't be that person.
The camera is ultimately an added layer, a filter, a shield between you and the world. Don't have the lens to your eye relentlessly. Don't just take non-stop photos of the artworks in a gallery or at a cultural show. Experience the art. Get lost in the show.
Remember Tip #1? Photograph your experience of a place.
To be a good documenter of travel you need to be a good experiencer of place and culture, soaking it up with your heart not just your eye. Which means being able to put down the camera and be present to the moment.
Life is just a series of experienced moments (and to be honest the most profound ones never fully translate into imagery anyway). Don't forget to live those moments fully. To spend time just being, soaking it up, letting it feed your soul. You'll have richer travel experiences, and that richness will translate into the photos that you do take at other times.
Interested in contributing to the digiLife blog? Email community@digidirect.com.au with the subject line "digiLife Contributor", and include links to your photography portfolio and a writing sample.





 Bear watching in Tofino ' photos from


Comments
No Comments yet. Be the first to comment.