We use cookies to make your experience better. To comply with the new e-Privacy directive, we need to ask for your consent to set the cookies. Learn more.
Photolab
0
My Cart


Digital photography was a revolution that freed us from the lag time between clicking the shutter and seeing how the image worked out - the digital LCD screen ushered in the era of instant feedback.
Shoot, look at the screen, see if looks right. It's super handy and for most purposes wayyy better than waiting for film to be developed.
BUT the new 'instant feedback' also encouraged a new way of thinking, along the lines of:
You don't need to understand all that technical camera-jargon stuff about settings now - just take a pic and look at the screen to see if it looks good!
And in a way it's true. You don't actually need to understand the 'nuts and bolts' of how a camera works to take reasonably nice pictures. Whack it on auto and snapity-snap.
But here's the thing: if you DO understand how the camera 'thinks', you're gonna make way better pictures because it puts you in the driver's seat, making pictures EXACTLY how you want them to look - not how auto-everything mode churns them out. Especially in situations that auto-mode can't handle, or when you want to get creative.
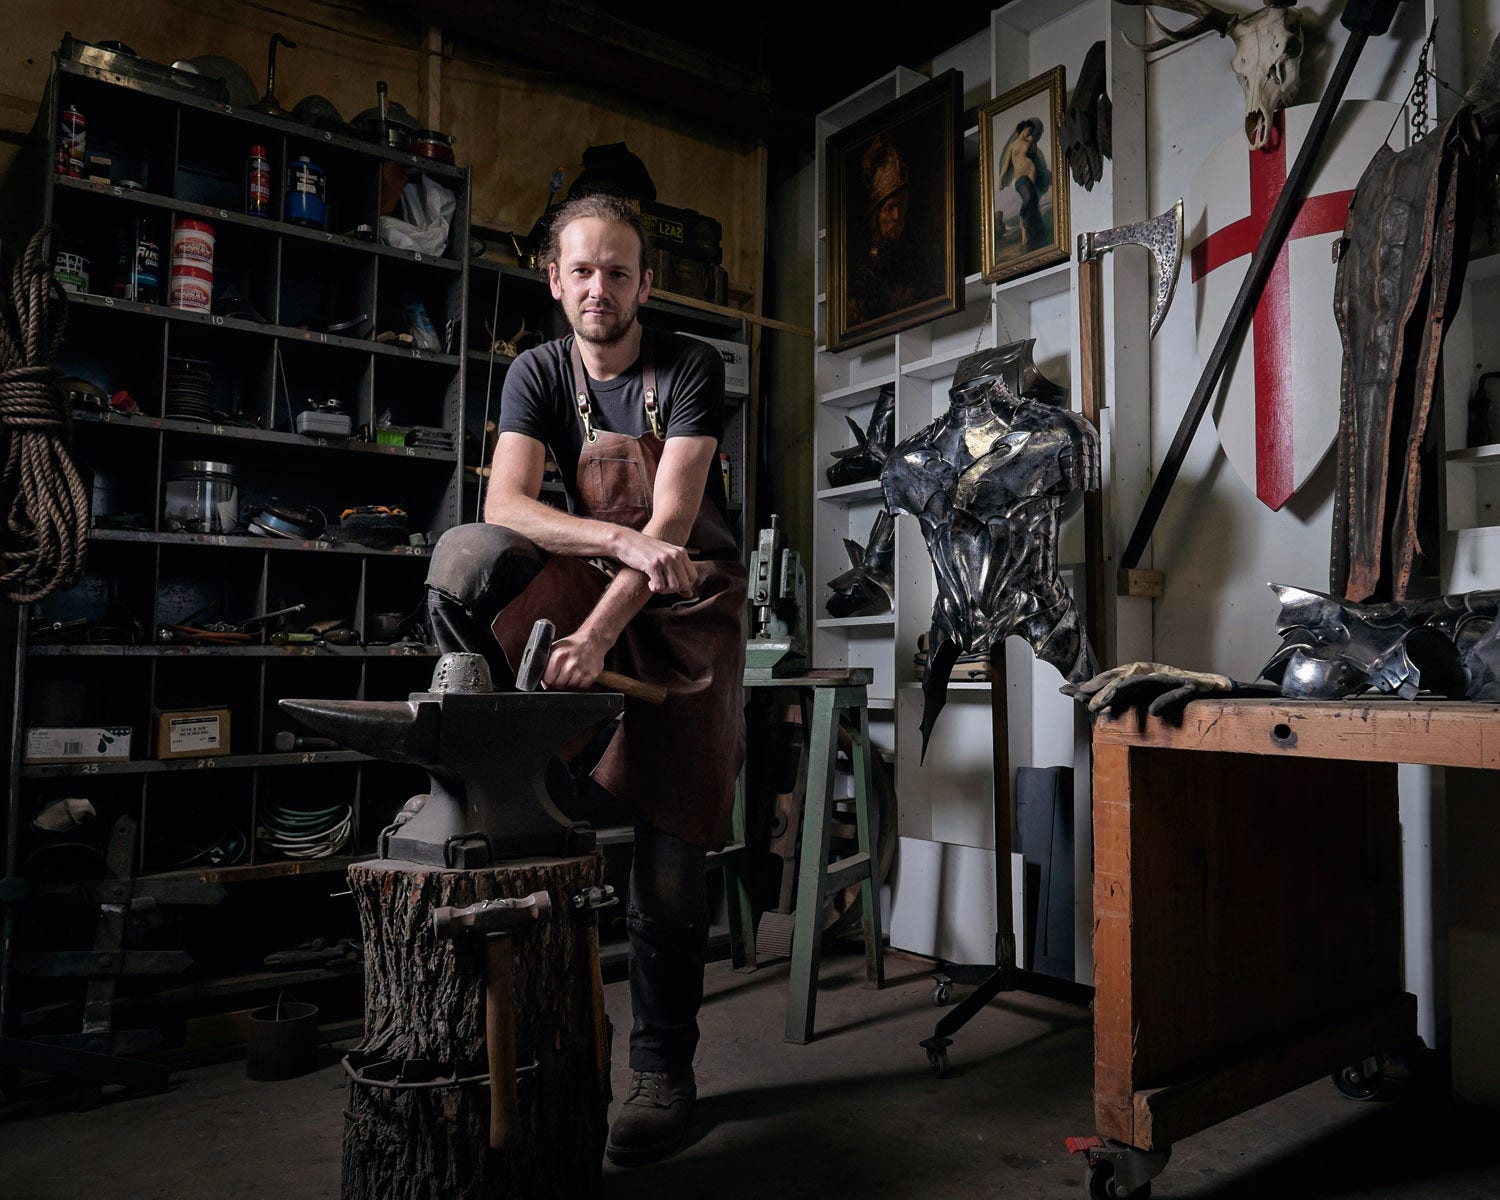
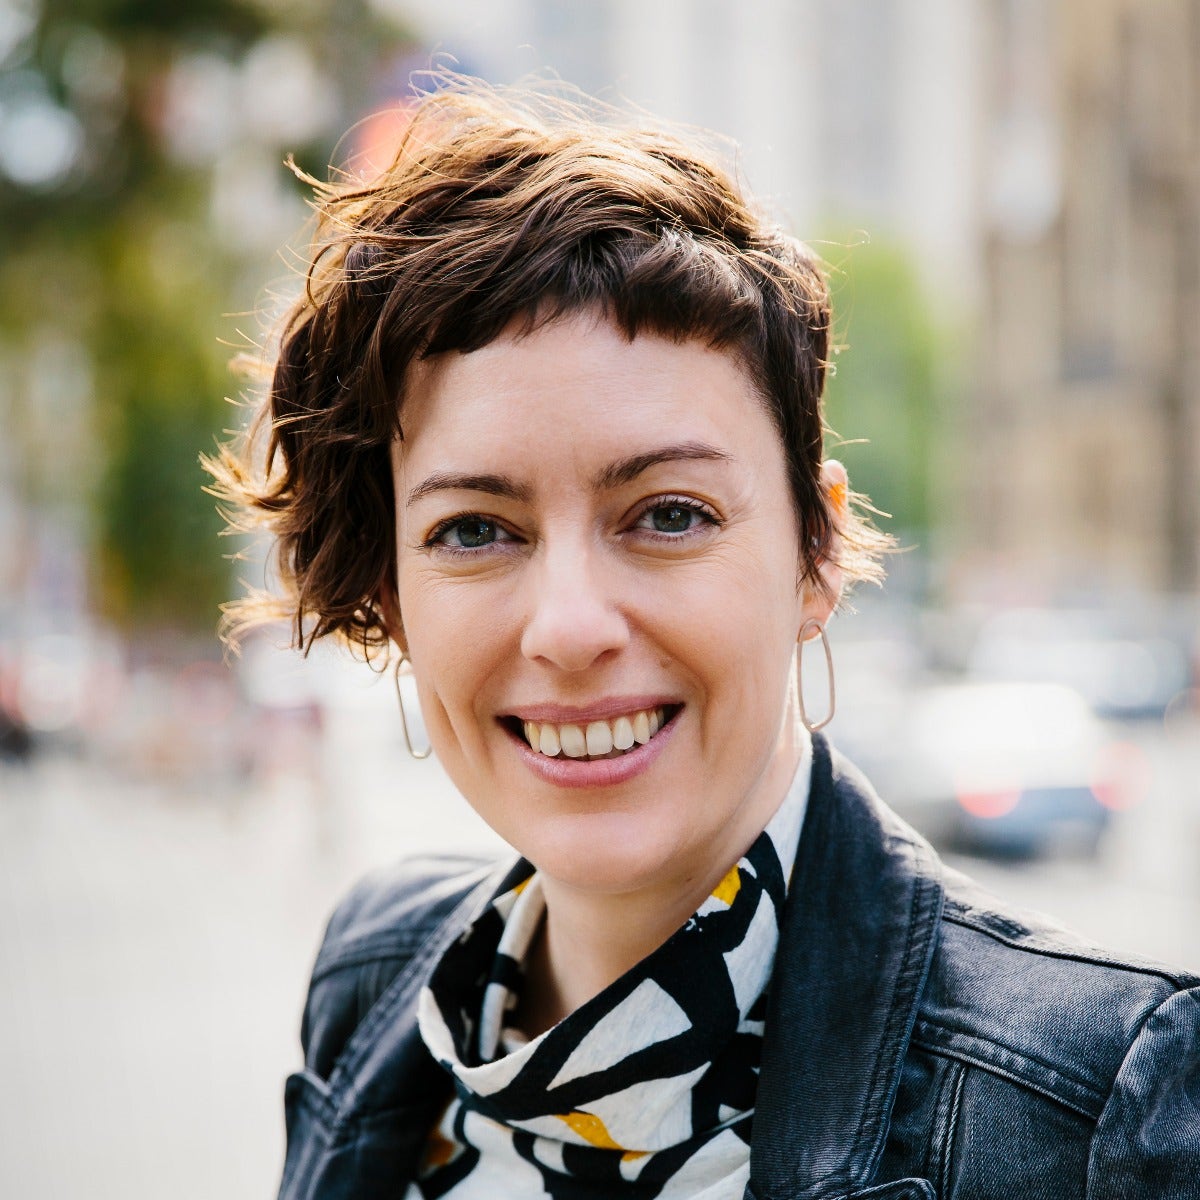
Stop - Hammertime! Understanding stops means taking control of settings and crafting images to look the way you want. Portrait of @lordbloomfield by my partner-in-crime Brence Coghill
Your camera thinks in 'Stops'. And if you get to grips with what 'stops' are then things make way more sense, you can confidently dial in settings, use manual mode instead of Auto, and master cool stuff like off-camera lighting.
So let's take a deep dive into Stops, what they are, and how to master them!
A 'stop' is a measurement of how much light the camera is seeing. Your bathroom scales think in kilograms (is it heavy or light?), your plastic school ruler thinks in millimetres (is it short or long?), your camera thinks in stops (is it bright or dark?).
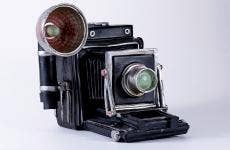
Yes it is! It dates from the ye-oldey early days of photography and the invention of 'Waterhouse Stops'. In 1858 astronomer-inventor John Waterhouse devised a way to control how much light entered a lens by inserting thin sheets of metal into a special slot in the lens barrel. The metal sheets had holes of varying sizes - the more light you wanted to cut, the smaller the hole you choose. It's literally a barrier in the lens to 'stop' some light from entering.
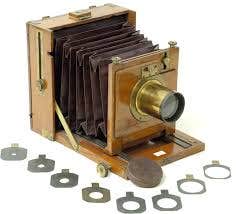
Old-timey camera with Waterhouse Stops
Nowadays we still do the same thing, we just don't slide bits of metal into our lens because the lens has them already built in, in the form of moveable diaphragm blades that can form different sized holes inside the lens.
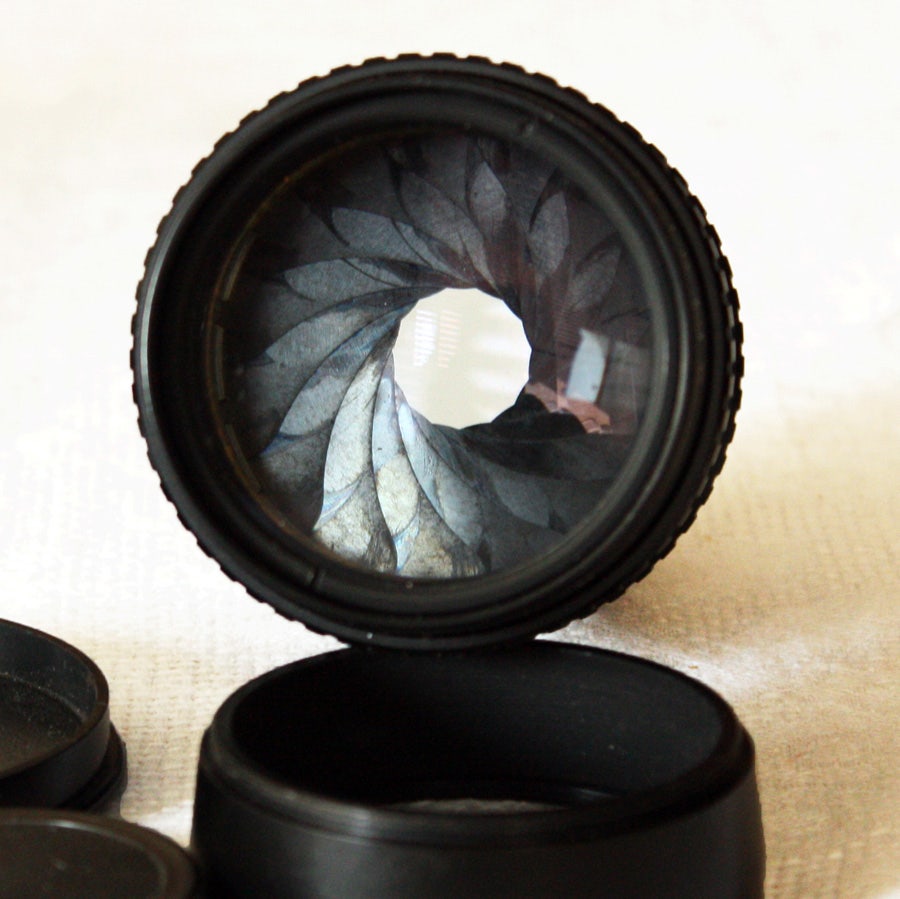
Aperture blades in a modern lens
When you change the Aperture setting on your lens, you're selecting which size hole it will use. 'Aperture' is just a synonym for 'hole' or 'opening'. Or 'rupture', or 'chasm', you get my drift. But how cool would it be to change the 'Rupture Value' on your lens!
I digress.
Aperture values (hole sizes) are called f-stops. f2.8 is a bigger hole, f11 is a smaller hole. What does the F stand for? 'Too effin' complicated to debate in this article!
The term 'stop' originated with Waterhouse's cunning metal plates, but the concept of 'stops of light' or 'stops of exposure' goes beyond just the lens mechanics.
Remember that 'stops' are a measurement system of how much light the camera is seeing, dictated by:
Nitpicky sidenote: TECHNICALLY the ISO setting doesn't control the amount of light the camera sees, it controls how sensitive the camera is to that light - which is nitpicking to the same degree that technically a tomato is a fruit and technically a peanut isn't a nut. But the functional effect of ISO (makes picture brighter / makes picture darker) is the same. When you/re learning this stuff it/s fine to ignore this technicality - don't put tomatoes in the fruit salad! 'Makes picture brighter / makes picture darker' is all you need to wrap your head around at the start.
Stick this in your brain right now:
Double or Half.
There you go! That's how stop measurements work.
If you think of stops as a scale (like your plastic school ruler), as you go up and down the scale each Stop is either double or half the amount of the one before it.
Now that we've got you thinking in stops as a concept (double or half!) it's time to look at how to actually work with stops in your camera settings.
Again, it's kind of stupidly simple.
Here's a pic of my Fujifilm X-T3:
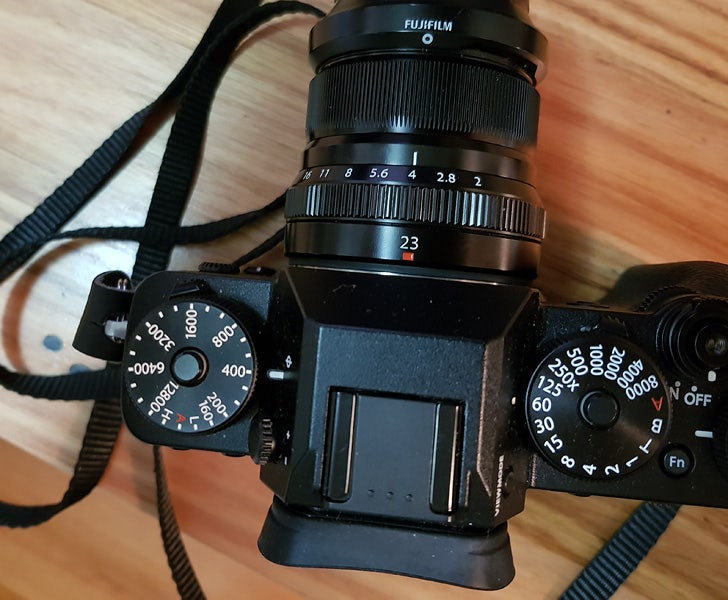
The Fujifilm X-T3 that I love for its 'at a glance' stop markers.
"Hang on a minute" I hear you say. "What's going on with those weird aperture numbers? Half of 4 is definitely not 5.6!"
Here's the deal. The aperture numbers are based on a bunch of crazy math to do with optics and square roots and TRUST ME you don't wanna go there or your head WILL explode! You don't need to understand all that, just that each f-stop is double or half of the previous one. You'l end up learning the f-numbers sequence off by heart, and in the meantime you can use a sneaky hack of 'counting clicks', which I'll explain shortly!
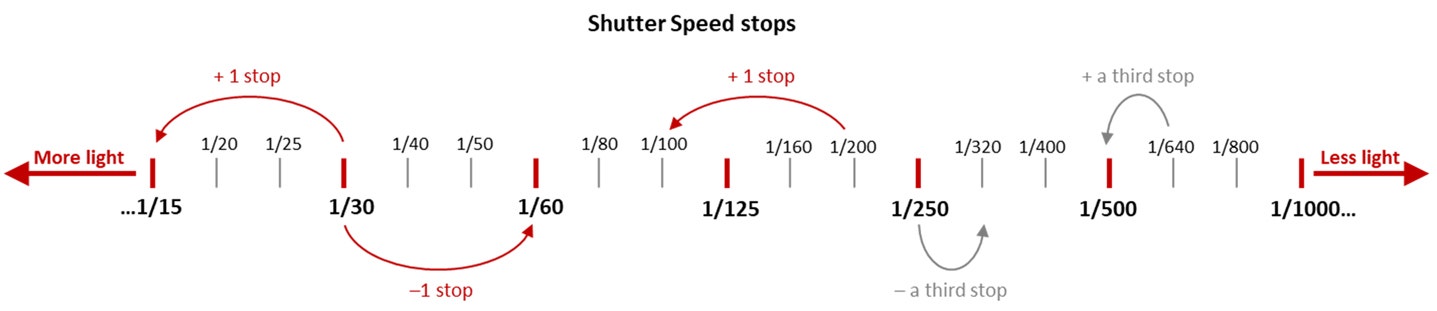
But what about those in-between dashes you can see on the ISO dial? What about when your DSLR says a shutter speed of 1/320th? WTF is f6.3?
In between each whole Stop are in-betweeny amounts. If stops are dollars, the in-betweeny amounts are cents. Most modern cameras work in third-stop increments (but half-stops are a thing too).
Because sometimes you want your picture to be a bit brighter or darker, but not by a whole entire stop's worth.
Here's some example camera settings and where the whole stops and in-betweeny third-stops are. Note that a whole stop is just 'three thirds worth', no matter where you're starting from:
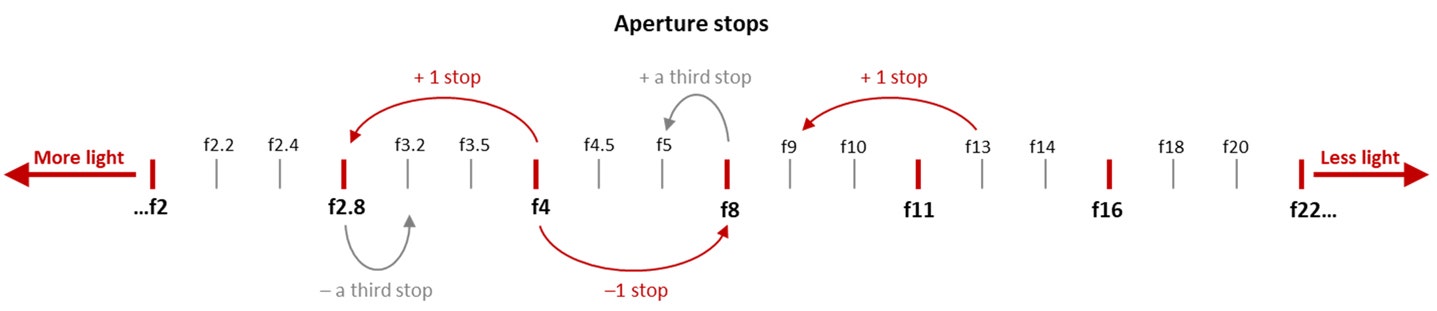
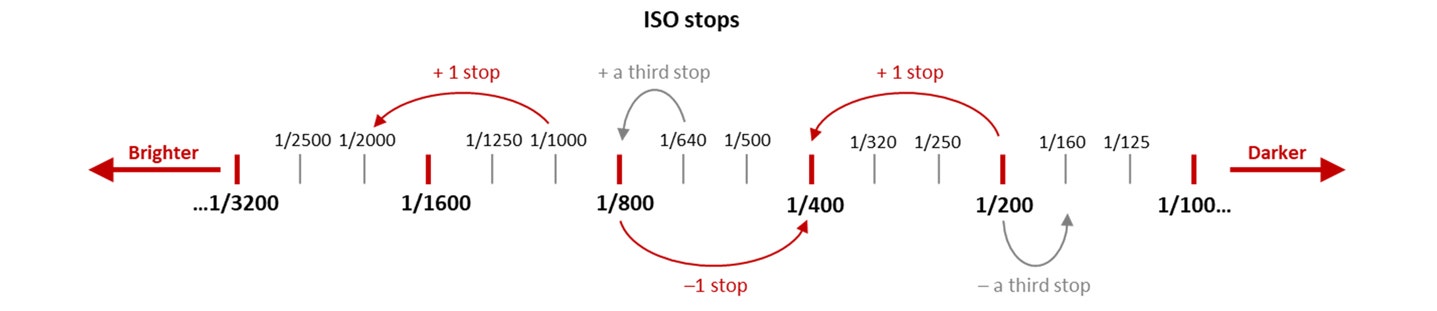
The super cool thing is that a stop on the shutter and a stop on the aperture and a stop on the ISO are all the SAME and interchangeable!
It's the same result - increasing the brightness by 1 stop - just three different ways of getting there. So if you want to make a picture brighter or darker you can now selectively choose which setting you want to use. To darken the exposure you might intentionally choose a faster shutter speed because you don't want to change your depth of field by fiddling with the aperture setting. You are now in creative control.
Memorising the sequence of full stops and in-between stops so you can hop between them on a whim is an admirable idea, but if you're not ready for that yet. just count the clicks! Best camera cheat ever.
If your camera is set to third stops (it probably is) each 'click' along the shutter, aperture or ISO dial equates to a third of a stop. If you move 3 clicks you've altered your exposure by 1 full stop.
Want to make your picture 1 stop brighter? Click-click-click you're there.
Counting clicks on a Canon dSLR.
Count along as we cut 2 stops of light with the shutter dial, then add 2 stops of light with the aperture dial. Different end settings - same exposure brightness.
Even if you start at an 'in-betweeny' number, if you've gone 3 clicks you've gone 1 stop.
Beginner Tip: if your head is exploding then set your camera to work in full stops only - that way each single 'click' is exactly double or half, without the in-between amounts there to confuse you.
Want to get to grips with lighting? Flash follows the same 'stop' principle of 'double or half'.
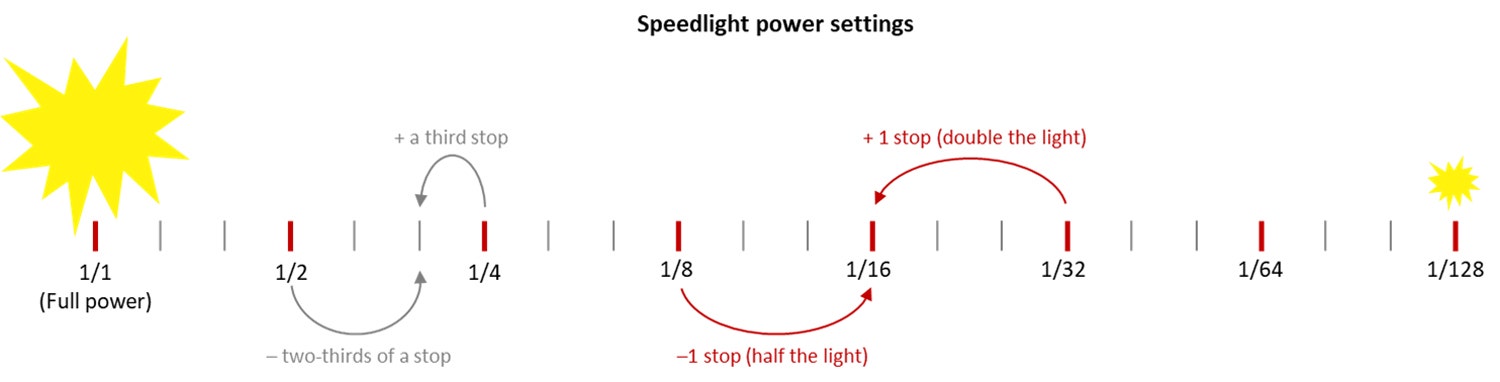
A speedlight has power settings of: 1/1 (full) power, 1/2 power, 1/4 power, 1/8 power etc. Each power setting is 1 stop different to the one before it.
If your speedlight is set to work in third-stop increments it might give you a jazzy number like: '1/4 +0.3'. Translation: '1/4 power plus an additional third stop of light'
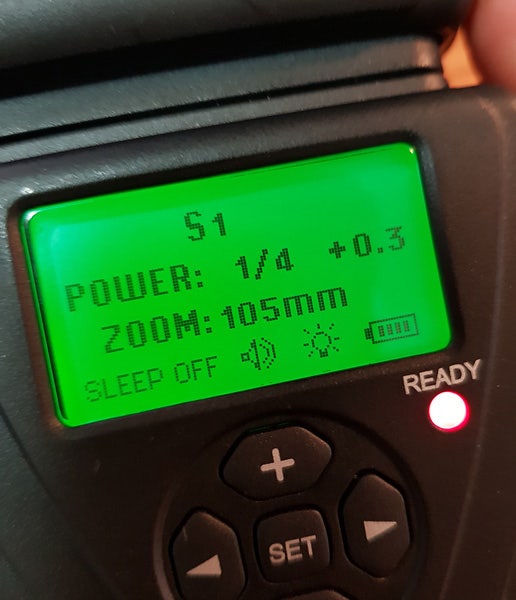
Power settings no longer look like gibberish when you understand stops
Or you might see '1/2 -0.7', which means '1/2 power minus two-thirds of a stop'. Incidentally, I'm using those two power settings as examples so you can see this:
They're the same! 1/4 +0.3 = 1/2 -0.7
This is where I tripped up when I was learning, because it's kind of a weird notion to get your head around.
A stop is a relative amount of light, not a set-in-stone, exact-number-of-photons amount.
This makes it a bit different to other measurement scales like grams or centimetres. A gram is a set weight: one gram always weighs exactly one gram. A centimetre is always the exact length as any other centimetre, no more, no less
But a stop of light can be any actual amount of light, because stops are relative - they are just 'double' or 'half'.
Example:
You're shooting in studio using a speedlight on 1/2 power. The speedlight's max power output is 100 watt-seconds, so 1/2 power is putting out half of that, or 50 WS of light. The picture is too dark so you turn up the flash to Full Power (going up 1 stop by doubling the output from 50 WS to 100 WS).
Now you're shooting in studio again but this time using a big studio light with a max power output of 3,000 WS. It's on 1/2 power, so it's putting out 1,500 WS of light. Again, the picture is too dark so you turn the strobe up full power (going up 1 stop by doubling the output from 1,500 WS to 3,000 WS)
Depending on the scenario '1 stop' could mean 50 watt-seconds, 1,500 watt-seconds, or any actual amount of light - it's just double or half the previous amount of light.
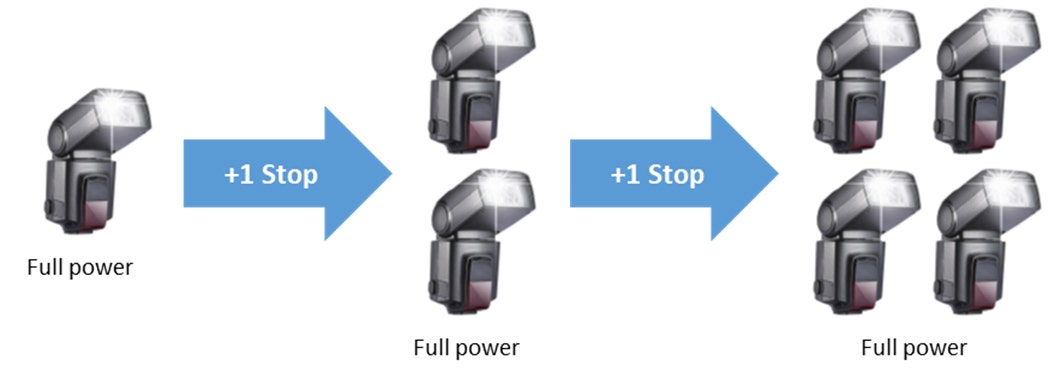
Adding a stop of light could mean 'add 1 speedlight' or it could mean 'add 2 speedlights'
Once you think in stops like your camera does, you're in the driver's seat (goodbye, Auto mode!) and you'll feel more in control of your picture-making and better able to dial settings with confidence.
Thinking in stops is handy for:
Here's few scenarios where thinking in stops makes you the boss of the camera:
When your exposure is fine but for creative reasons you want to change one of the camera settings - now you can dial in your perfect alternate settings lightning fast. Just keep track of how many stops you've moved (or count the clicks).
You're taking a photo of two people standing offset to each other. Your exposure's bang on, but at f2.8 one person is out of focus because of the shallow depth of field. You want the same exposure but using f5.6 to get more focus. How do you get there?
You're in a lively outdoor market and want a photo that allows the people moving around the market to have motion blur to convey a sense of movement. You change to a slower shutter speed whilst keeping track of how many stops you've moved and then make the equivalent change in stops to the Aperture/ISO to balance the settings again.
Remember - you don't have to have all the settings memorised. Just count the clicks if you need to.
Why not just shoot using a Priority mode? Well, you could. But sometimes the camera gets confused when there's a bright light or a backlit sun included in your shot which causes confusing changes in exposure between each shot you take.
Understanding stops lets you use manual mode and take control to make sure the camera is doing what you want it to - especially when you want to get creative or have a specific vision you're trying to execute. You can choose whether to alter the shutter, aperture, ISO or flash power based on how you want the picture to look.
There's a lot of 'rules of thumb' you can learn (or devise your own!) to be able to create certain 'looks' by using stops to track the brightness and darkness of different areas in the image:
When you pay attention to stops you quickly get an intuitive sense of how much light you have, and how 'off' you are with your first shot.
You'll find yourself taking better guesses at camera settings - snap one shot and think 'oh, that's about 1 stop under'. Click click click. And you're there - perfect exposure.
Ever have that moment when you're on Aperture Priority and you change your framing slightly and the sun sneaks in the corner of your frame and suddenly all your settings change wildly and you lose track of what's going on and WTF you need to change to fix the exposure?
I asked my photography partner-in-crime Brence his opinion on why understanding stops is useful, and he made a great point which I think underlies all the other points above.
And that's this:
Thinking is stops means being in control, knowing where you are 'in time and space', and making intelligent decisions based on where you want to get to.
He says stops let you "put a peg in the ground, move three steps to the left, think 'oh no I've gone too far!', and then take a step back in the right direction. It lets you find your way to where you want to be."
It means not hacking through the jungle of settings in random fashion hoping to stumble upon the city of gold.
And there's a thought. Stops are a measurement scale, but they're also a compass. A means of navigation so even if you're not sure what the right settings are off the bat for the thing you're trying to shoot, you can 'put a peg in the ground' and systematically find your way.
Happy travelling!
Interested in contributing to the digiLife blog? Email community@digidirect.com.au with the subject line "digiLife Contributor", and include links to your photography portfolio and a writing sample.


Comments
No Comments yet. Be the first to comment.