We use cookies to make your experience better. To comply with the new e-Privacy directive, we need to ask for your consent to set the cookies. Learn more.
Photolab
0
My Cart


Shooting RAW is the best way to have full control over how your final images look. I've been using the Adobe Lightroom RAW editor for yonks now, and have built up an arsenal of go-to tools and methods I use pretty much every time I sit down to edit.
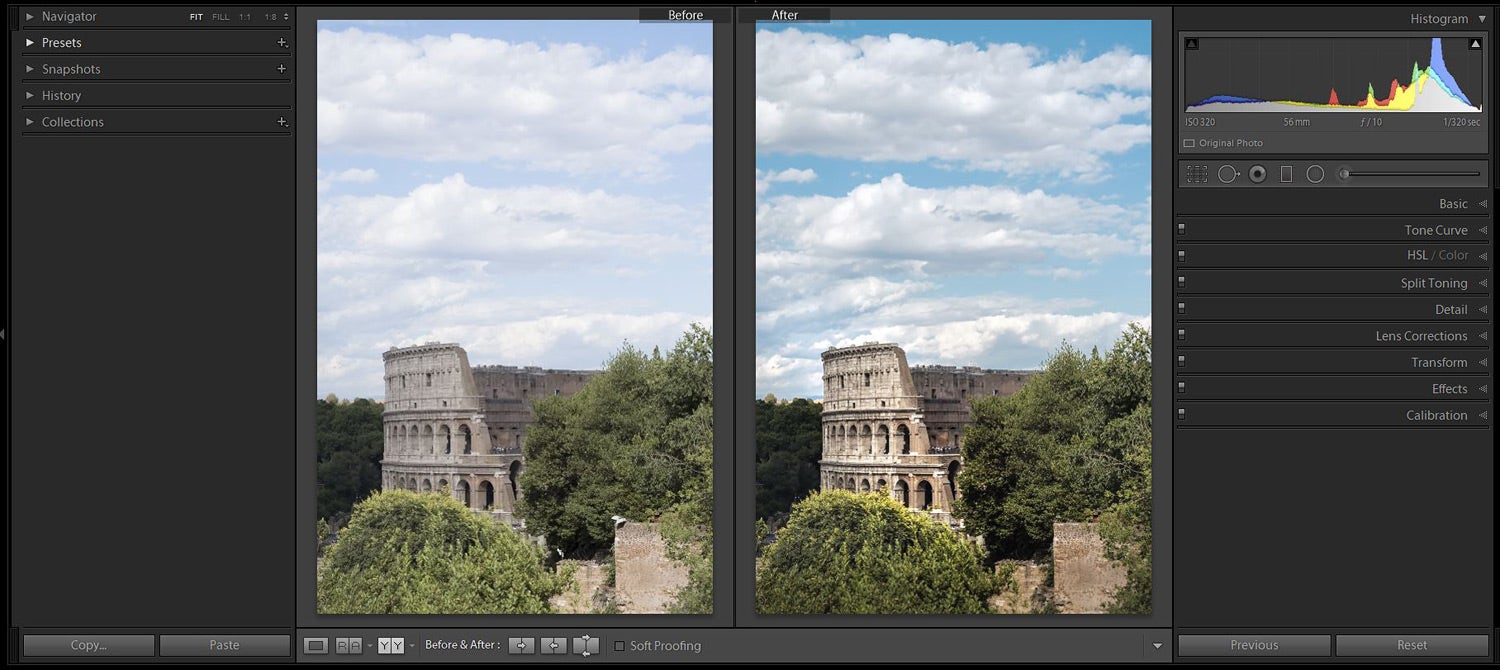
The Colosseum in Rome:
From out-of-camera file to processed RAW image
I'm often working through hundreds of shots so am always looking for ways to make the edit process more efficient. Let's take a whistle-stop tour through some of the tools and tricks I've found super useful.
Note that Lightroom comes in a couple of different flavours these days - I'm using the Lightroom Classic version.
Sensor dust is a pain in the butt, leaving spotty marks in otherwise pristine blue skies. I like to spot out sensor dust during the RAW adjustment stage instead of waiting to do it in Photoshop.
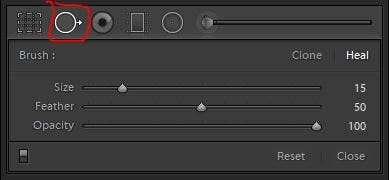
Spot removal tool
You can spot out dust with the Spot Removal tool (top of the adjustment panels in Develop mode). I used to click on the tool and then squint and hunt around in a bright blue sky trying to find all the faint dust spots and going cross-eyed in the process - until I found an easier way!
Hit 'Q' on your keyboard to quickly launch the Spot Removal tool, then hit the 'A' key. The 'A' key toggles into a special visualisation mode - a black & white view where edge details are highlighted.
Sensor dust spots are much more visible now - they show up as distinctive looking circles. The toolbar underneath the image has a slider to adjust the edge-detection strength, I find you need it cranked to about 70-80% of the way to see everything. (You'll need to have the Toolbar option turned on - it's in the View menu)
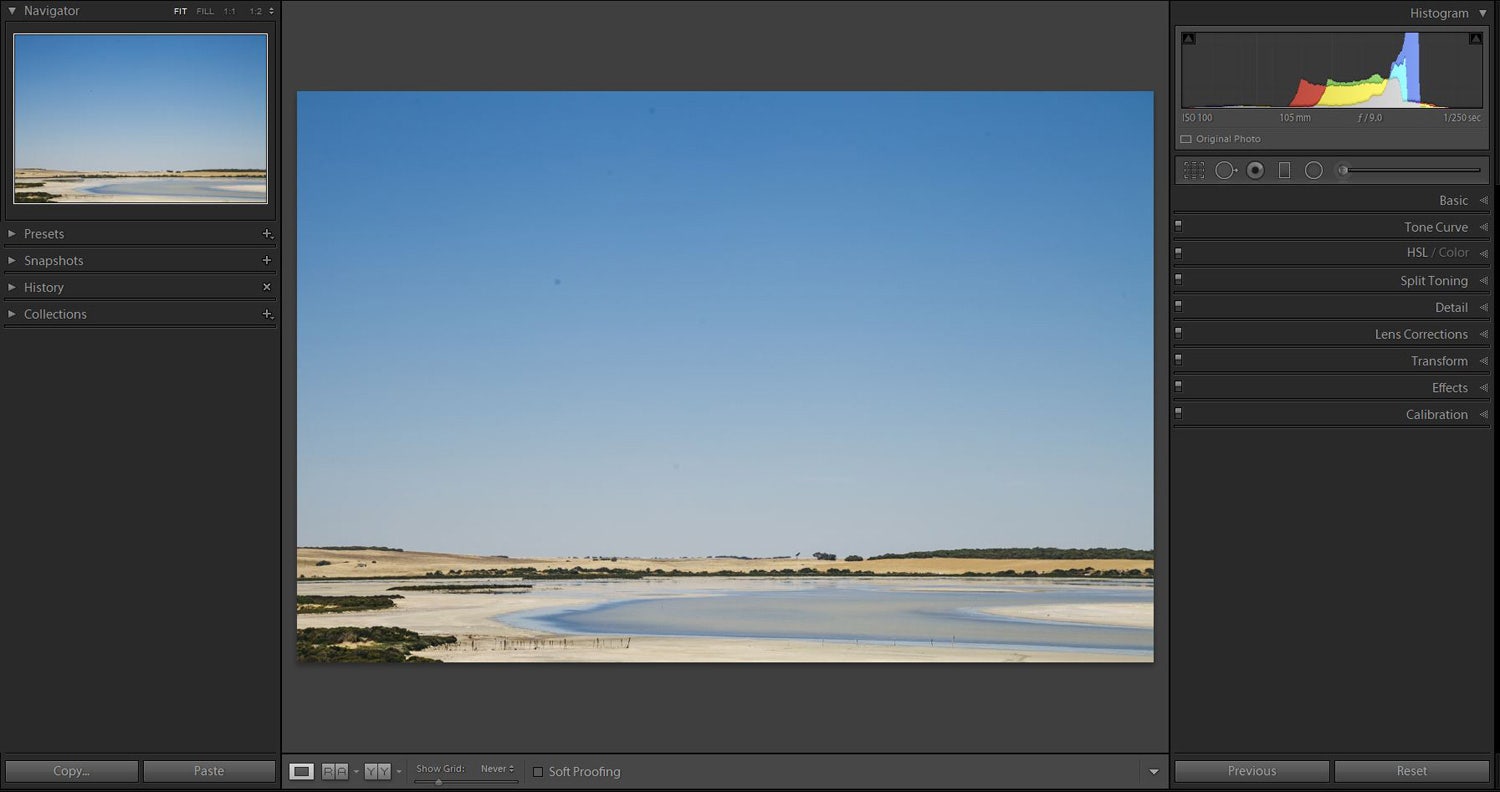
Here's a pic of Coorong National Park by my partner @brencecoghill - I can see about 8 dust spots in the sky.
But - hit 'Q' then 'A' and it's a different story!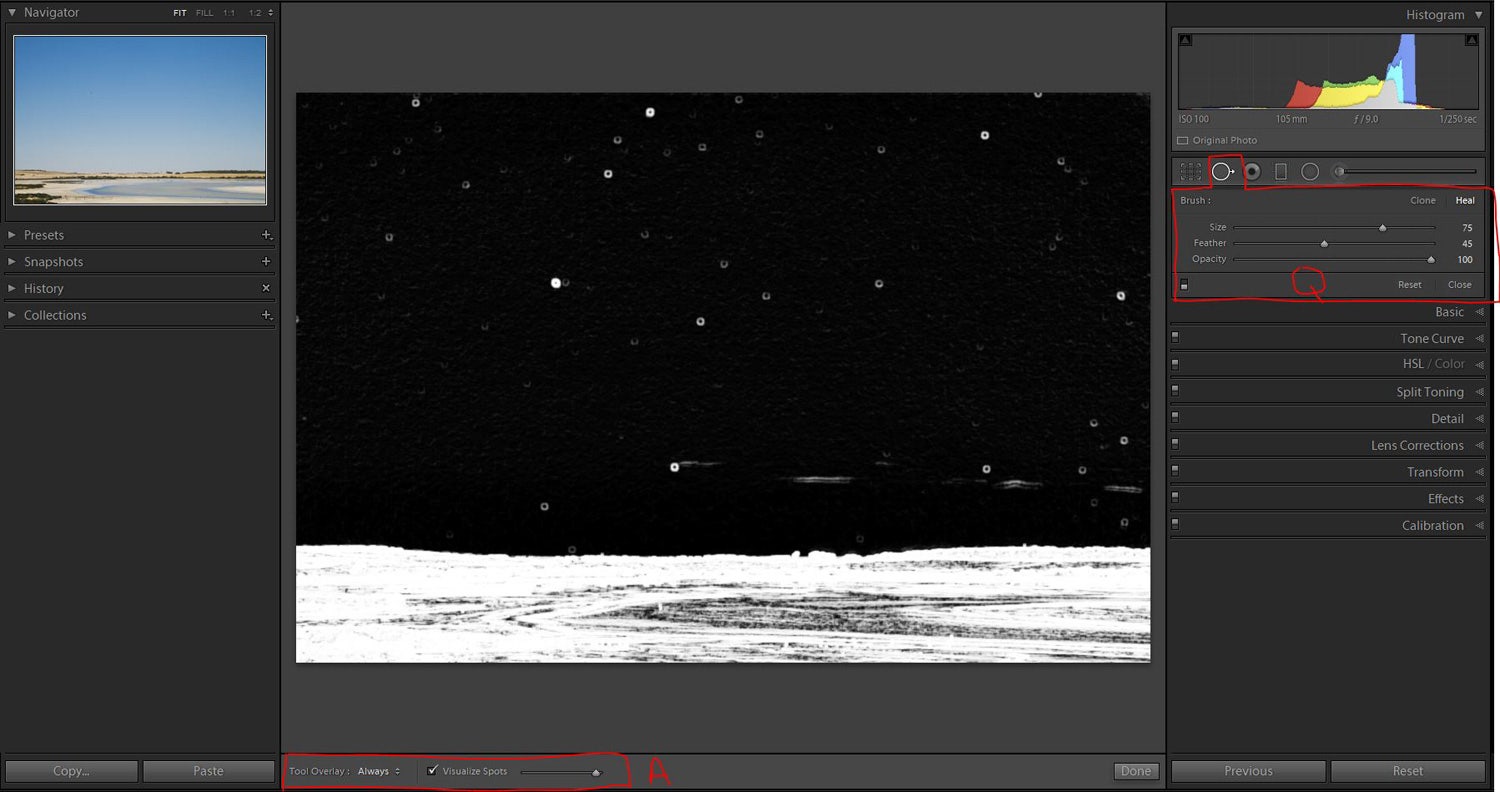
Yikes! Wayyy more dust than I could easily see at first! (to be fair we were changing lenses in windy conditions on sand dunes - looks like it' time for a sensor clean!)
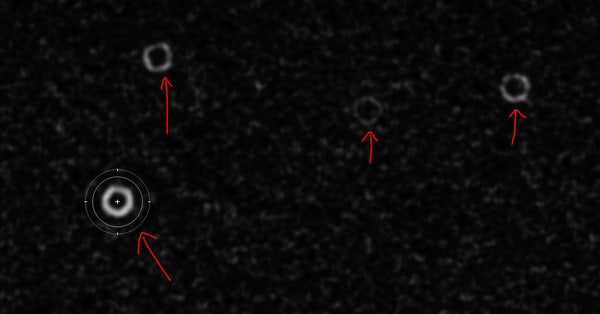
Look for distinctive circles in the sky and spot those mofos out!
You can go ahead and spot out dust marks without even changing out of the special black & white view. Once you're done, hit 'A' again to toggle back to the normal image and check everything looks good.
Tip: I like to zoom in while spotting to better see what I'm doing - when zoomed in just hold down the spacebar and click-drag to pan around the image. Keep the Navigator window open on a side panel to keep track of where you are.
Got a wonky horizon? My old method to fix them was to hit the 'R' key for the Rotate tool, then either rotating by hand and eyeballing it for straightness OR clicking the 'Angle' ruler tool thingo, then clicking and drawing a line along the horizon and THEN hitting the 'Enter' key to apply it. Bah! Boring! So much clicking!
Then I discovered there are magic buttons in the Transform tab and LIFE GOT WAY BETTER!
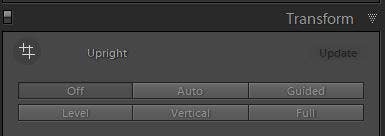
Behold the magic buttons
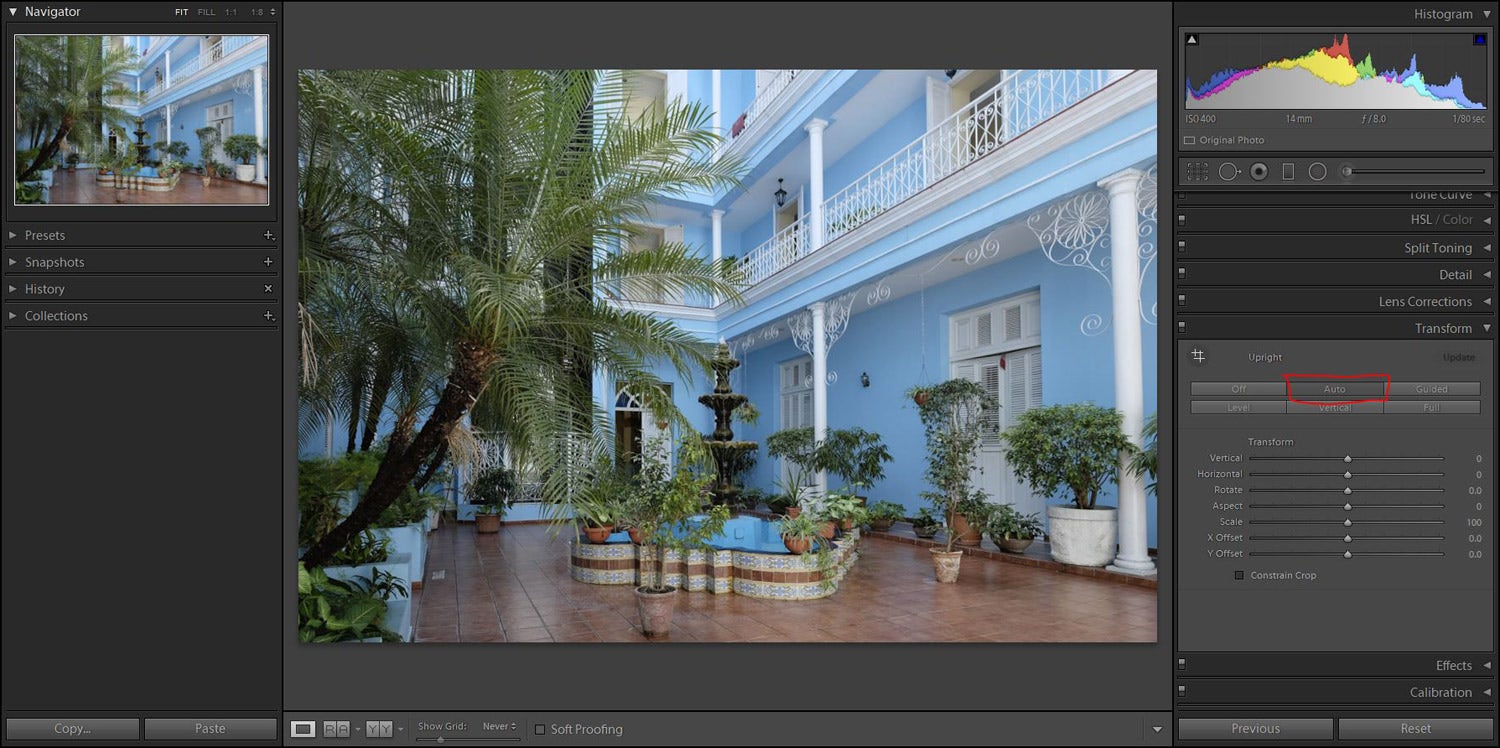
Turns out Lightroom is pretty smart at figuring out what parts of images should be straight or level. For a wonky horizon click the 'Level' button and hey presto Lightroom straightens it up in a single click. It's not 100% accurate, but does get it right about 95% of the time.
There's a 'Vertical' button to fix converging verticals (great for buildings), or the 'Auto' button to fix an image that's wonky in multiple directions.

Tip: for trickier images use the 'Guided' button: draw lines on anything that needs to be levelled and/or made vertical and Lightroom does the rest. SO handy.
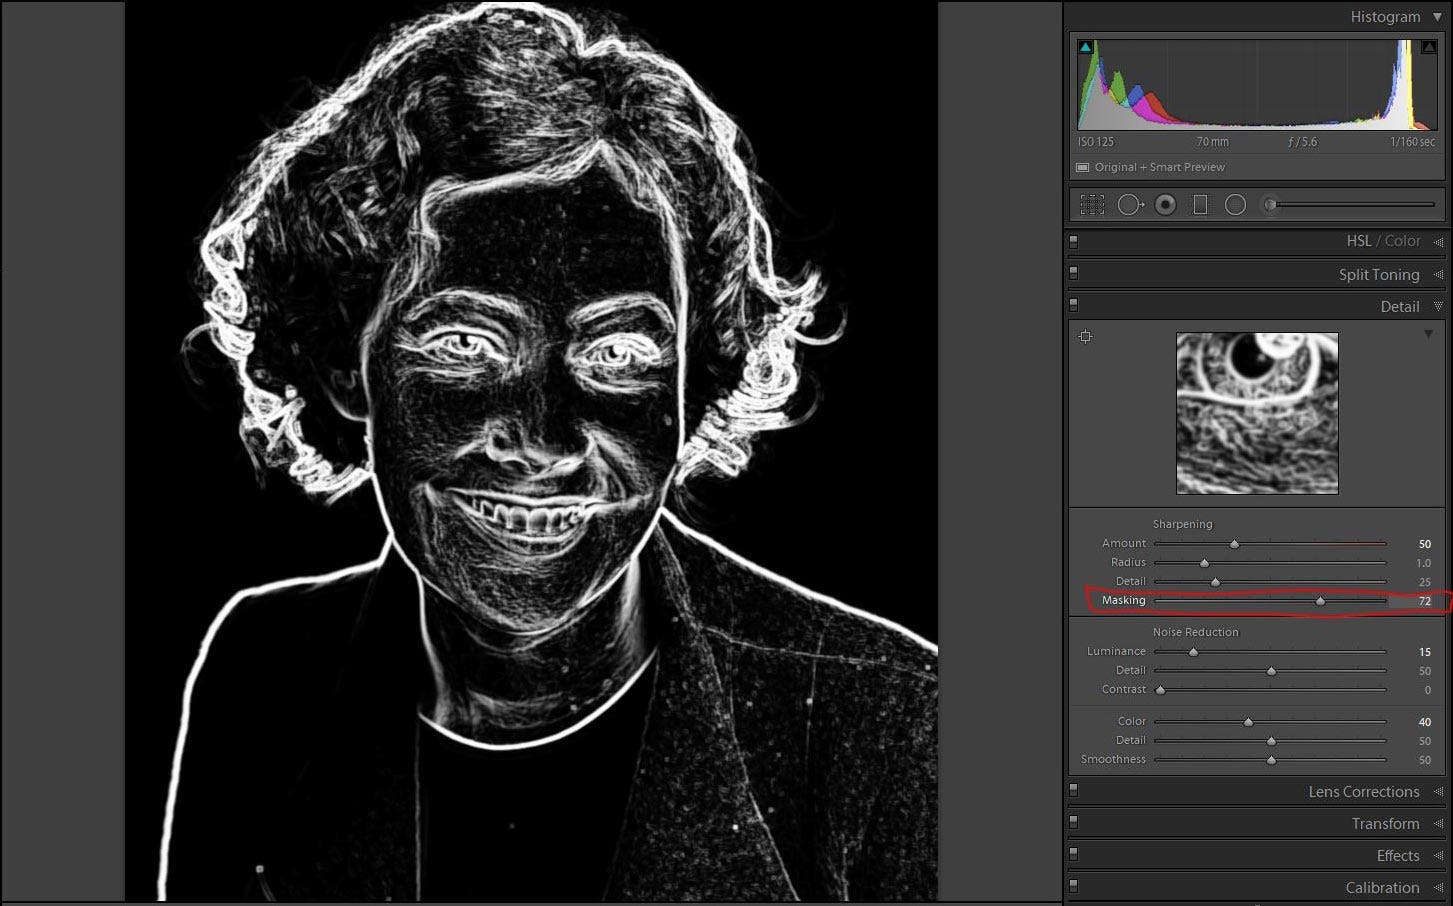
Sharpening is just adding contrast between pixels- by ramping up the difference between adjacent pixels your eyes perceive more of a 'sharp' edge.
Here's the thing though - you only ever really want to sharpen the edges of things. If you sharpen literally every single pixel in an image you risk making smooth tonal areas look over-crispy. And if you've got image noise (e.g. from a high ISO) then adding sharpening on top of the noise just makes it worse.
Masking your sharpening is more nuanced then blasting every single pixel with the same sharpen amount. So how to sharpen a building, person or other feature while leaving smoother tonal areas alone?
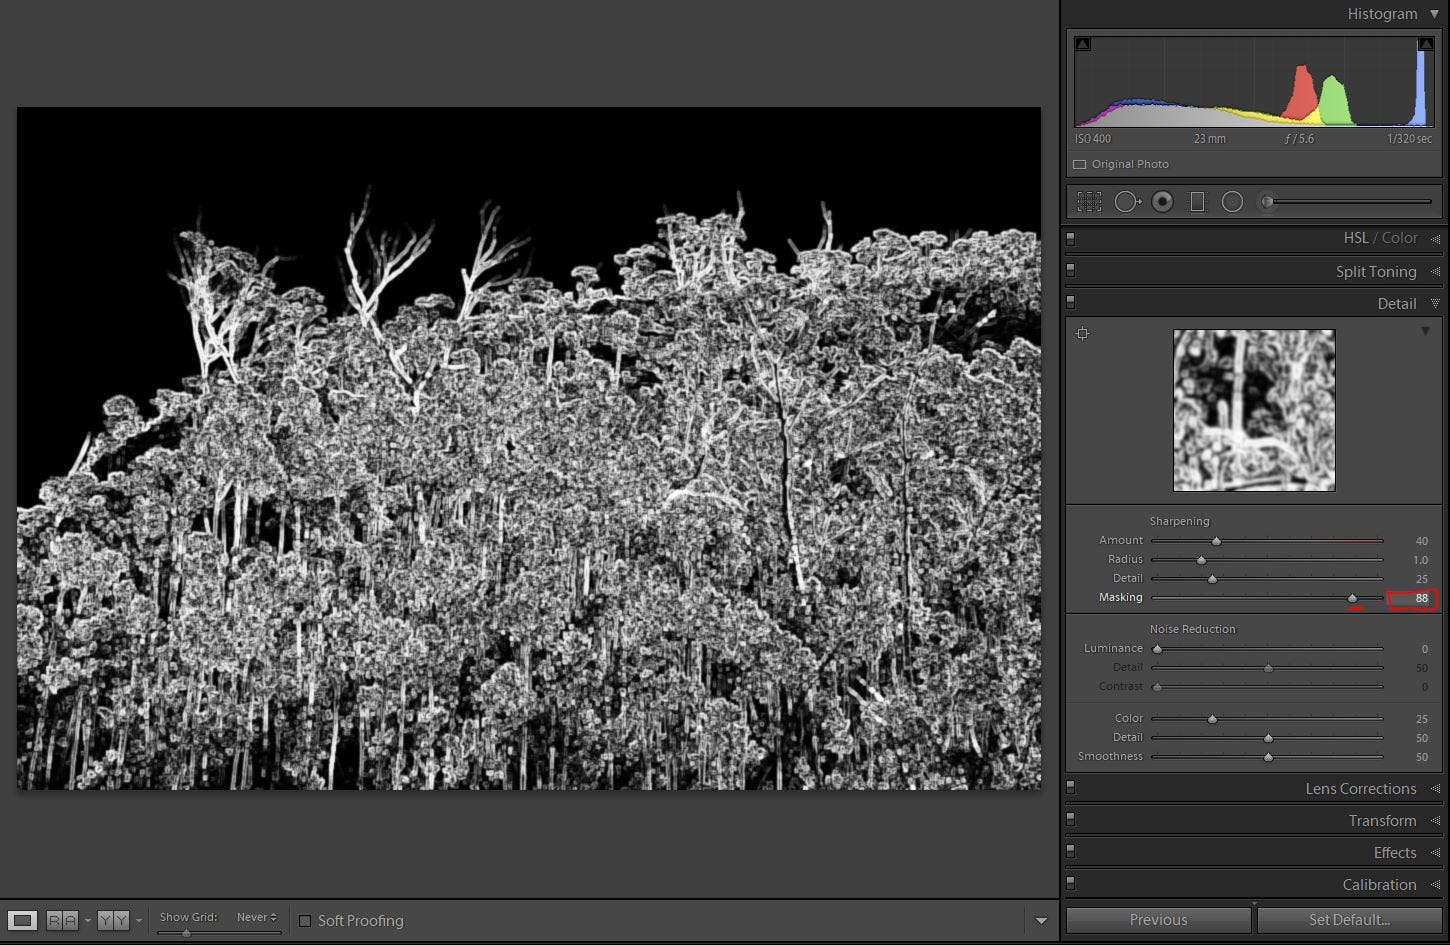
Under the Detail tab (in Develop mode), use the Masking slider to selectively restrain sharpening to edges and detailed areas only. It's a great way of keeping smoother areas untouched while sharpening the edges of your subject.
The key is to hold down the ALT key (PC) or Option key (Mac) as you slide the slider to see exactly which parts of the image are being sharpened or not sharpened.
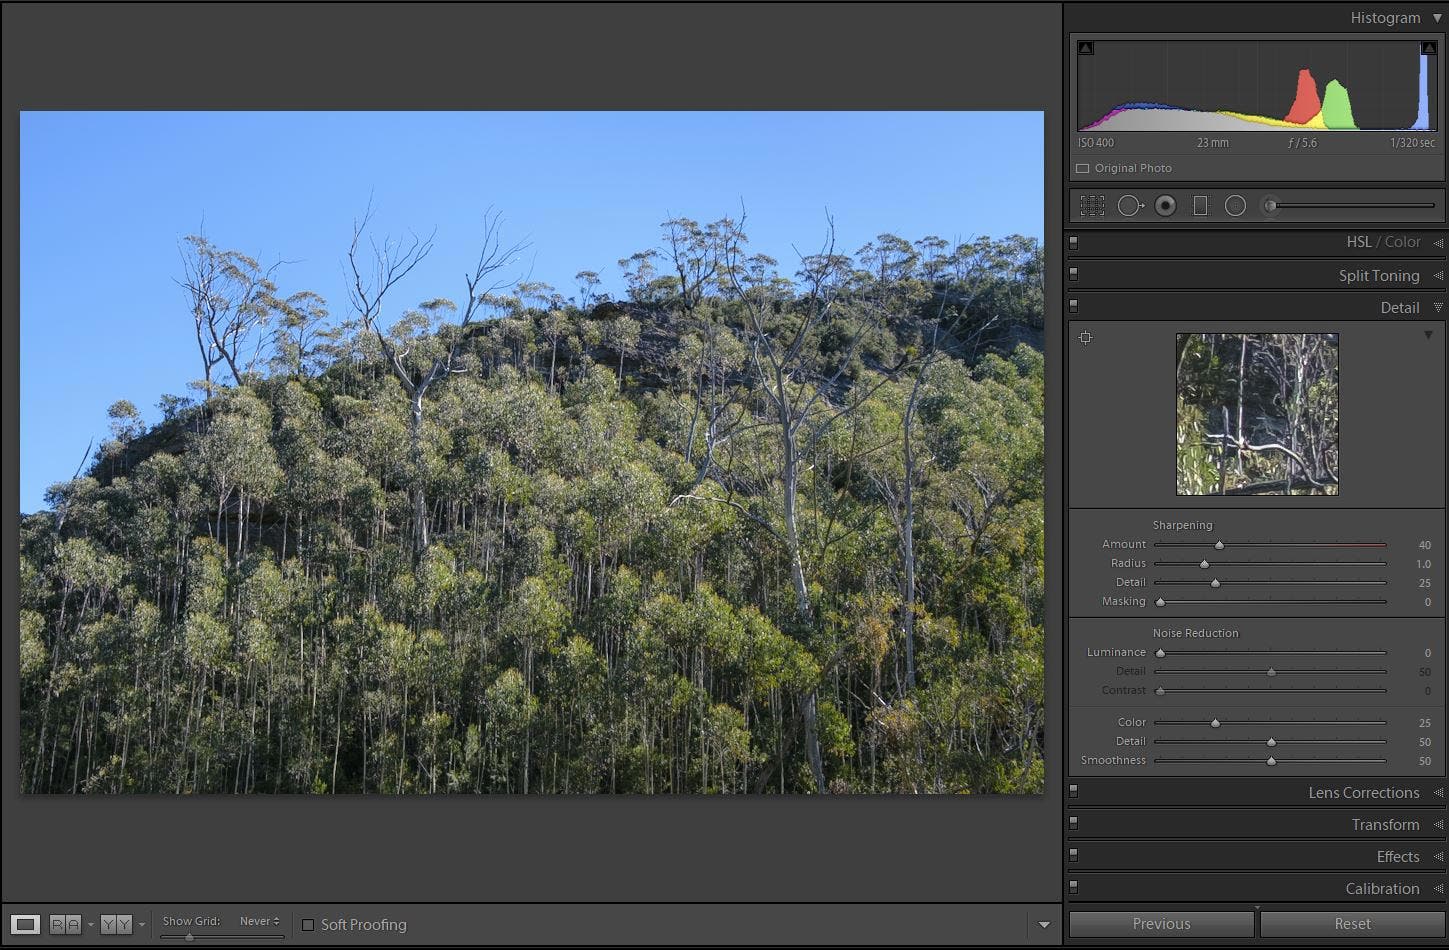
A shot from the Blue Mountains with a smooth sky and super-detailed tree area.
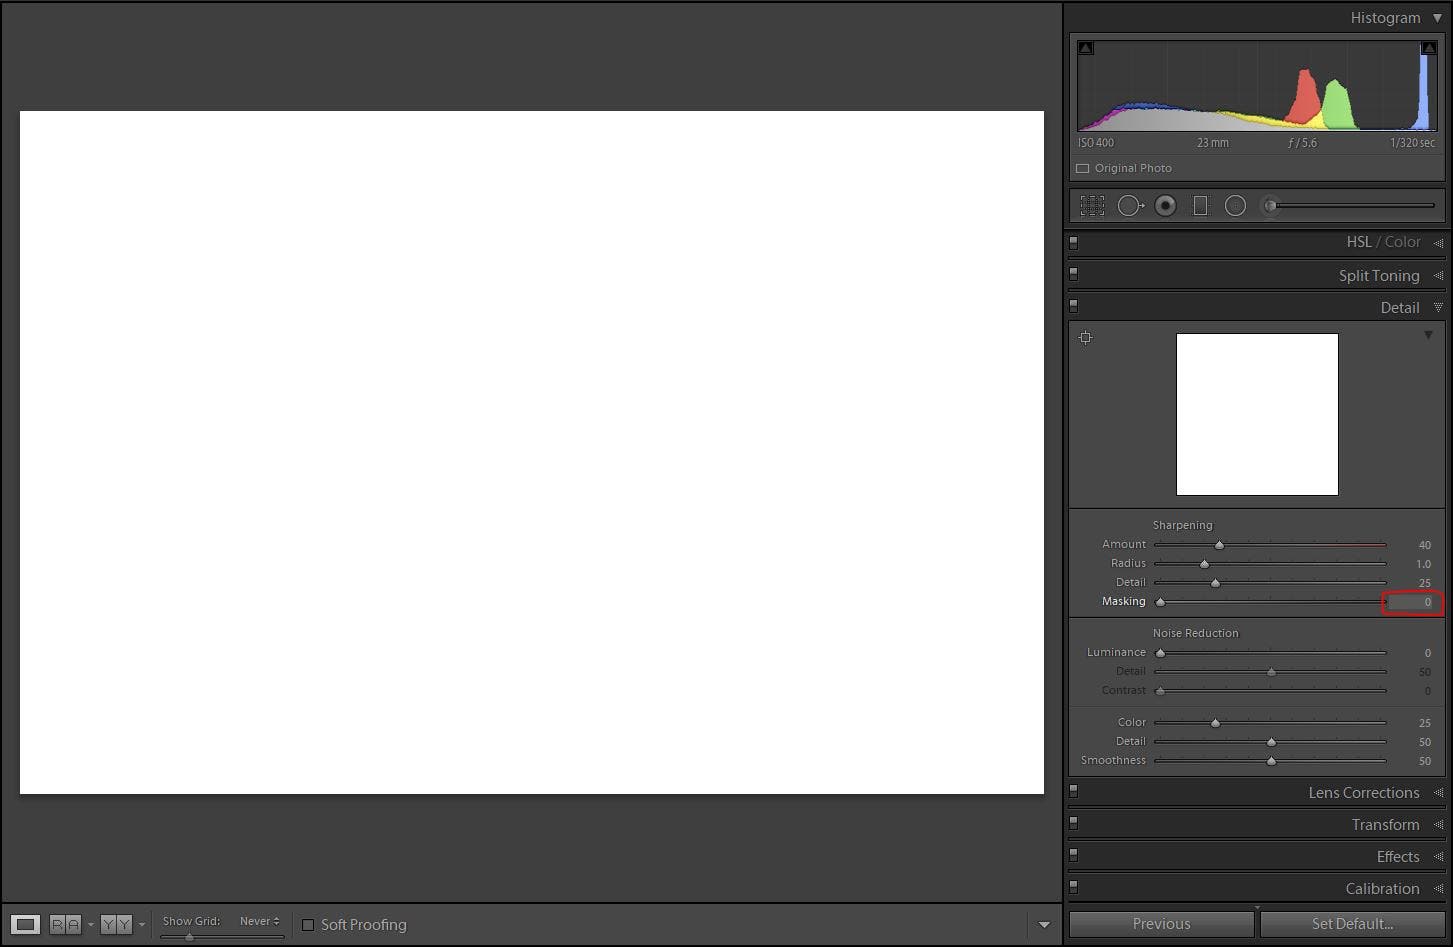
Hold down ALT (or Option on Mac) while clicking the Masking slider to see what's being masked.
At a setting of 0 every single pixel is affected.
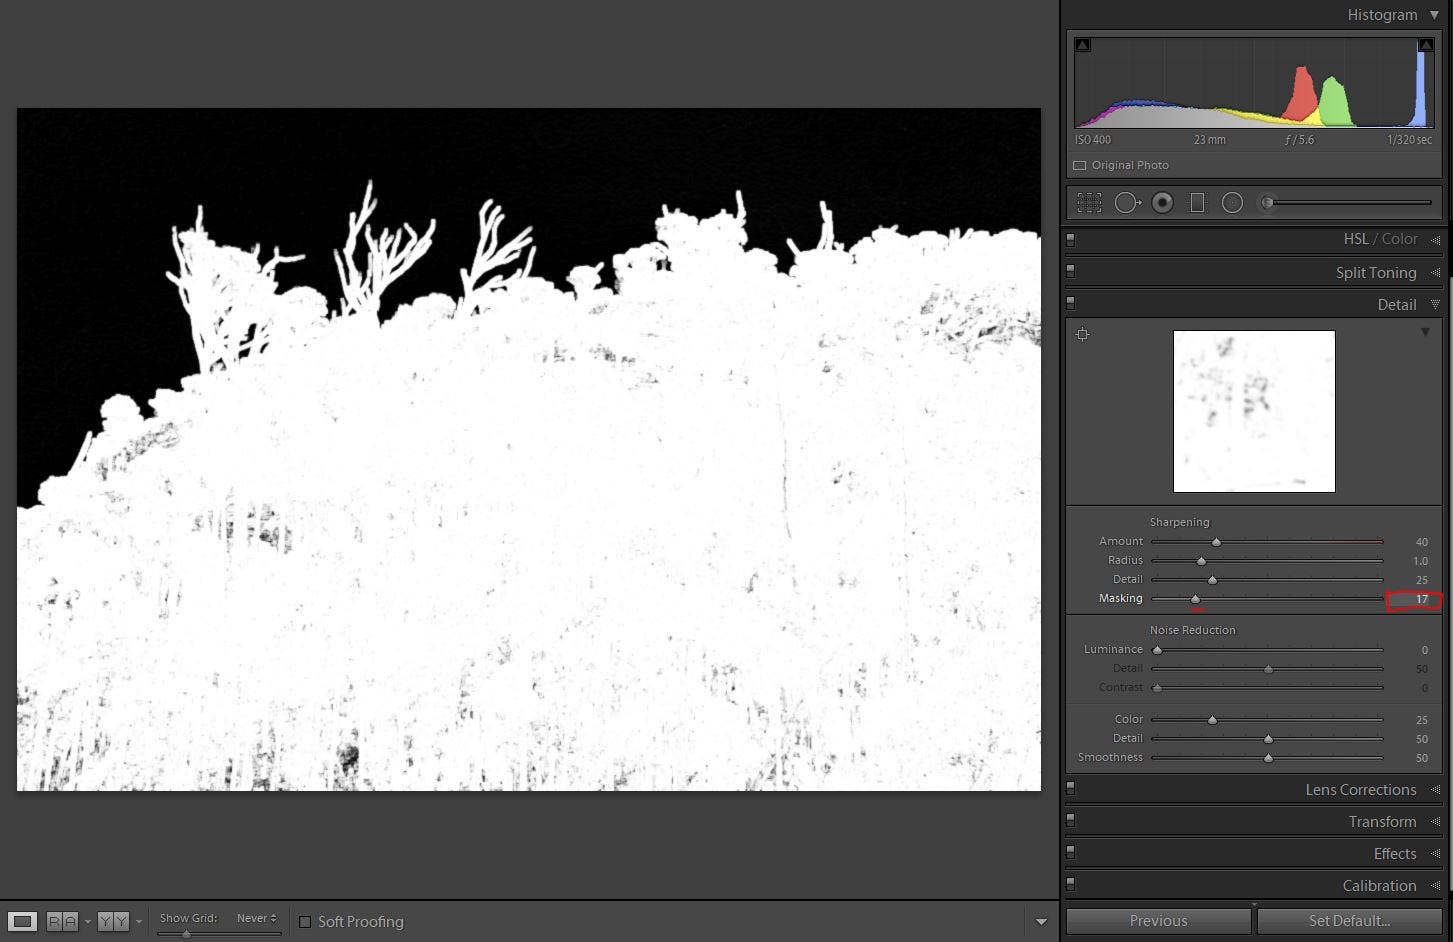
Slide further to only sharpen the more prominent leaves and trunk outlines,
preventing the tree foliage from becoming over-crispy.
For portraits you can apply sharpening to facial features like the eyes and mouth while leaving the rest of the skin less affected.
Mask sharpening on portraits to avoid making skin areas overly textured
When you dial in basic settings like exposure, contrast, saturation, etc. they affect the entire image. But sometimes it's better to isolate different areas for adjustment.
Blown out skies are an obvious example. Too-bright skies can often be recovered by pulling down the Highlights slider in the 'Basic' tab. But that will pull down the highlights across the whole image and can make some areas look flat and dull, because you're effectively killing the highlights everywhere, not just in the sky. Much better to darken the sky only, and leave highlights elsewhere bright and sparkly.
There's 3 masking tools to help you select specific areas in an image.
![]()
Graduated Filter, Radial Filter, and Adjustment Brush
(why Adobe chose to make the brush icon a million miles wide is anybody's guess)
The two I use the most are the Graduated Filter and Radial Filter. I don't generally like going 'painty-painty-painty-painty' with the brush tool - once things get that persnickety I'll leave it to do in Photoshop, as I find the tools there much better for detailed selections - see Tip #10 in Part 2 of this article on using Virtual Copies for more info.
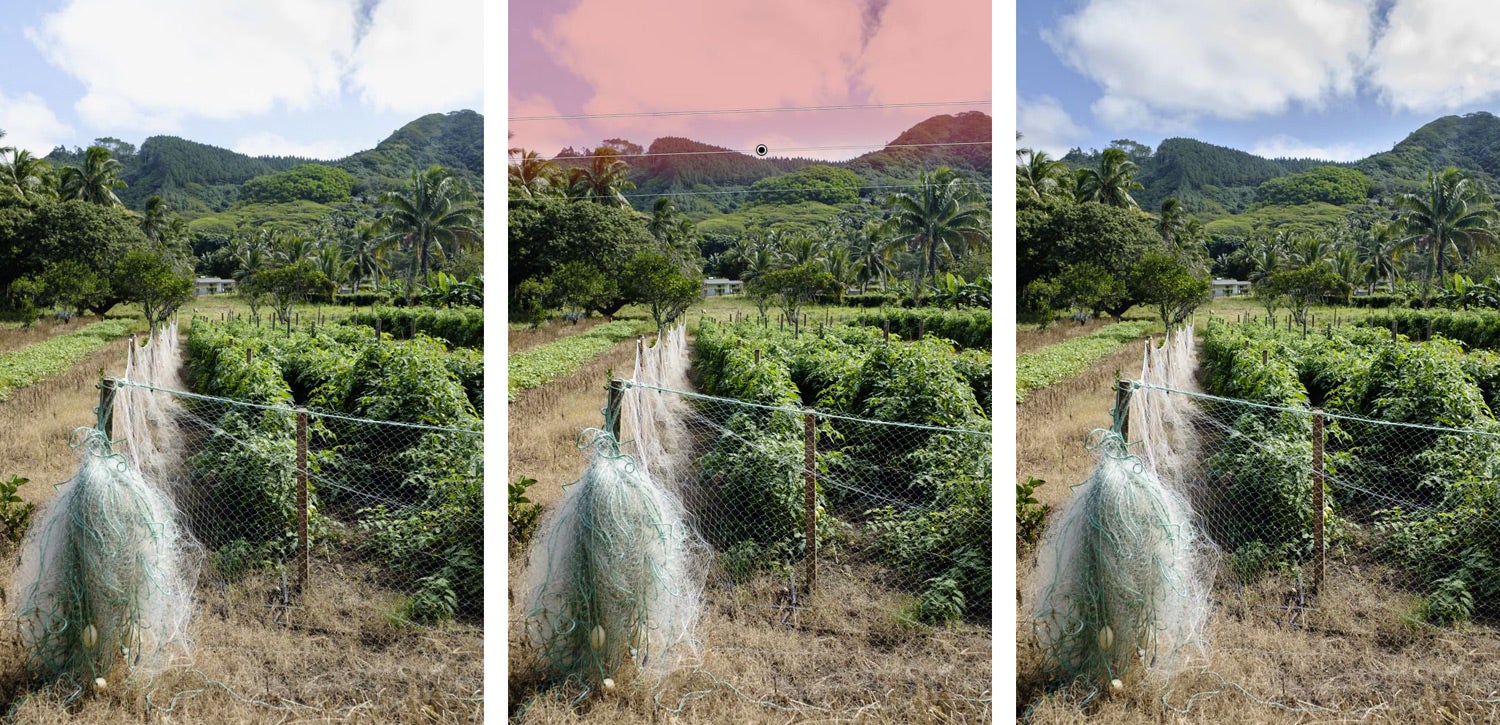
Example of dropping a quick graduated filter to darken a sky - highlights elsewhere are untouched, preserving the bright sunny feel of the foreground foliage.
Exposure and highlight recovery are obvious examples of things you might want to selectively adjust, but I also use masks for things like white balance, contrast, and saturation.
Tip: When you open a masking tool the sliders retain the same settings from when that tool was last used. To reset just double-click the word 'Effect' in the top of the toolbox.
This is kind of obvious in a way, but it was only when someone pointed out to me that I could purposefully only use the edge of a mask that I realised how useful this is.
The gist is to use a huge mask, but shove it off the side of the frame so only a portion affects the image.
I do this mainly with radial masks. They're super quick to throw on an image but are fairly basic - the centre of the circle is the strongest and the effect fades out towards the edges. You can adjust the feathering but it's still a 'hotspot in the middle' kind of tool. By putting a large feathered mask off the edge of the image, you can target a specific image area, avoid an obvious 'hotspot', and make adjustments with a nice subtle transition.
In the image here of the Coulee verte green walkway in Paris, there's some large areas that could use tweaking. The sky area and lower right hand corner are a bit washed out, and the left hand side under the trees is quite dark. It feels unbalanced.
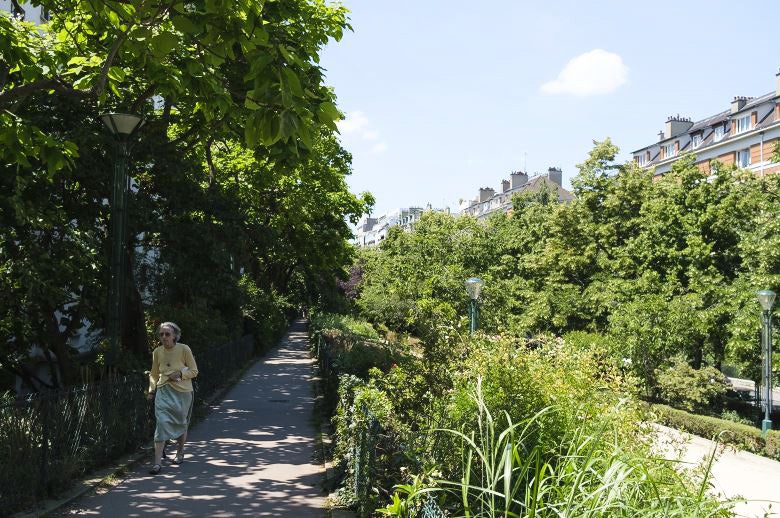
There's a few ways you could tackle this, but let's use radial masks for a quick fix. I'll use a smaller mask for the shaded area and two big masks shoved off the edge of the frame for the brighter areas.
When using large masks I always zoom out to 1:8 to see what I'm doing.

Bang on 3 feathered masks and Bob's your uncle - exposure now balanced!
Check it out - the centres of the two large masks aren't even on the photo!
I've used the smaller mask on the left to add light into the shadows and warm up the white balance (shade records bluer than sunlit areas). The two bigger masks on the right are taming the highlights of the sky and pathway and foliage in the bottom corner.
Big radial masks can be good for selectively targeting wedge or corner shaped areas. Make sure to tick the 'invert' box in the mask settings to make your adjustments happen inside the circle.
Using a big mask with the central point off the edge keeps the effect soft and more subtle, and the big feathered edge means you don't need to be hyper-precise about exact positioning.
And yes - you could use the painty-painty brush tool instead to make a more custom-shaped mask for these areas, but it takes longer and if I'm quickly editing thousands of photos then the faster method wins for me - I save detailed masking tasks for Photoshop.
Tip: Hit the 'O' key with a mask selected to toggle a view that shows you the coverage and feathering
I hope you find those tips helpful! Read Part 2 of this article for the next 5 tips.


Comments
No Comments yet. Be the first to comment.