We use cookies to make your experience better. To comply with the new e-Privacy directive, we need to ask for your consent to set the cookies. Learn more.
Photolab
0
My Cart


Photography can be a difficult hobby. There is a lot of terminology and you have to learn a lot about different types of gear. It requires both technical understanding as well as creative and compositional understanding. Often newcomers to photography find it overwhelming to enter the world of photography.
As you know, in reality it is not quite as difficult as it may seem at first, and there are lots of great resources (like digiLife!) to help you along your way. However, there are some common stumbling blocks along the way. One of the biggest of these is flash. There are many photographers who have been shooting for some time and have a good handle on photography, but haven't yet entered the world of flash photography. This tends to be because flash adds both more gear (which can be expensive) as well as a new area to learn. Don't be intimidated though, because flash photography can certainly be understood, and that understanding will make your photos all the better.
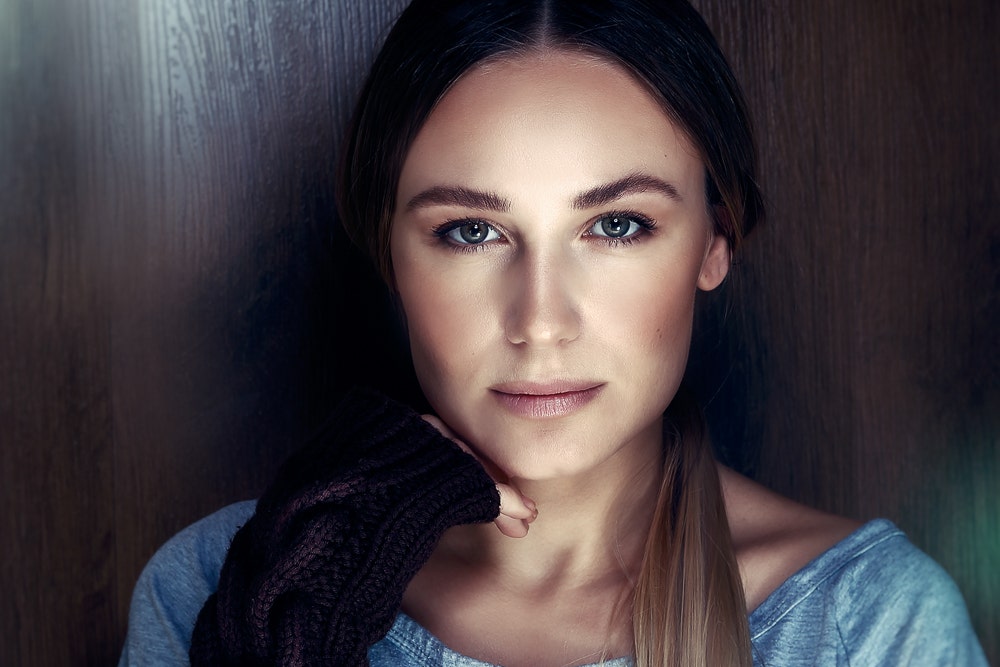
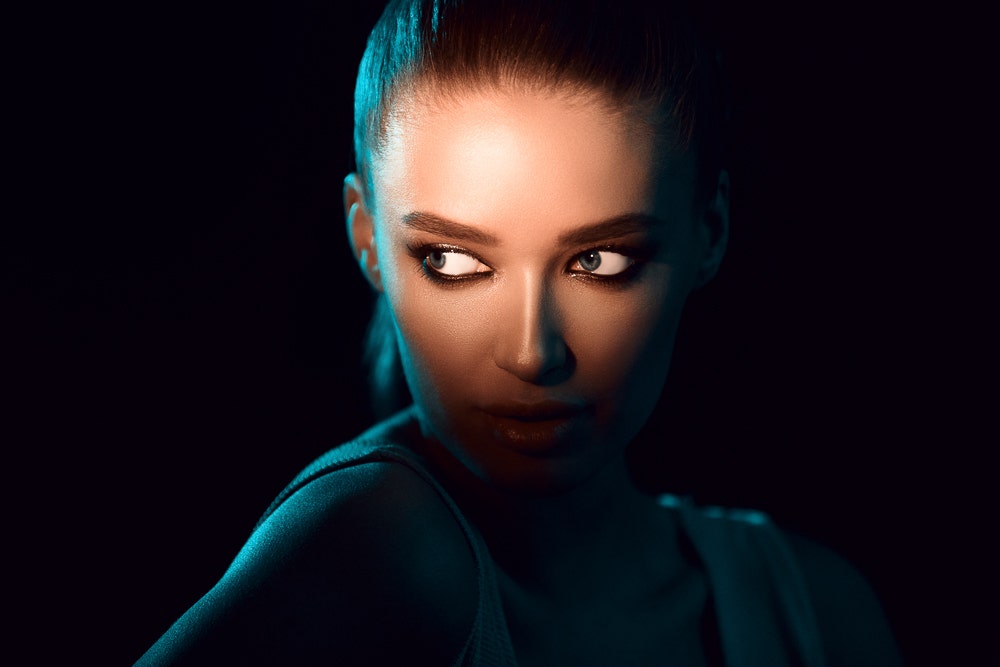
Flash can help your portrait photography stand out
Photography in its purest form is all about controlling time and light to illuminate your subject. The 'light' part of that formula is probably the most important when discussing the use of flash. Without an appropriate amount of light, we cannot capture the contrast between light and dark. With the introduction of flash, you can add one or many layers of light to both improve your chances of catching a clean image and create necessary contrast. In general, when you use a flash, the flash will fire or light up at the same time that your shutter opens and exposes the sensor.
The use of flash, either off-camera or on-camera, will enable you to gain greater control of the amount of light illuminating your subject and as a result, hitting your sensor. In addition to general exposure correction, creative use of flash can offer a level of drama or interest in your composition that would not be possible with natural light alone. Flash is especially appreciated in portrait photography as you can illuminate a specific part of the face and have the rest fall off into shadow. Or perhaps you want to have a sharp contrast between the foreground and background subjects. There are many possibilities.
As mentioned, being able to create a dramatic level of contrast can result in very appealing portrait images. The creative control that flash provides portrait photographers is endless. Even with a single flash, you can add an extra element of light to the composition and highlight facial features while not highlighting the background. This contrast between the subject and the background is what makes your subjects "pop". Flash diffusers soften the harshness of flash and create a more natural level of light without the harsh shadows. Colour gels added to a flash unit will allow you to adjust the hue of the light falling on your subject. A simple addition such as this can create a dramatic impact on the overall composition.
 |
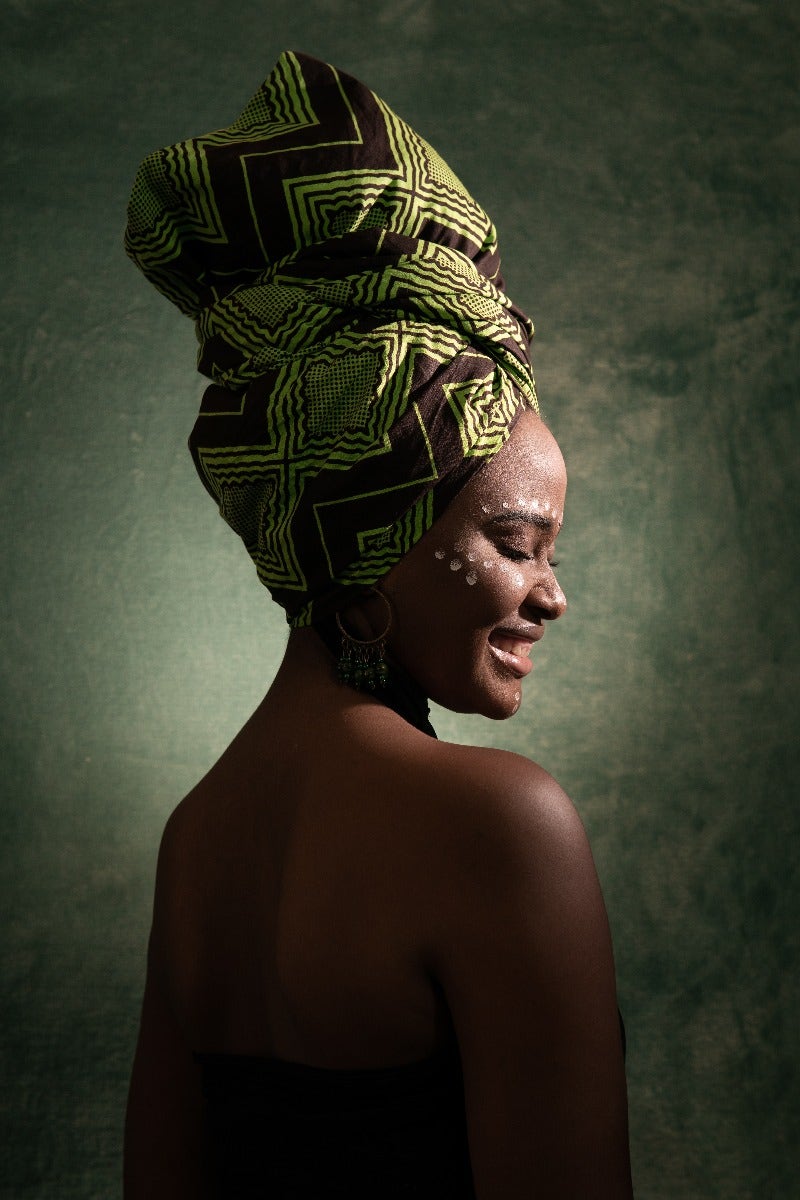 |
Flash can be used in either a dramatic and noticeable way, or subtly to help your subject pop
With multiple flash units, all controlled from the trigger unit attached to your camera, you can create several light sources. Further to this, you can even add lighting to background elements that are part of the story of your image. With most flash units, you can control the amount of light each flash will emit when fired. Again, using this kind of approach can allow you to get stronger light illuminating one side of a face with a more subtle glow to cause a silhouette effect on the other.
Some new to the field believe that flash photography is only beneficial in darker indoor settings, like a studio. The truth is that you can use flash in any environment regardless of the lighting quality that already exists. Flash is probably of most obvious benefit in darker indoor settings, because when there is not a lot of light, the light from your flash has a more noticeable impact on the scene.
That doesn't mean that flash is no good outside though. In outdoor photography, you can use flash to gain greater control of the level of natural light. Imagine a subject standing in the foreground, silhouetted by the sun in the background. Using flash to 'beat the sun' allows you to make the most of the dramatic silhouette while filling in the face and body with light. Another example is where you have dappled light from overhead trees falling across the face of your subject. Using flash can help you to smooth out those shadows falling across the skin and give a less distracting look. Outdoor daylight shooting will always have some sunlight present, but using flash allows you to utilise a second light source that provides a lot more flexibility than sunlight alone.

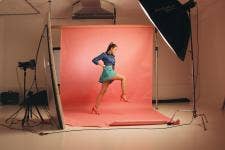
Flash is common in a studio environment, but it has plenty of other applications as well
While it is not super difficult, using flash does require one to be cognisant of a few new concepts and settings that you would not have encountered outside of flash photography. We'll discuss some of these below.
In most current cameras, a flash function known as TTL will be available in the menu settings. TTL stands for Through The Lens. TTL allows for your camera to meter the amount of light or exposure currently in the scene through the optical information that it collects through the lens (as opposed to a secondary sensor). It does this by firing a pre-flash which the camera uses to read the exposure. The camera then directs the flash how much light to apply to expose the scene correctly. You've likely seen this, where a flash will make a quick flash followed less than a second later by the full flash as it takes the photo.
Most flashes today will also feature a Manual setting. Manual allows you to control the amount of light emitted by the flash when you trigger the shutter button. This is in contrast to TTL where your camera will automatically determine the flash strength based on the input it received from the pre-flash. As a result, when shooting in manual there is no pre-metering as there is with TTL. Nor is the camera doing any calculation or modification of the flash power. So essentially this is similar to the manual mode on your camera - you have to make sure the settings are adjusted so that the scene is exposed properly. When shooting Manual, you can adjust the amount of exposure compensation via a dial on the back of the flash. This mode allows precise adjustment of the flash so you can get exactly the shot you want, but it can also require more trial and error compared to TTL flash. It's more effective for a scenario where you have time to set the scene and take a test shot or two, like portraits.

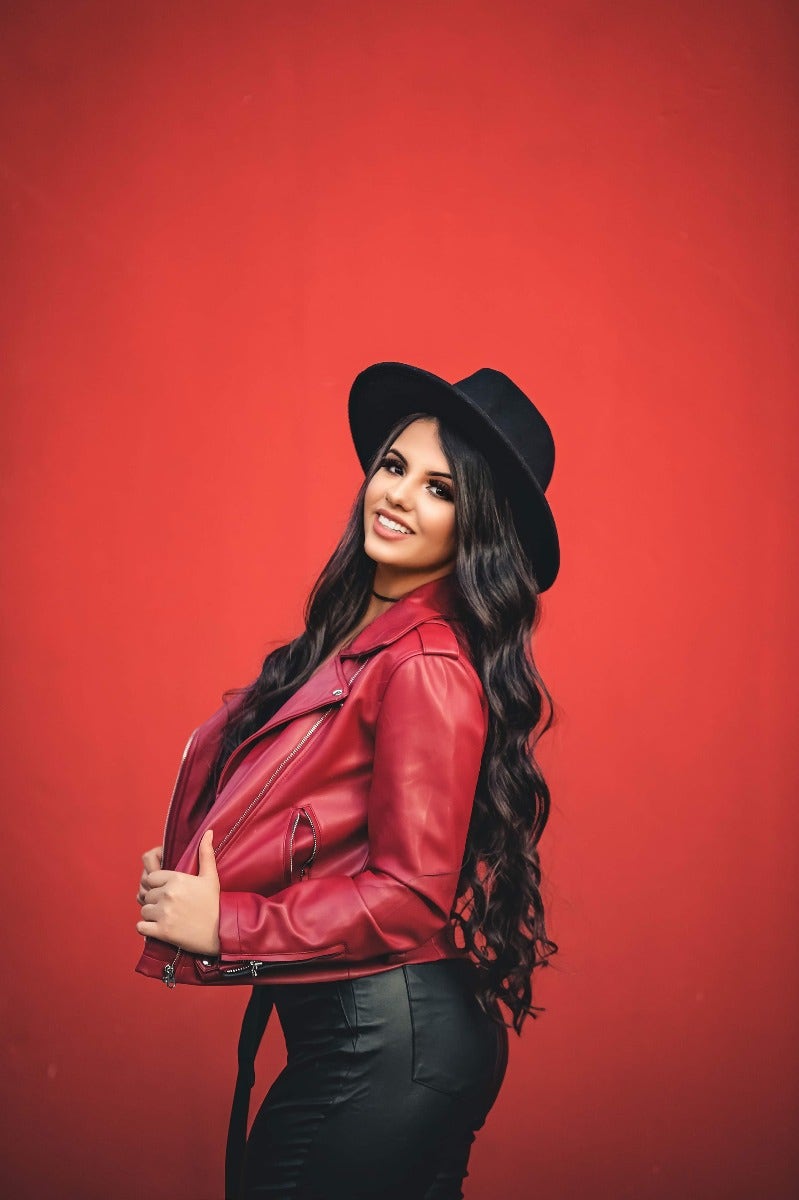
Flash allows you to sculpt the light and shadows around your subject
The recycle time of the flash will vary significantly between brands and manufacturers. Most brands will advertise the recycle time of their flash as a selling point. The recycle time is how fast the unit can fire a flash and then be ready to fire the next one. We recommend considering this in your flash purchase but also taking it as not an exact science. Recycle time will vary significantly as a result of the age and quality of the battery you are using in your flash. Also, rechargeable batteries will recycle the flash differently to off the shelf batteries.
All flashes have a Guide Number, and this can be a confusing concept to understand. Most consider the guide number to be a measure of the power of the flash; however, this is incorrect. The Guide Number is more about the distance at which the flash can operate. For example, the Nissin i40 compact flash has a Guide Number of 131' at ISO 100 and 105mm. The 131' is the distance that the flash can travel to hit its subject. The ISO is the recommended ISO setting for the camera to achieve the correct exposure. And finally, the 105mm is the maximum zoom that the flash can make. The flash zoom is where the flash can narrow or concentrate its beam to hit the subject. Generally speaking, you can understand a higher guide number to mean a higher power flash unit.
In most cases, when you pair a flash with your camera, there will be a limit on your camera of how fast your shutter speed can be when using flash. High-Speed Sync is the function of pushing the capabilities of the pairing beyond this inherent shutter speed limitation. This feature will only work if both your camera and flash are High-Speed Sync capable. If so, then you can push your shutter speed up to much higher levels. This feature is especially handy if you are shooting outdoors during the daytime and need fill flash to illuminate your subject further.
 |
 |
You can use flash subtly or with a heavier hand to achieve different effects
You will hear the terms on-camera and off-camera when discussing the use of flash. On-camera flash is as it sounds, where you have a single flash unit attached to the hot shoe on the top of your camera. The hot shoe is not just the mounting plate but also a data transfer port that allows your camera to communicate with and control the flash. Once the flash syncs to your camera, you can control the flash to perform in the way you wish, via various modes. In some cases, depending on your flash's functionality, you can use the single flash on-camera and have other flashes positioned around the subject to add further light.
Off-camera flash is also as it sounds; however, there is an added element of a flash trigger. A quality flash trigger will allow you to control or master one or more flash devices remotely. You would initially use the trigger to sync with each flash unit you are using. Then you would place your flash units on tripods or light stands around your subject. The flash trigger allows you to control the amount of light each flash device will emit when fired. You can then frame your composition, and when you press the shutter button, each of your flashes will fire in synchronisation.
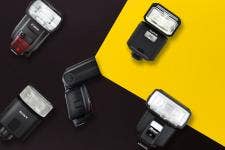
The simplest way to get starting shooting with flash is first to do your research on a suitable flash that you can use on camera (to save you some time, we've put together this Flash Buyer's Guide). It is essential to be aware that a flash unit, even a third party one, must suit the brand of camera that you are using. Otherwise, the ability to sync the flash to the camera and control the flash will be made redundant. A great example of an entry-level flash for all the major brands is the previously mentioned Nissin i40, which comes in different versions for each camera brand. This flash has a fast recycle time, is affordable, and also features a built-in LED light that can be handy for video work. Alternatively each camera brand will also have an offering of flashes for use with their cameras.
You can create dramatic looks with a dark background and flash
You will need to ensure that you use the flash menu function within your camera to set the kind of flash functions you wish to utilise. We recommend beginning with TTL flash until you are confident enough to experiment with Manual settings. The skill in using flash for portrait photography is to start with a small amount of light. If you are new to the game, then we would not recommend going out and buying four flashes and a trigger. Start with one flash and experiment lots with various subjects. If you are more confident with your flash photography, then you could consider investing in a more powerful flash. An example of this is the Canon 600EX II-RT which is a far more powerful flash and has a guide number 197' at ISO 100 and 200mm, compared to the Nissin i40's guide number of 131' at ISO 100 and 105mm.
Camera flash, like all light sources, bounce when they hit an item. Flash bounce can include your subject, nearby furniture and reflective surfaces that can result in a harsh amount of light. However, you can use the flash bounce to your advantage. You can use it as a means to control the amount of light hitting your subject and the harshness of that light. Most quality flashes can both rotate up to 180 degrees and also bend from horizontal to vertical. Using this flexibility allows you to bounce the light from the flash off the ceiling or off a nearby wall. Flash bounce can allow for more creativity as you can angle the light from a different position purely by bouncing it off a large flat area.
Flash bounce can be very useful when shooting with an on-camera flash. When the light hits your subject after a bounce, it will be much softer than if the flash was pointed directly at the subject (which can sometimes be unflattering). This allows you to achieve a more subtle flash look in situations where you don't have the time or gear to set up an off-camera flash.
It is apparent the value that flash can provide in enhancing your portrait photography. Flash can make your subject stand out and provides you with creative control of the lighting necessary to make your composition successful. By starting simple with a single on-camera flash, you can achieve great results without the need for further and more complicated equipment. However, with practice and patience, you will soon be looking for additional opportunity to paint your scene with light to create dramatic and compelling portraits. For more help on how to get started in using flash for your portrait photography, please head on into your local digiDirect store for more valuable information.


Comments
No Comments yet. Be the first to comment.