We use cookies to make your experience better. To comply with the new e-Privacy directive, we need to ask for your consent to set the cookies. Learn more.
Photolab
0
My Cart


Humanity's earliest archives show that we have always had a fascination with viewing and documenting the stars. That fascination still holds today as we seek to understand the universe around us. At some point in time, you will have seen amazing images of star fields spread across the sky. The ability to capture such images is not as hard as you may think. We will walk you through the basics of astrophotography and how you can shoot these star scenes yourself!
Astrophotography is no longer just the realm of astronomers sitting atop mountains with observatories and expensive equipment. Of course, that is an incredibly important function of science, but there is no reason why you cannot reach for the stars yourself. Astrophotography, in its purest form, is capturing long exposure images of the night sky, packed full of brilliant stars. Those images represent a moment in time as the earth and our little solar system travels around the Milky Way galaxy.
Astrophotography is a discipline focused on taking images of stars in the night sky
Astrophotography requires several considerations to be made before you can take your first shot. You will need to be aware of the impacts of light noise when choosing your location, and timing is incredibly important as the clarity of the stars and the light from the moon change at different times of the month and year.
Being well prepared and knowing how use your equipment well is critical. If you leave it till you arrive at your location, you will be fumbling around in the dark. You will also require patience, as astrophotography images can take some time to capture. Let us take you through more details on each of those essential factors.
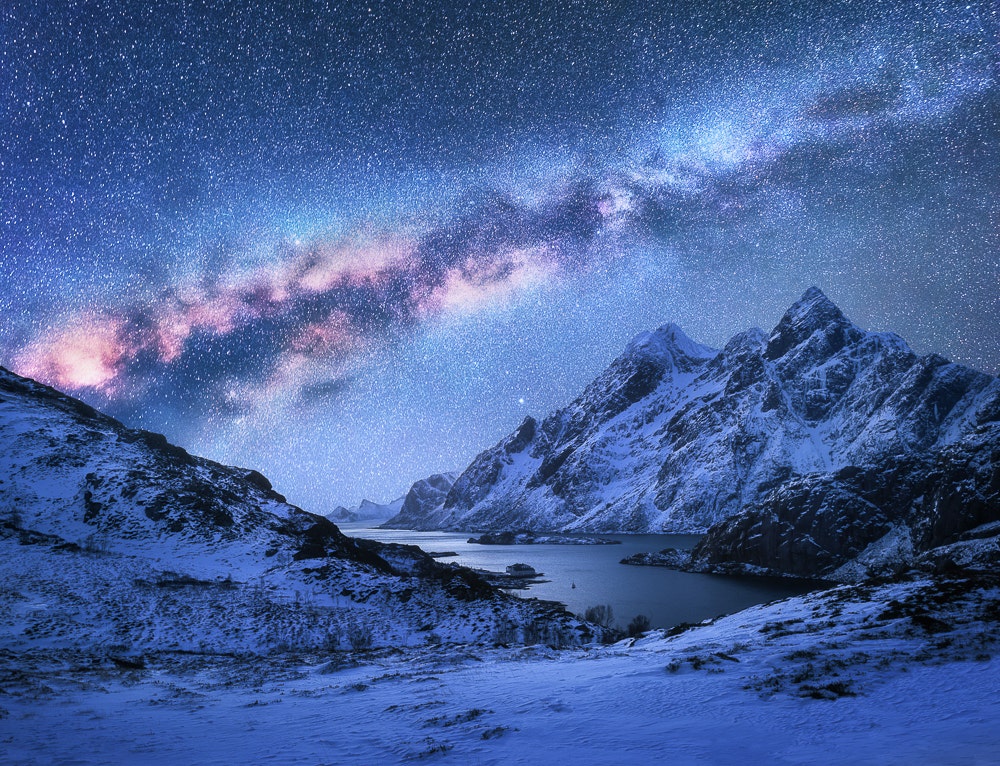
Our sun and solar system are part of the broader Milky Way galaxy. When you look up at the night sky, all of the stars you see are from our galaxy. Being able to track the bright galactic plane and even brighter galactic core of the Milky Way is often the ultimate goal in astrophotography. Knowing how to find it is another job altogether. The best viewing times for the Milky Way are from March to September in the Northern Hemisphere and September to March in the Southern Hemisphere. In the Southern Hemisphere, the Milky Way will typically appear directly above you. In the Northern Hemisphere it will appear at the southern end of the sky.
Throughout the night, there will always be at least a portion of the galactic plane and galactic centre appearing. There is a range of mobile and desktop apps (like Photo Pills) that give you up to date and precise information about the location of the Milky Way.
Imagine that you have taken the time to scout and reach a perfect location for your astrophotography. However, you missed one vital detail. You forgot to take a moment to check the weather forecast! Being able to have a clear night sky is critical, especially on your first few astrophotography excursions. With experience, you can make light cloud patterns work exceptionally well in your composition. But to start, you'll probably want to be sure that the sky is clear of cloud and wind-free. The reason for this is that high winds may cause your camera to shake - when taking long exposure shots, you want your camera completely still. Any amount of wind over a long period can ruin your images
Another consideration is to ensure that you cannot see the moon on the same night sky as you are photographing. Shooting when there is a new moon (i.e. when you cannot see the moon - the opposite of a full moon) will ensure that you have an entirely dark sky. The moon produces an exceptional amount of reflected light, and this can dull the amount of light you can draw from the Milky Way. There may be specific situations where you do want to include the moon in your images, but that is more of an advanced concept. If attempting this, the moon phase should be Waxing or Waning Gibbous as opposed to a full moon. A full moon is incredibly bright and will wash out details of the moon's surface.

Cloudy skies or a bright moon can negatively impact your astrophotography - best results will come from cloud-free evenings with a new moon!
Chances are that you live in some sort of residential area. Regardless of it being inner-city or the outer suburbs, it is highly unlikely that you can effectively capture a detailed starfield simply from your backyard. The reason for this is light pollution. Traffic lights, car lights, house lights, car parks, shopping centres and street lights all create light pollution. Taken altogether, light pollution creates a glow of light over an area and is one of the key reasons that you cannot see many stars in the sky when standing in your backyard. You need to be far enough away from an urban centre so that you are not affected by light pollution, which leads us into our next point.
Due to light pollution, you need to find a location unaffected by any source of light. You want your camera sensor to be able to pull in all the light and detail from the stars without being impacted by light pollution. Most astrophotographers head into the country for this very reason. Be sure to let someone know where you are heading for safety reasons. It is also best to be a reasonable distance away from any main roads and not be in an area where people will pull in and out. That way, you can set up for a long session of astrophotography and not have passing cars affect your image. In addition to lack of proximity to light pollution, you will want to choose a location that has a clear, non-obstructed view of the sky, and perhaps also one that has features that can add to your composition.
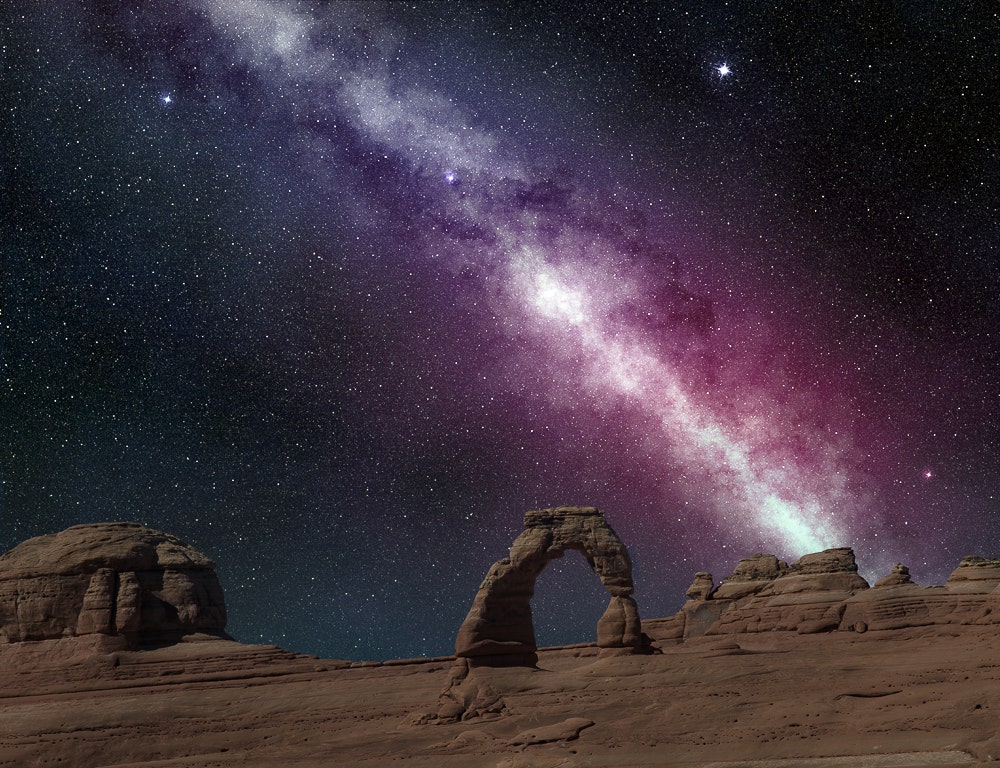
You need to consider if the location is going to meet the needs of your intended composition. Are you wanting to capture an image of the Milky Way spread across the sky or are you wanting to take it up a notch? What we mean by that is to add an interesting foreground subject to complement your starry background. A shot of pure sky by itself is typically not the most interesting image. You'll often want your Milky Way shot to be framed above with some terrestrial features as well, as this provides context, scale, and points of interest. Interesting rock formations, abandoned buildings or rusted-out farm equipment are just a few examples of creating interest in your overall image. With a suitable lens, you could have a fantastic rock formation close to your foreground and then a vast expanse of the Milky Way sailing above.
Incorporating dramatic terrestrial features with the Milky Way can lead to much more engaging images
One important thing in any genre of photography is to be inspired! As you likely know, there are plenty of forums and social media accounts dedicated to local astrophotography groups. These can provide great inspiration and ideas of different ways to take and compose you photo. In addition, they can be an invaluable source for location ideas.
When shooting astrophotography, you will need to rely on some more advanced camera settings. We will walk you through each one, so you have a clear understanding of how to prepare for your shoot. Using manual settings allows you to set your camera to capture an optimal shot of the night sky and gain a higher level of detail.
When choosing your shutter speed, most cameras will have a Bulb Mode that you can select when in shutter priority or manual mode. When shooting in bulb mode, you press the shutter release down and hold it down for the required duration of your exposure. In astrophotography, this is beneficial as you want to leave the shutter open for longer than for a daytime shot. This way, you expose the sensor longer and will draw in more light, contrast and detail to form the desired image. In general, we recommend that you set the shutter to somewhere between 15 and 30 seconds. Trial and error with the exposure duration will ensure the best results in your situation.
The downside of Bulb Mode is that holding the shutter down for that prolonged can cause camera shake just by having your hand on the camera. An alternative is to use a shutter release cable or an app if your camera can pair with your phone. We recommend manually adjusting the shutter speed to the desired setting and then using the self-timer function on your camera to give you a 2-second gap. This way, you press the shutter and remove your hand, the self-timer will count down from 2, then the shutter will open and expose the sensor for the desired time. Finally, the shutter will release, and it will close again. No touching = no shakes!
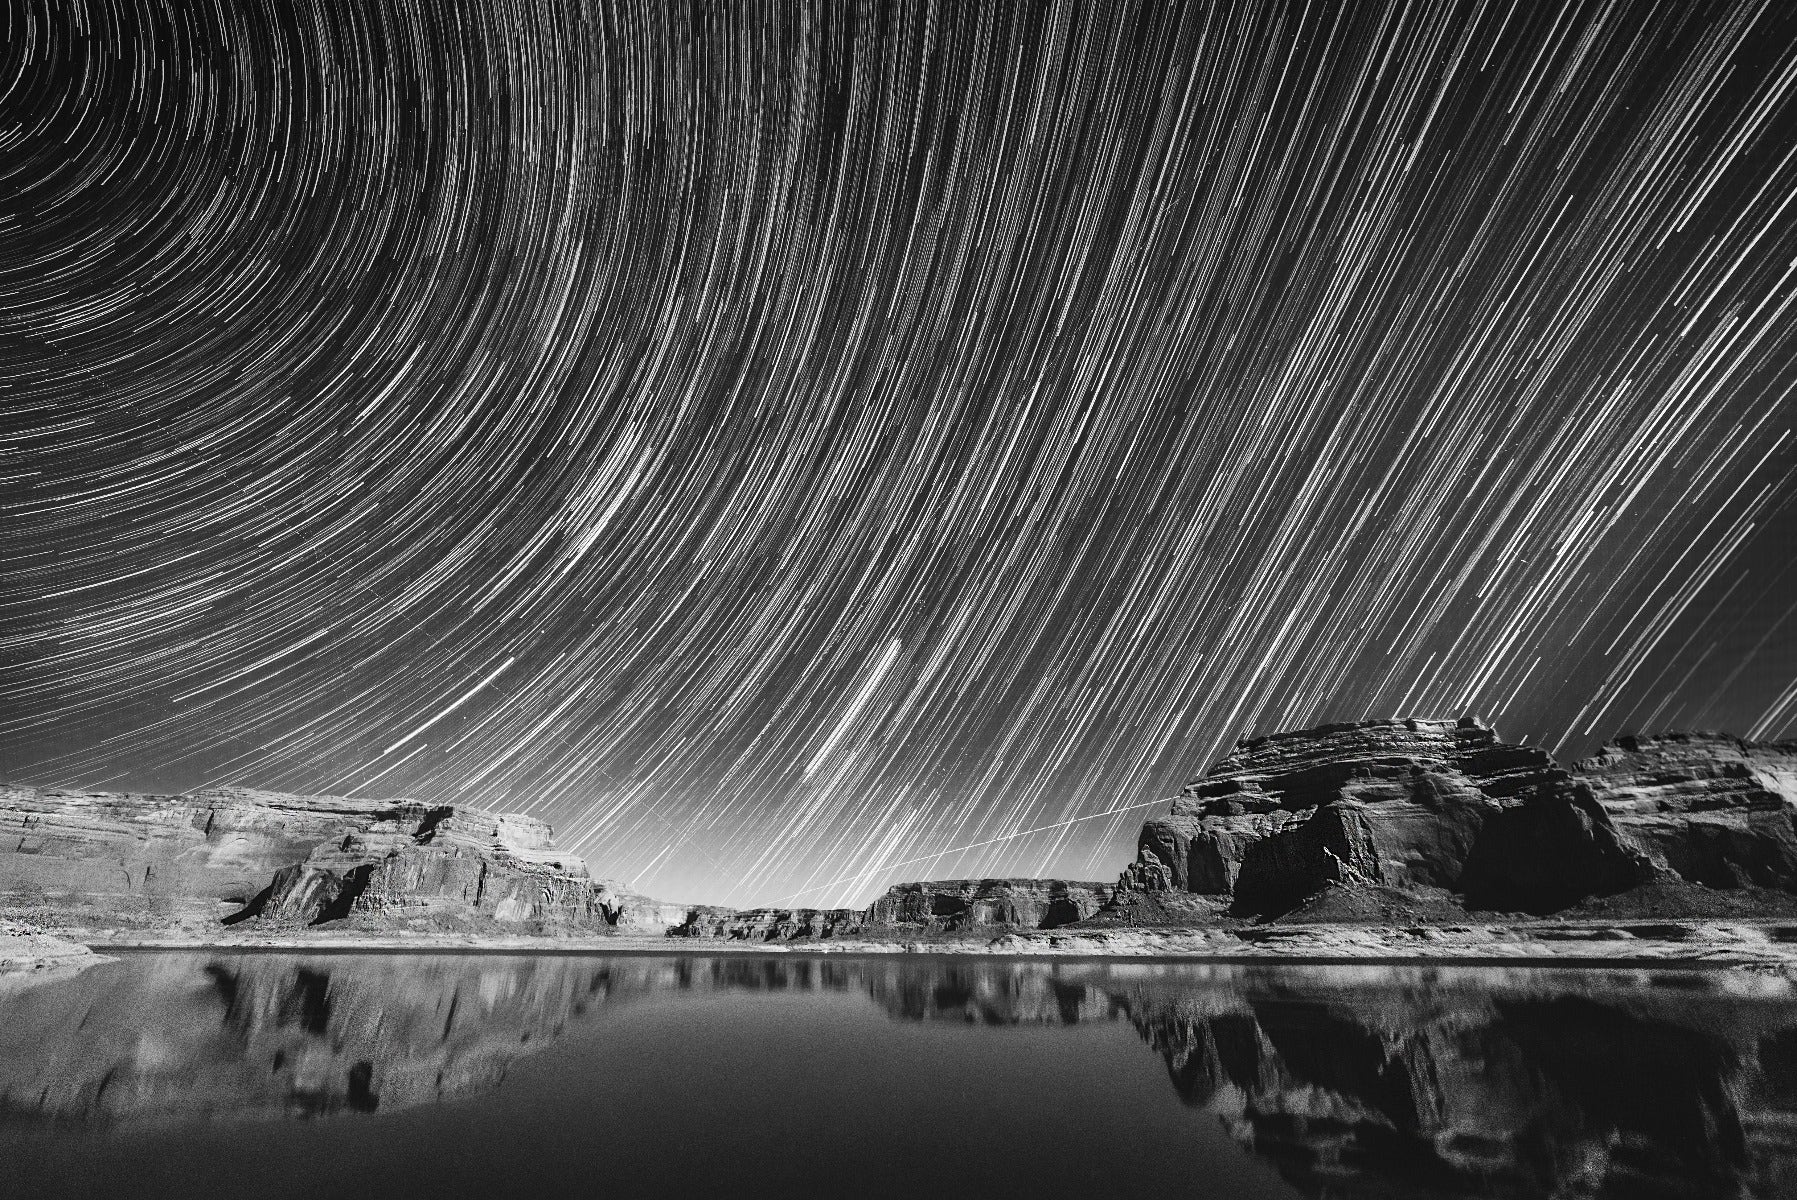
Star trails is a sub-genre of astrophotography that generally involves shooting multiple long exposures and editing them together (also known as stacking)
ISO is all about the sensitivity of light coming in through the lens and hitting the camera sensor. In a typical situation, you would increase the ISO when you were shooting in, say a dark room with soft lights. In that scenario, you may increase ISO to 3200. Outside on a bright sunny day, you would generally drop the ISO as low as it can go. In astrophotography, you need to be very careful as the temptation is to drive the ISO up really high to accommodate the dark scene. However, using high ISO has the risk of creating unnecessary noise on the final image. Noise appears like messy grain where the camera has tried its best to replicate what it thinks it is seeing. We recommend using an ISO around the mid-level of 1600.
White Balance is what controls the colour temperature of your image, and in astrophotography it is vital to get it correct so that the stars don't appear yellow. Fortunately, most issues with White Balance can be adjusted in post-processing. Regardless, we recommend setting the White Balance on your camera to Auto to ensure a reasonably stable colour temperature across the image.
You want to set the aperture to be as wide open as possible. Just as the pupil of your eye opens up if you enter a dark room, it is trying to let as much light in as possible. If your lens has a maximum aperture of f2, then set the lens to f2 and leave it at that. Having a wide-open aperture greatly assists with letting as much light as possible into the lens and then to hit the sensor.
You will also need to set your lens to Manual mode so that you can set the focus to infinity. That way, everything in the frame is in sharp focus. You will also want to set your camera so that you have a single focus point. Manually focusing on the night sky can be a little tricky to get the hang of; however, some lenses have a focus scale that shows where the infinity focus point is. Alternatively, you can focus on a single bright star and use the contrast created between the star and the darkness of the sky to focus. Get the meeting point crisp and sharp.
Having a camera with a suitable sensor and excellent low light ability is essential for astrophotography. The sensor will read the light that is coming from the night sky and is pivotal in gaining detail and contrast. In this regard, larger full frame sensors are generally preferable for astrophotography, We recommend a camera such as the Sony A7R IV, as it has a brilliant 61-megapixel full-frame sensor that is perfect for this kind of application.
In addition to the camera, having the right lens is important. As the sky is a very large subject, particularly if you want to fit in terrestrial foreground subjects as well, you will need a wide-angle lens that will allow you to gain a broad view of the galactic plane without cropping. All camera manufacturers make a wide angle lens for their respective system. Particularly popular are Samyang lenses, as they are relatively inexpensive and made in different versions that suit various different camera systems. While they are generally manual focus only, this is something that is not much of a problem for astrophotography. They also typically have focus scales that make it easy to focus to infinity. A lens such as the Samyang 14mm f/2.8 is perfect as it has a very wide angle of view without unnecessary distortion of the final image. It is available in most major mounts.
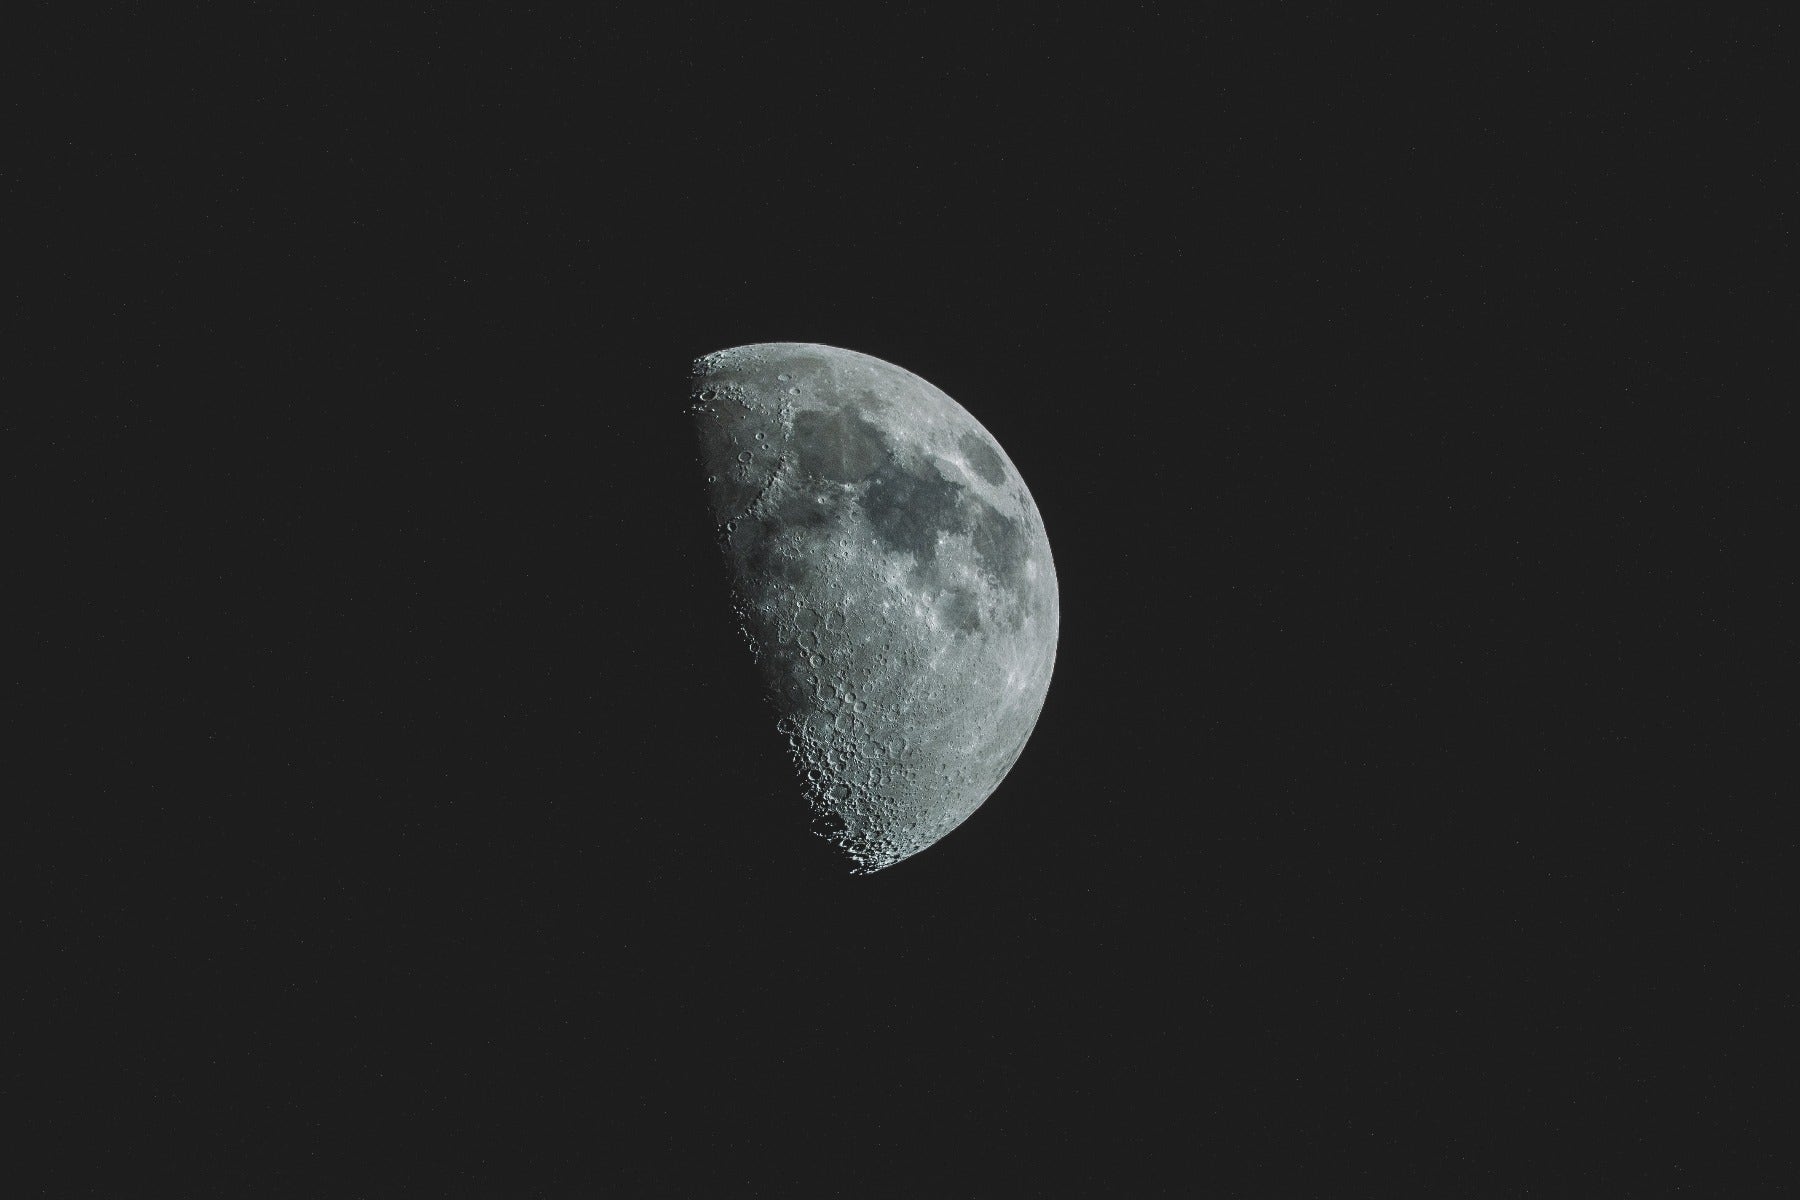
You can also experiment with shooting the moon, although you still will have to avoid the full moon as the light will be too bright to capture detail. This also requires a much more telephoto lens than general astrophotography
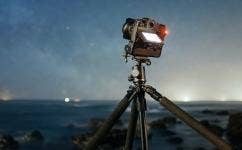
Aside from having your camera ready to go, you will need a few other pieces of equipment. The first of which is to carry some spare batteries. As we have mentioned, astrophotography requires taking lots of long exposure images over a space of several hours, depending on where the Milky Way centre appears. This kind of action will eat into your battery faster than standard shooting. Having spares will save you the heartache of having to leave early. You will also need to have a good quality and sturdy tripod. A tripod will ensure that you can have a perfectly still composition in the frame while the camera is conducting its long exposures. Any shake at all and the image will be blurry and unusable. Last but not least have a handy torch so you can see where you are going and what you are doing.
Astrophotography can produce exhilarating outcomes after a period of patience and practice. You could potentially spend many hours out on your shoot waiting for the Milky Way centre to travel across the night sky. But we are firm believers that the prize is worth the chase and with the above practises and knowledge you will succeed in astrophotography.
Interested in expanding your astrophotography skills but not sure where to start? Reach our to speak to digiDirect's friendly staff either in-store or online for advice on gear so you can start shooting faster.
{{widget type="Magento\CatalogWidget\Block\Product\ProductsList" title="Products Featured in This Article" show_pager="0" products_count="10" template="Magento_CatalogWidget::product/widget/content/grid.phtml" conditions_encoded="^[`1`:^[`type`:`Magento||CatalogWidget||Model||Rule||Condition||Combine`,`aggregator`:`all`,`value`:`1`,`new_child`:``^],`1--1`:^[`type`:`Magento||CatalogWidget||Model||Rule||Condition||Product`,`attribute`:`sku`,`operator`:`()`,`value`:`126636,122888,113782,118452,113785,113787,119926,132548`^]^]" type_name="Catalog Products List"}}


Comments
No Comments yet. Be the first to comment.