We use cookies to make your experience better. To comply with the new e-Privacy directive, we need to ask for your consent to set the cookies. Learn more.
Photolab
0
My Cart


When shooting portraits, the focal length of your lens has a lot of influence on the final result. It's very common to hear a lot of discussion surrounding 85mm, 100mm, and 70-200mm lenses, as these are the most common focal lengths used for "traditional" portrait photography. However, there really is no right or wrong answer about which is the best lens for portraits - it completely depends on the style and results you want to achieve! In this article we'll be discussing how you can use a more unusual 24mm focal length for effective portraits. We'll compare that to using a more traditional 85mm focal length, we'll see the different situations in which each lens excels, and we'll discuss the best situations in which to use either focal length and why.
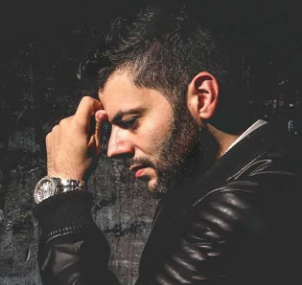
While a 24mm lens is a great focal length that has a lot of portrait applications, let's start the discussion by pointing out the kind of portrait where I would AVOID using a 24mm lens - headshots. The reason for this is because 24mm is quite wide (particularly on a full frame camera), and as such it suffers from the perspective distortion that most wide lenses exhibit. Specifically, it exaggerates distances, making close objects appear larger than normal and distant objects smaller than normal. This is more pronounced the closer you are to the subject, and when trying to get a close-up headshot it can really distort the human face. This distortion is not a pleasing look and gives a bit of a "Funhouse Mirror" effect, which is typically not what your clients will be looking for!
In contrast, a longer 85mm lens has the opposite effect. Rather than distorting features, it compresses them, which actually has quite a flattering effect on the human face. This gives your headshots more of a realistic look and is why I primarily shoot headshots on 85mm or longer lenses.
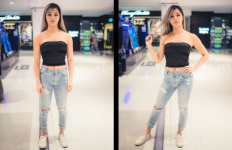
Let's demonstrate this by having a look at the below images. We can clearly see the difference between two lenses here; the 24mm lens results in a distorted look while the 85mm gives a much more pleasing result. For this reason, I would avoid a 24mm lens when shooting headshots.
 |
 |
Left: a 24mm lens exaggerates distance, which is not flattering to the human face. Right: In contrast, a longer 85mm lens flattens the subject, which is generally flattering for headshots.
Now that we know when to avoid a 24mm, when should we use it? The best application of a 24mm lens for portraits is for environmental portraits. These are situations where you want to capture your subject in the larger context of the environment in which they are situated. This is as opposed to close-ups and headshots where we typically want to almost completely obscure the environment through use of shallow depth of field and tight composition. Environmental portraits instead aim to tell a story about the subject; the environment can establish context about who they are, what they are doing, and generally provide more nuance than a standard headshot.
Whenever I want to tell a story via an environmental portrait, a 24mm lens is almost always what I reach for. Because it's wide focal length allows me to take a step back and pay attention to a larger field of view, it's a great lens to capture the scene in which your model or couple is in.
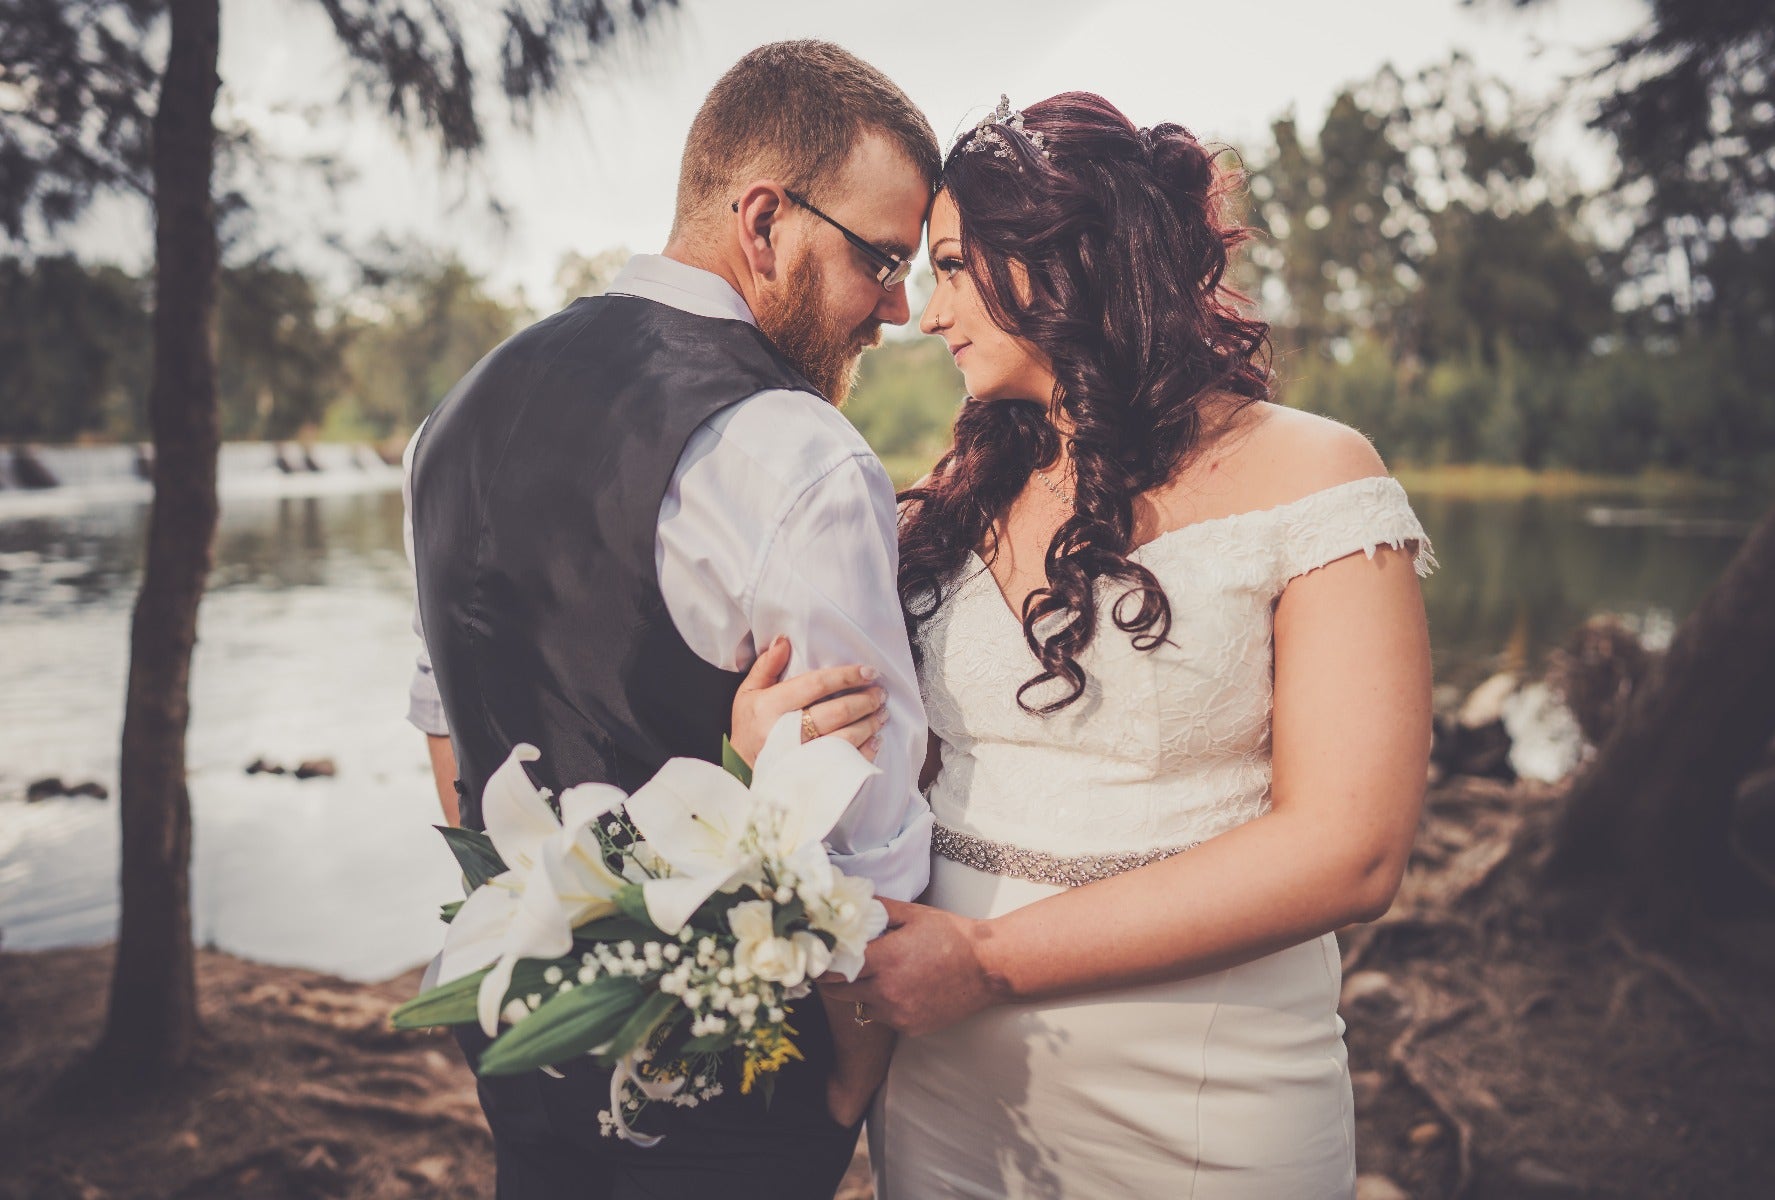
A 24mm lens is also great for those tight spots where you want to capture the full body of your subject and can't use any longer focal length due to limited space. This can be common in restricted spaces, such as churches, indoor venues, and even portrait studios!
Let's examine some images that I've shot using a 24mm lens.
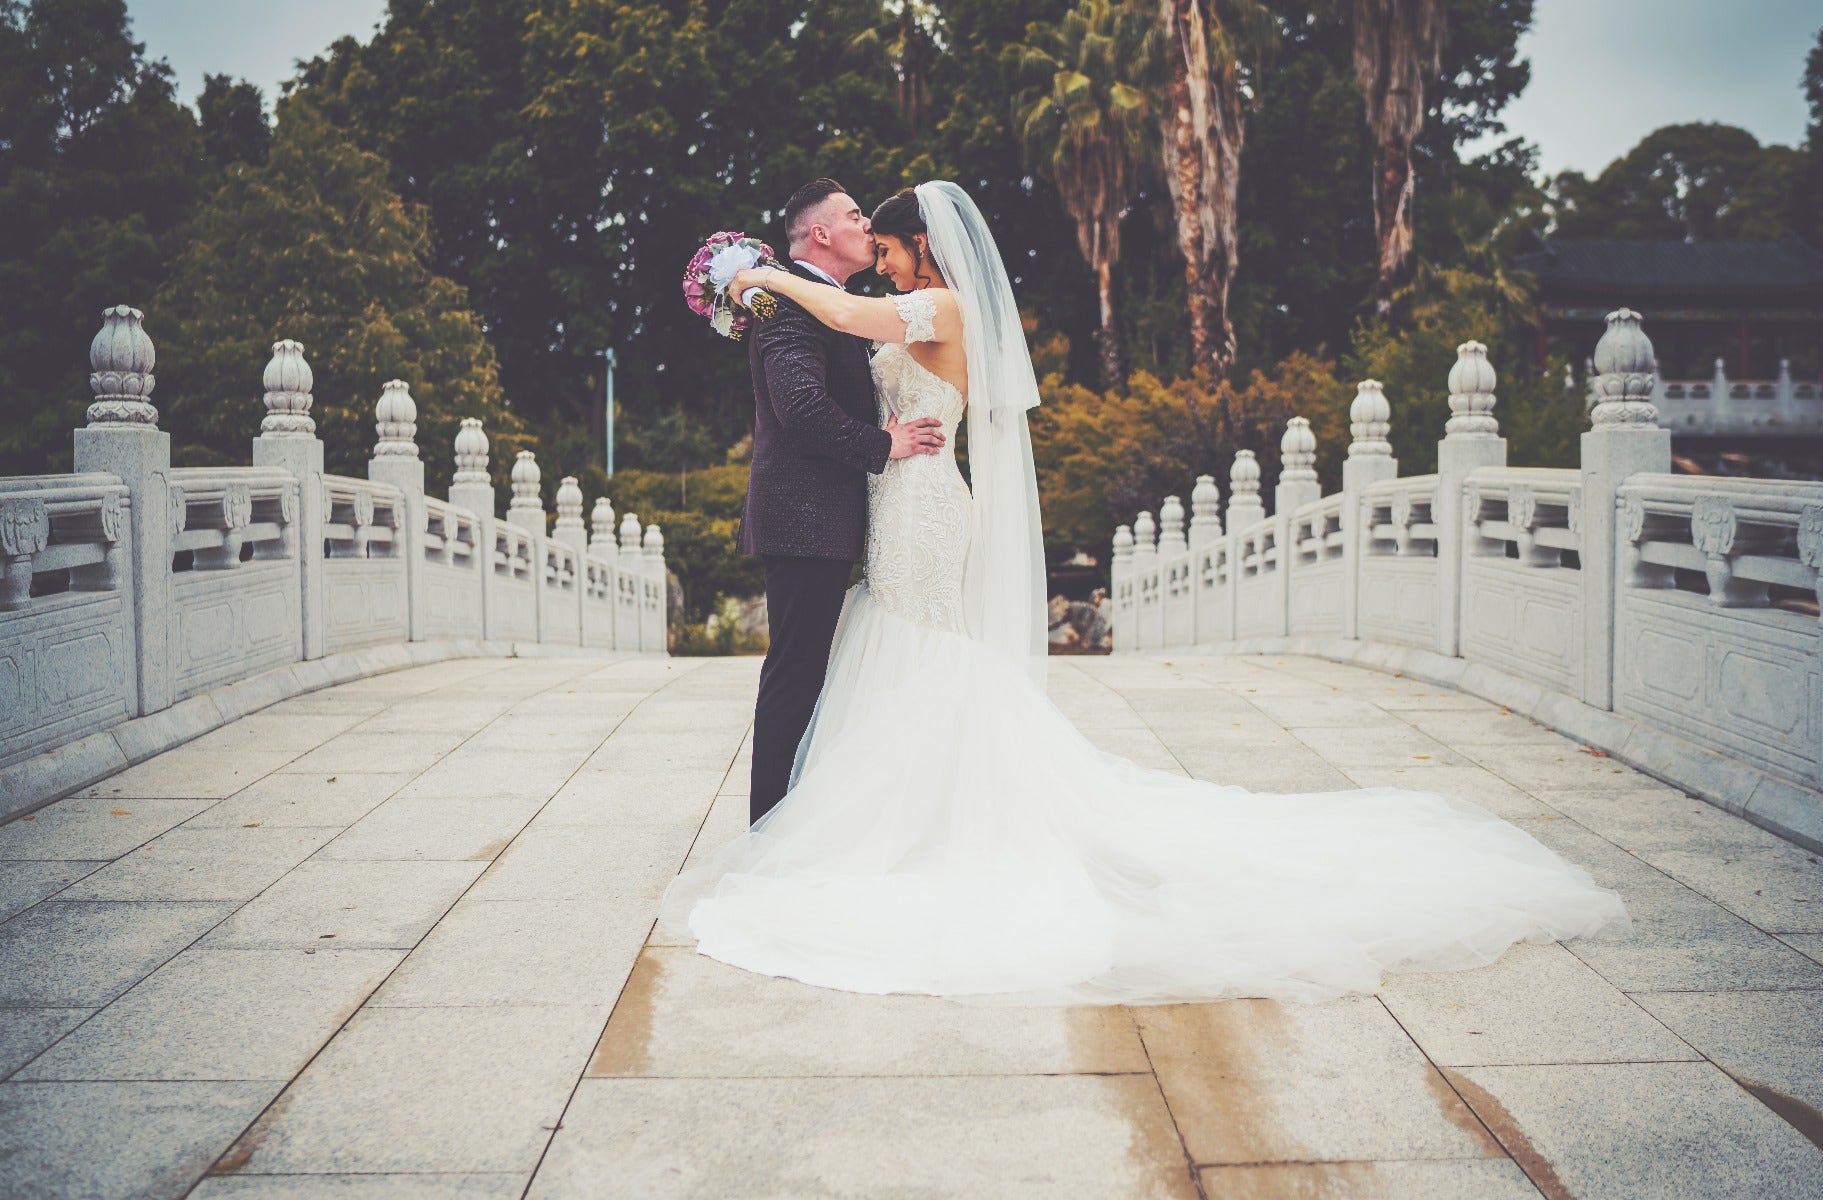
If I had attempted the above shot with an 85mm, I wouldn't have enough room to step further back and been able to capture the whole body of the couple including the bridge. So instead I used the Sony 24mm f/1.4 GM (on a Sony A7 III) to capture this shot, which allowed me capture a wide shot of the couple with the bridge. And since I've put some distance between myself and the subject, we don't see those distortion issues that we noticed on our close-up headshot examples previously.
Let's look at some more examples, this time showing a few different shooting positions. In this case we'll look at one with full body and the other with half body. In the first image below, my back was completely against a wall and I couldn't step back. I wanted to capture more of the environment and another focal length wouldn't be wide enough to capture what I had envisioned. The 24mm allowed me to include the lovely background imagery as well as a full body shot without any distortion on the couple.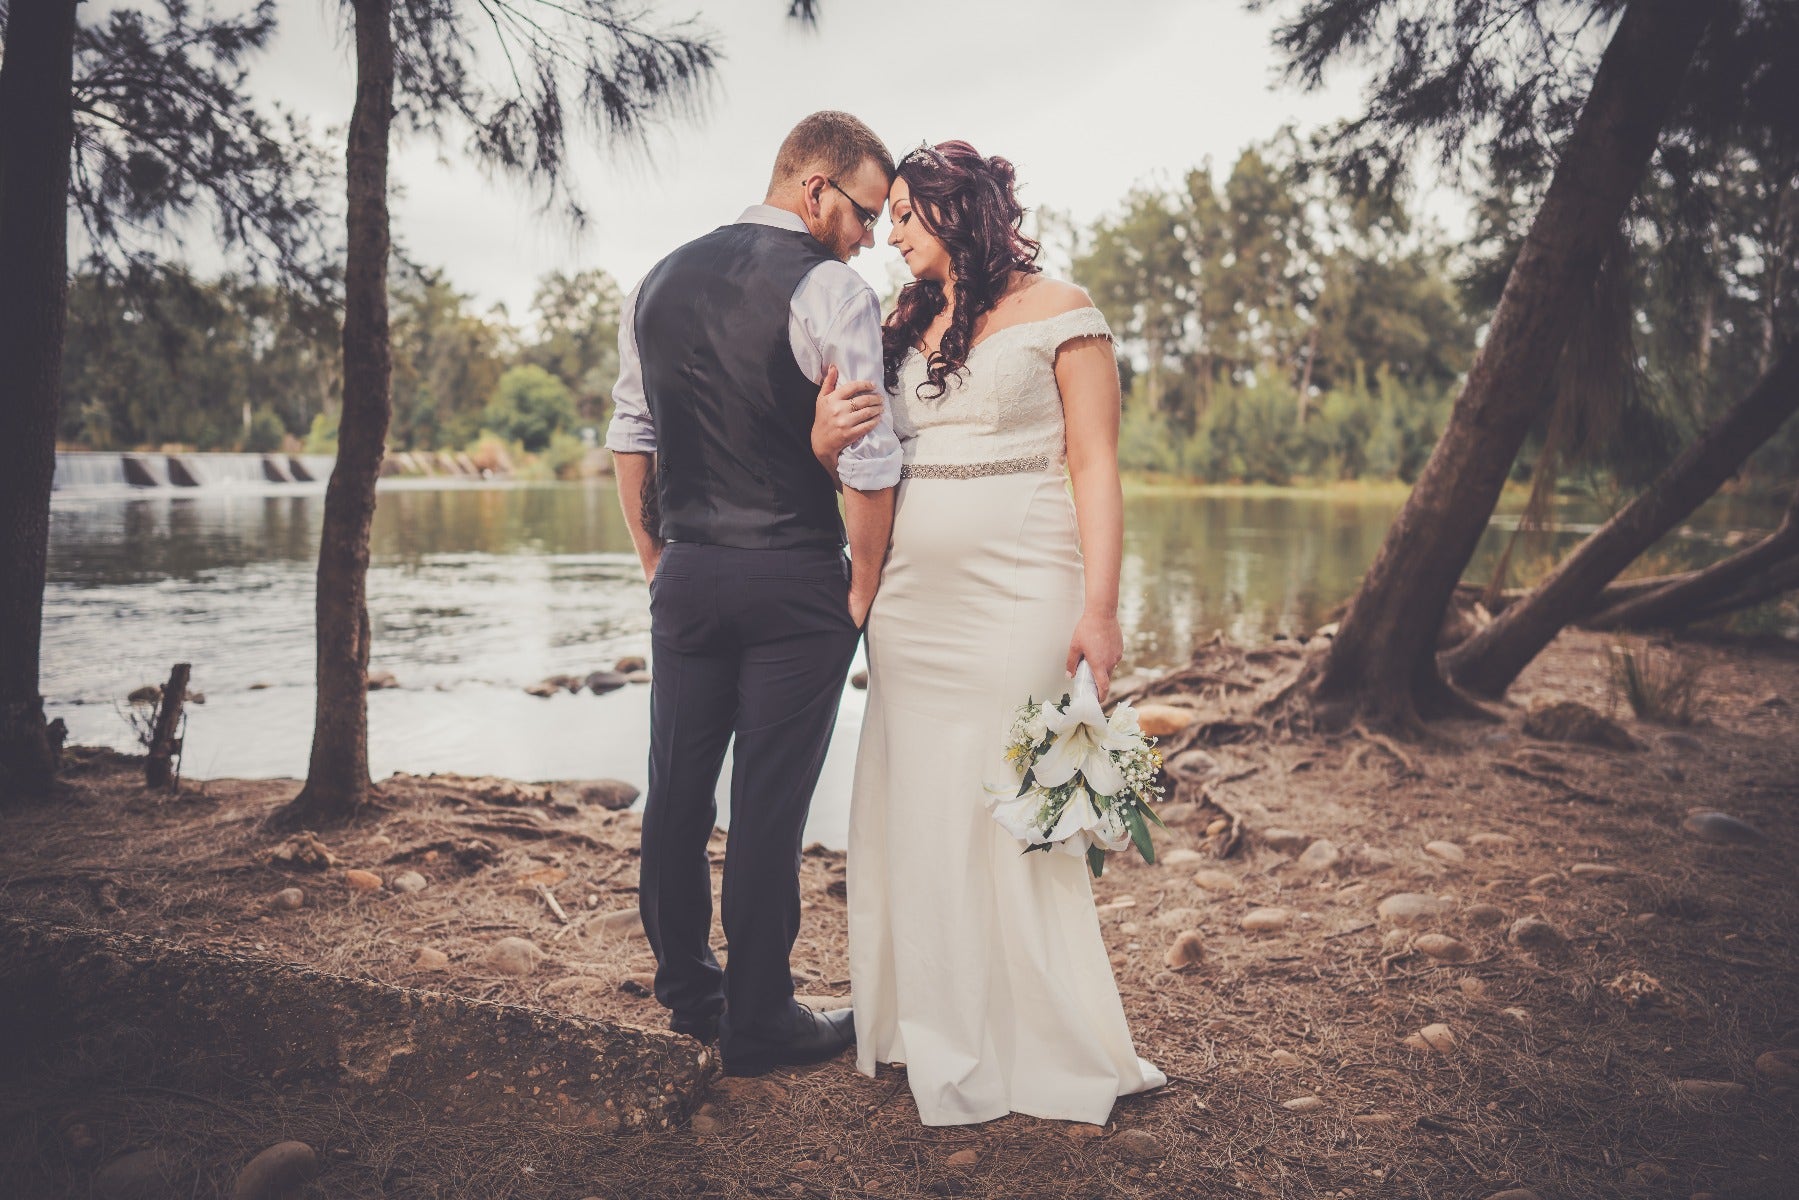
Below is the exact same posing, except that I stepped in closer for more of a half-body shot. This allowed me to still show the background but have the couple fill more of the frame. Notice how it still provides some nice separation between subject and background, which is why a fast aperture can still be useful on a wider lens.
The 24mm also allows you to more freely capture creative perspectives when a longer 85mm focal length would be more limiting. In the below image I was standing on a small ledge and stretching my arms out above the couple in order to show a different perspective than normal portraits. If using an 85mm lens this would have required a dedicated ladder, or more!

The image below is a close up that was shot with the 24mm. Now, this is close enough that I had to be careful about encountering the distortion that we discussed at the beginning, but it's not too overpowering in this instance. If you carefully manage your positioning and angle, it can be possible to minimise this effect to some degree (although it will always be there). It's something that I would recommend practising so that it becomes second-nature when on a shoot.
Now that we've talked about the 24mm, let's discuss when a more traditional 85mm lens can be the right choice. I love using an 85mm when I want to get close, or when I want to achieve a very shallow depth of field. This is because a longer focal length provides more shallow depth of field than a wider one, so an 85mm lens will always be natively better at capturing a beautifully out-of-focus background than a 24mm one. As discussed earlier, an 85mm also gives you more of a realistic perspective of the persons face when shooting close up due to the compression of the longer focal length.
The below image was shot at a local park. The background had quite a few busy and distracting elements, but shooting at a wide f/1.4 aperture on an 85mm allowed me to blur those elements out, keeping the focus on the subject and creating artful background bokeh.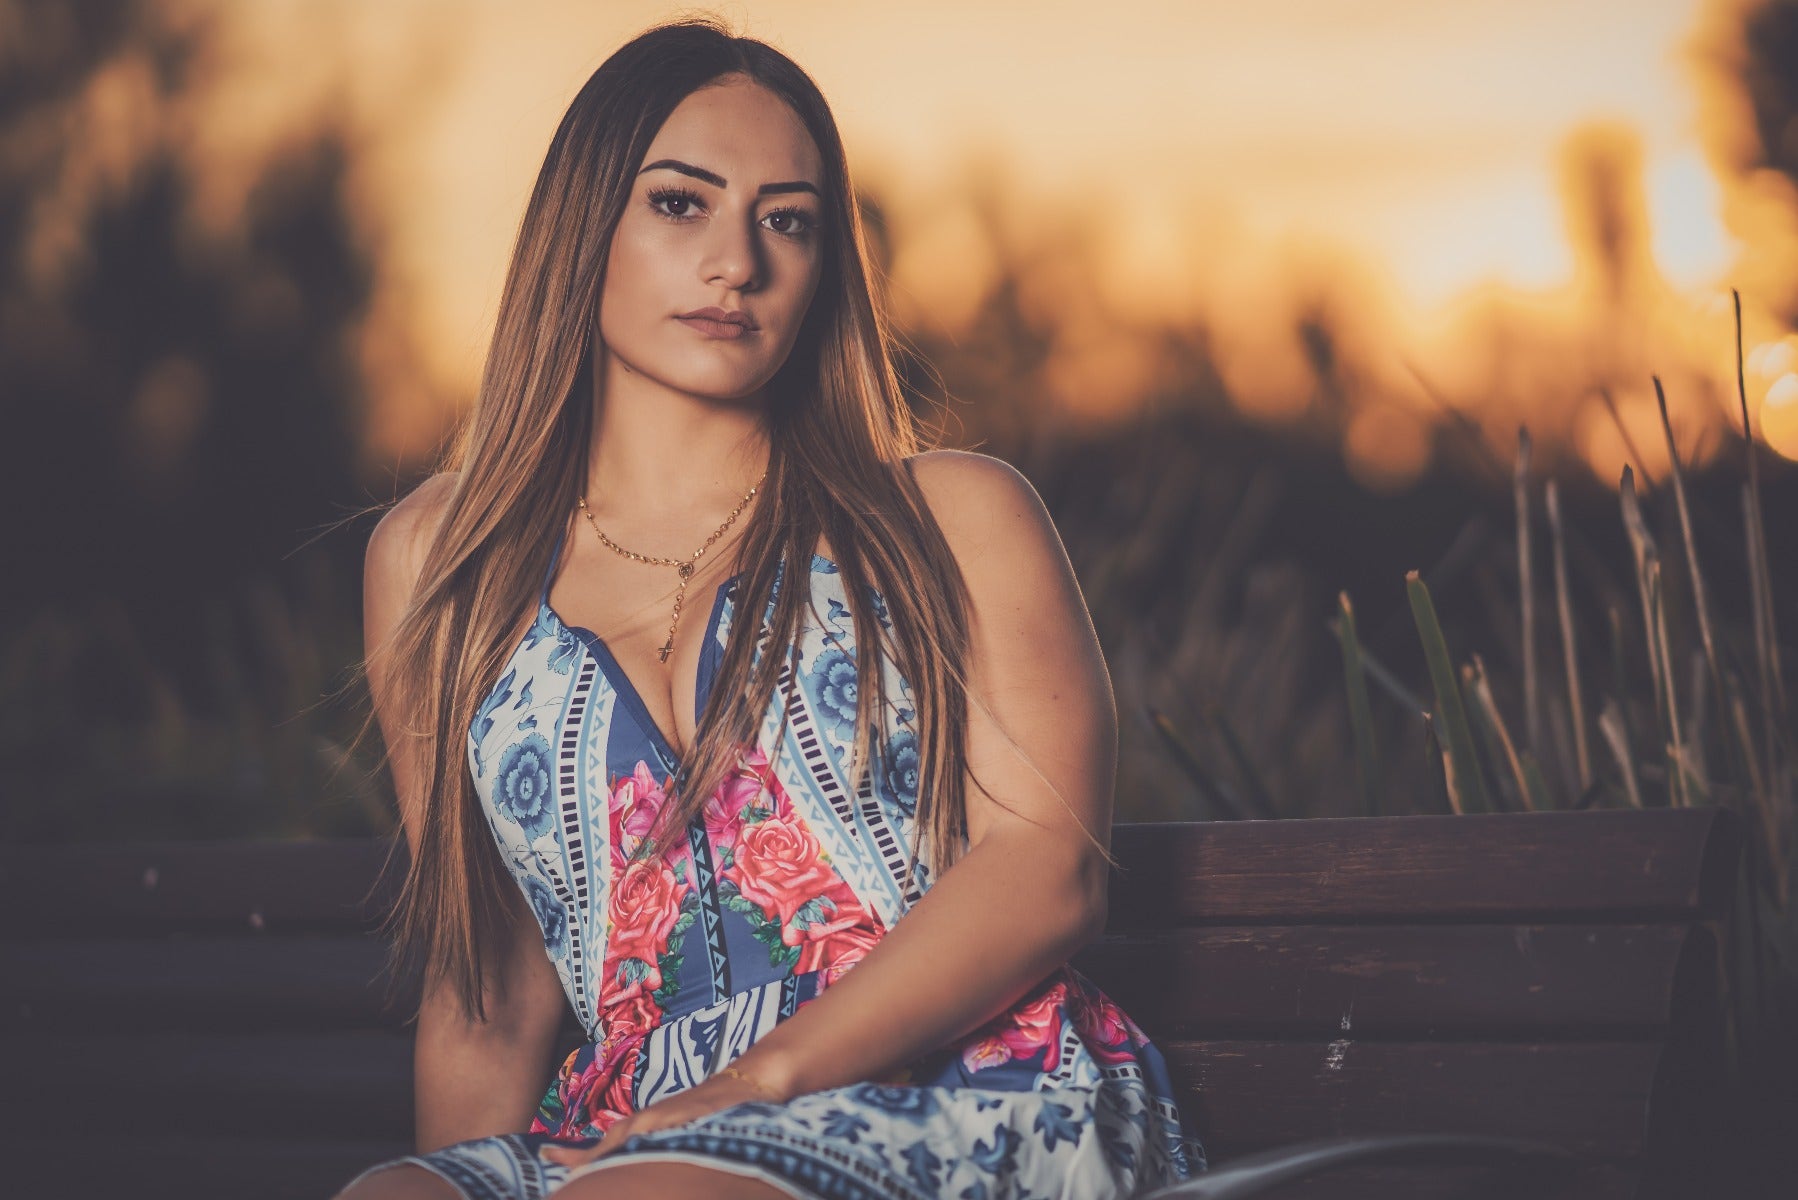
You can also use an 85mm for full-body shots in a similar way that you might on a 24mm, but you will have to be further back in order to do so. In this example I was on the other side of the pond from the model as I wanted to capture the water in the foreground. A 24mm would be too wide in this situation, as the model would be far in the distance! The 85mm allowed me just enough reach to show the environment and full body of my subject while also producing bit of bokeh in the background. 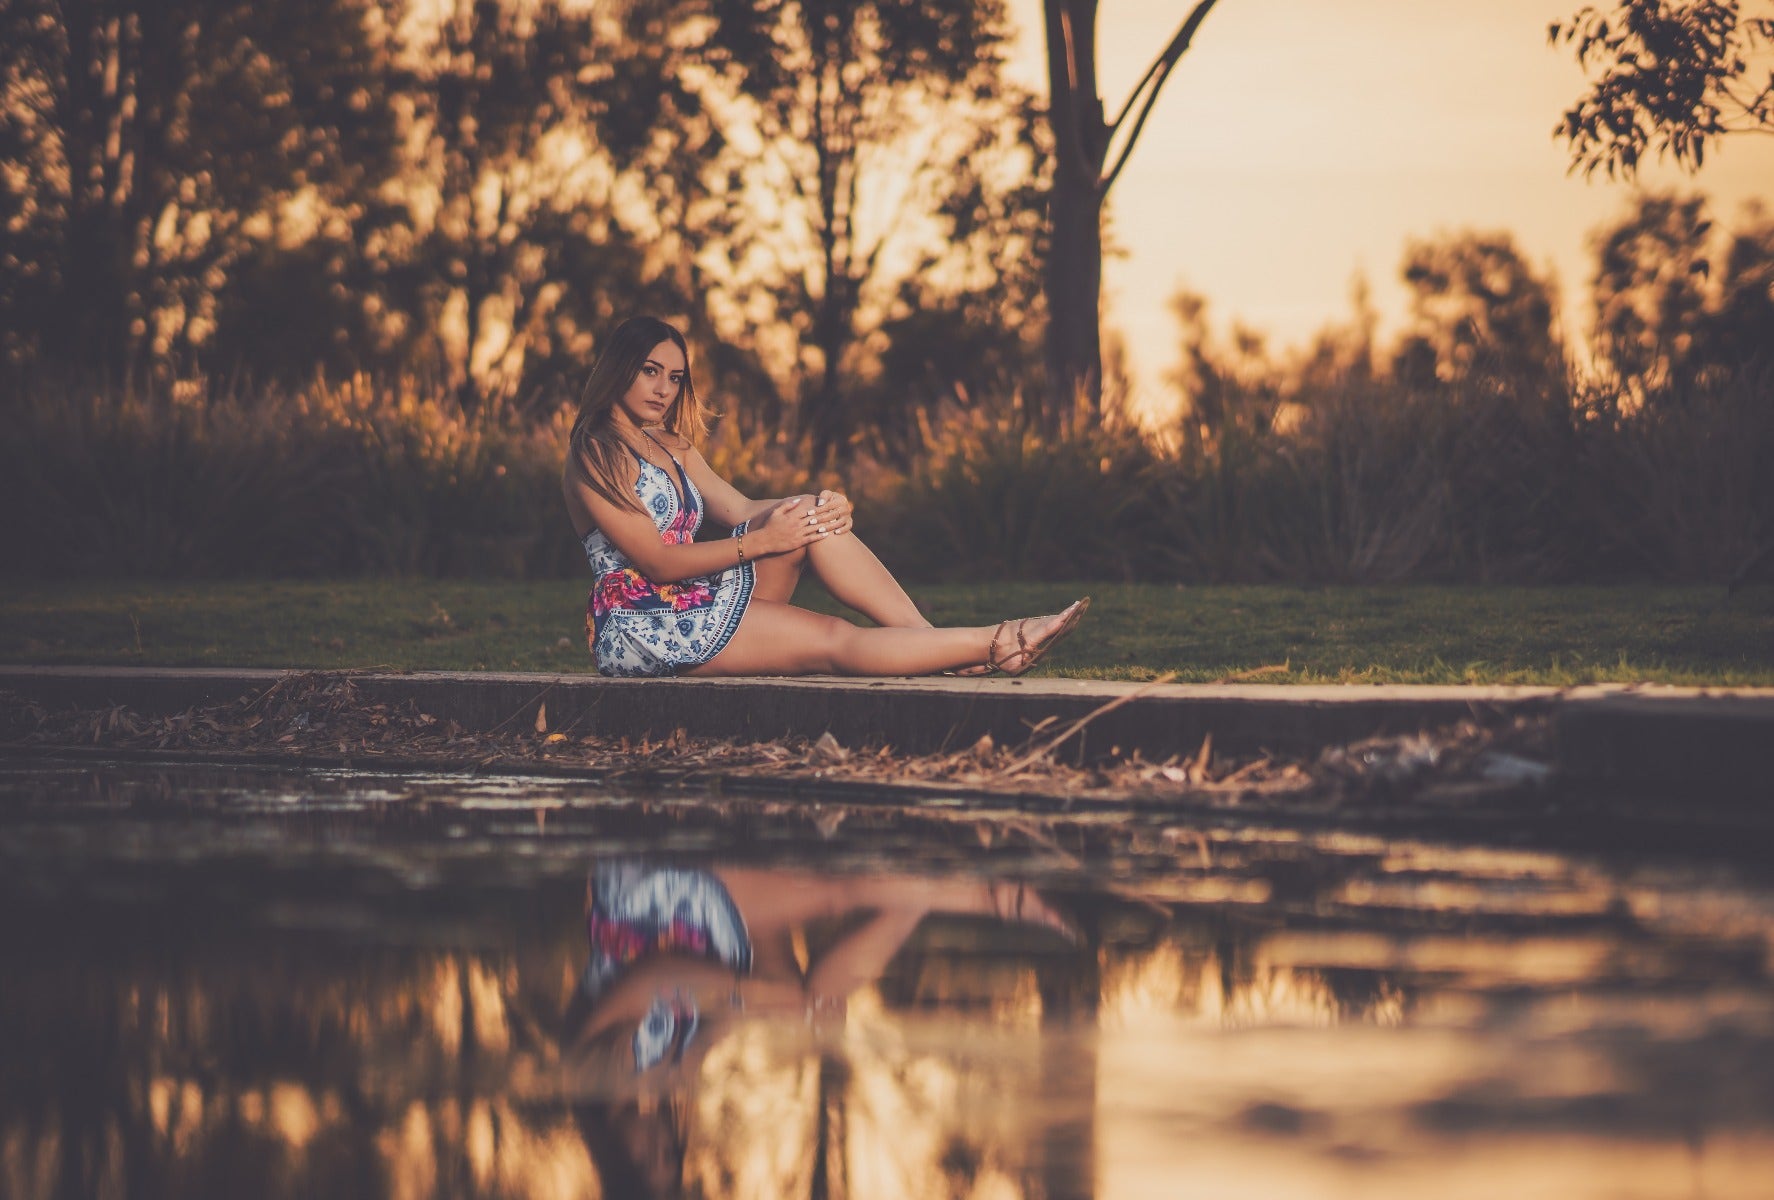
In the image below I knew I wanted a blurry background, so I knew I needed to be close to the subject. However I also wanted a full-body shot, so I was careful about my distance in order to achieve both of these. You'll notice that many of the full-body shots on an 85mm involve the subject sitting or in some other non-standing position. This means that they don't have as much height, which will allow you to get a bit closer in order to fill the frame and maximise the bokeh. It can sometimes feel a bit contrived to position a model this way, so I would recommend experimenting with some more natural-feeling poses with a family member in order to get a feel for this type of posing. For more tips on this, read my article on posing techniques.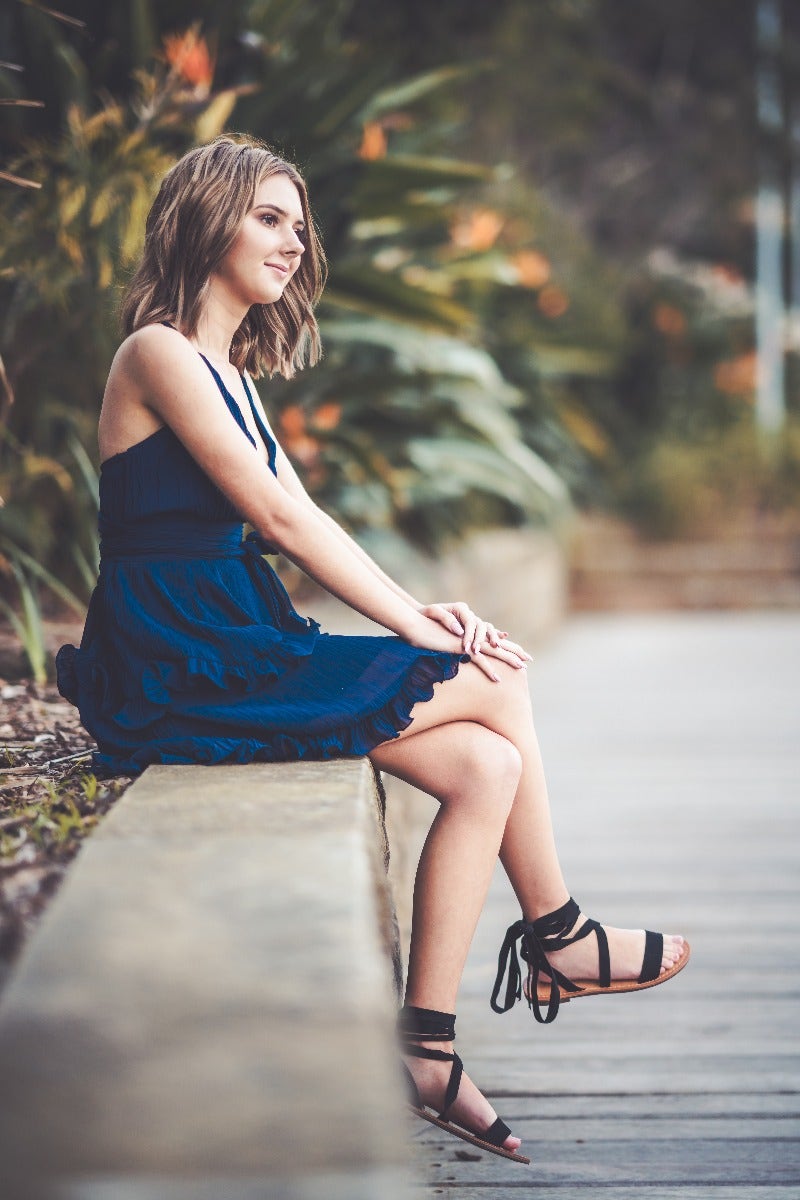
When discussing the 24mm, we looked at a half-body shot with a couple. In that instance, the background was slightly blurred, but was still mostly visible because the 24mm can only achieve a certain amount of bokeh due to it's wide angle. Below is an example of a half-body shot using an 85mm - notice how the background is almost completely blurred out, a much different effect than we found on the 24mm. Of course, I was much further away from the subject in order to achieve this framing on an 85mm than I was for the 24mm shot. The takeaway is that even if you have the positioning freedom to achieve the same type of image in terms of framing, these different lens choices can still significantly affect the result! Neither is better, it's just a matter of different styles for the job at hand.
A great example of where an 85mm certainly excels over a 24mm is in studio headshots. As studio backgrounds are often simply a solid colour, they tend to heavily emphasise the subject over the background, making them a natural fit for an 85mm. In addition, you'll often be using more complex flash and lighting setups in a studio, which can be easier to manage when you're only focusing on how that lighting affects a model's upper body vs their entire body. Here is an image captured with the 85mm in studio which gives a perfect perspective of the model's face while avoiding distortion.
Shooting portraits can be one of the most rewarding styles of photography, particularly if you enjoy working with people. While there are tried-and-true methods, using unusual focal lengths like 24mm can lead to more creativity and experimentation, giving your portraits the "pop" needed to stand out from the rest. On the other hand, the 85mm look has a lot of benefits as well, and is a classic for a reason. Mastering both styles can be a very exciting and rewarding experience!
All images courtesy of Hanna Saba.
Interested in contributing to the digiLife blog? Email community@digidirect.com.au with the subject line "digiLife Contributor", and include links to your photography portfolio and a writing sample.


Comments
No Comments yet. Be the first to comment.