We use cookies to make your experience better. To comply with the new e-Privacy directive, we need to ask for your consent to set the cookies. Learn more.
0
My Cart


Getting started with off-camera flash can be daunting as hell. Especially when you're on location trying to balance flash output with the locations ambient light. How do you stop it from turning into a hot mess?
How do you get from a murky test shot to beautifully lit result without going mad in the process? Read on!
Don't fret. Off-camera flash on location can get terribly complicated, but it can also be relatively simple if you approach it in a methodical way. (Side note: my dad was a science teacher and as a kid I learned about being methodical and tweaking experiment variables one at a time. It's helped enormously on shoots).
"But Sharon, why would you even want to use flash at all?" I hear some of you asking, "If the picture looks too dark, just turn up the ISO!"
Um, yes. You could bump your ISO to make a dark picture brighter (or use a slower shutter speed, or whatever).
But - and here's the important bit - flash isn't just used to "make sh*t brighter". It's used to shape and control the quality and direction of light. It's to establish a figure-ground relationship (more on this in a moment). It's to put a catchlight in the eye to add life to a portrait. It's for a whole gaggle of technical and creative reasons beyond just "hey it's real dark in here".
Righty-ho then, *gets down off soapbox*. Off we go!
Here's a one-light location portrait approach that requires minimal, non-expensive gear, and gives you a procedure to think through, so you don't stand there panicking and thinking "crap crap crap where do I start?"
The aim is to balance flash with ambient light. We're not trying to light the entire room or scene with flash. Instead we're going to use the ambient light as a base exposure and add flash just to the subject to help them "pop".
In a nutshell, here's what to do:
It's a high-level overview, but basically THAT'S IT! Badda boom. (And when you get comfy with the process you can skip #2 and go straight from #1 to #3)
Let's walk through it.
Get your composition figured out first. You don't even need your subject to be standing in the shot yet. Think of it as framing up the background elements and general scene for the portrait - like if you're putting on a play the first step is to "create the set" for the actors to be in later.
Find framing before worrying about lighting and camera settings. Until you've framed up your image composition there's little point fretting about whether a window might cause lens flare or whether a metal surface will be too reflective until you know if it's actually going to be visible in the shot or not.
It's a great idea to put your camera on a tripod at this stage so that when you've found your composition you can lock it in and mentally tick it off as 'done'.
Now dial in camera settings to get an exposure for the overall scene. Don't turn the flash on yet - just find an exposure for the scene with whatever the ambient light is in the room. (Note you can apply this approach to outdoor shoots - for the sake of simplicity I'm using the word 'room' or 'scene' to mean "the space you're shooting in", but it could be indoors or outdoors).
To keep things simple use the camera in Manual mode and dial in an Aperture + Shutter Speed + ISO combo to give an exposure that generally 'looks right', brightness-wise. If it's an average scene your histogram will be roughly middle-ish.
Note that we aren't worrying about how our lovely portrait subject looks yet (even if the person is standing in the frame smiling at the camera, just politely ignore them). We're still in 'set building' mode. Just find a generally correct-looking baseline exposure for the room (even if the person looks poorly lit).
The exact settings of Aperture + Shutter Speed + ISO you use is up to you. Bear in mind a wider aperture is generally nicer for portraits and a lower ISO will give a cleaner image.
The key camera setting to be aware of is to keep the shutter speed to 1/160th or slower.
Why? Your shutter speed needs to be slow enough for the camera to 'see' the flash that we're going to be using. If the shutter speed is too fast, the camera won' record the flash properly and things can get weird. The exact sync speed of particular camera/flash combinations vary, but generally speaking a shutter speed 1/160th or slower is safe when using off-camera flash.
Obviously if the shutter speed is too slow it introduces other issues of camera shake or blur from subject movement so a shutter speed somewhere between 1/60th and 1/160th is a good working zone.
(Yes, there is High Speed Sync, but I'm keeping things simple so we're not going to delve into that here, and for most situations you won't need it.)
So, we've got our shot framed up and we've got baseline camera settings dialled in to expose the scene more-or-less correctly. Now we're going to change those initial camera settings to underexposure the scene slightly.
Change your camera settings slightly to shift the exposure a bit darker (slide the histogram to the left).
Why do this? For two main reasons:
1. To create a figure-ground relationship between the subject and the background.
If you're asking "WTF is a figure-ground relationship?", it's one of the Gestalt laws of perceptual organisation. Google that phrase if you want further reading - it's super interesting. The TL:DR is this: Figure-ground is a way of organising visual information to communicate what's of primary importance. In other words, your lovely portrait subject should be more important than the wall behind them.
We're utilising figure-ground here by letting scene/background be a little bit darker than 'correct exposure', so that a correctly lit person will 'pop' against it. Figure against ground. We are only looking for a slight (sometimes almost imperceptible) difference, but it does make a difference.
Many photographers will be familiar with adding a dark vignette to an image to draw the eye to the centre of the frame. This is just another way of drawing the eye by using slight differences in relative brightness between the person and the background.

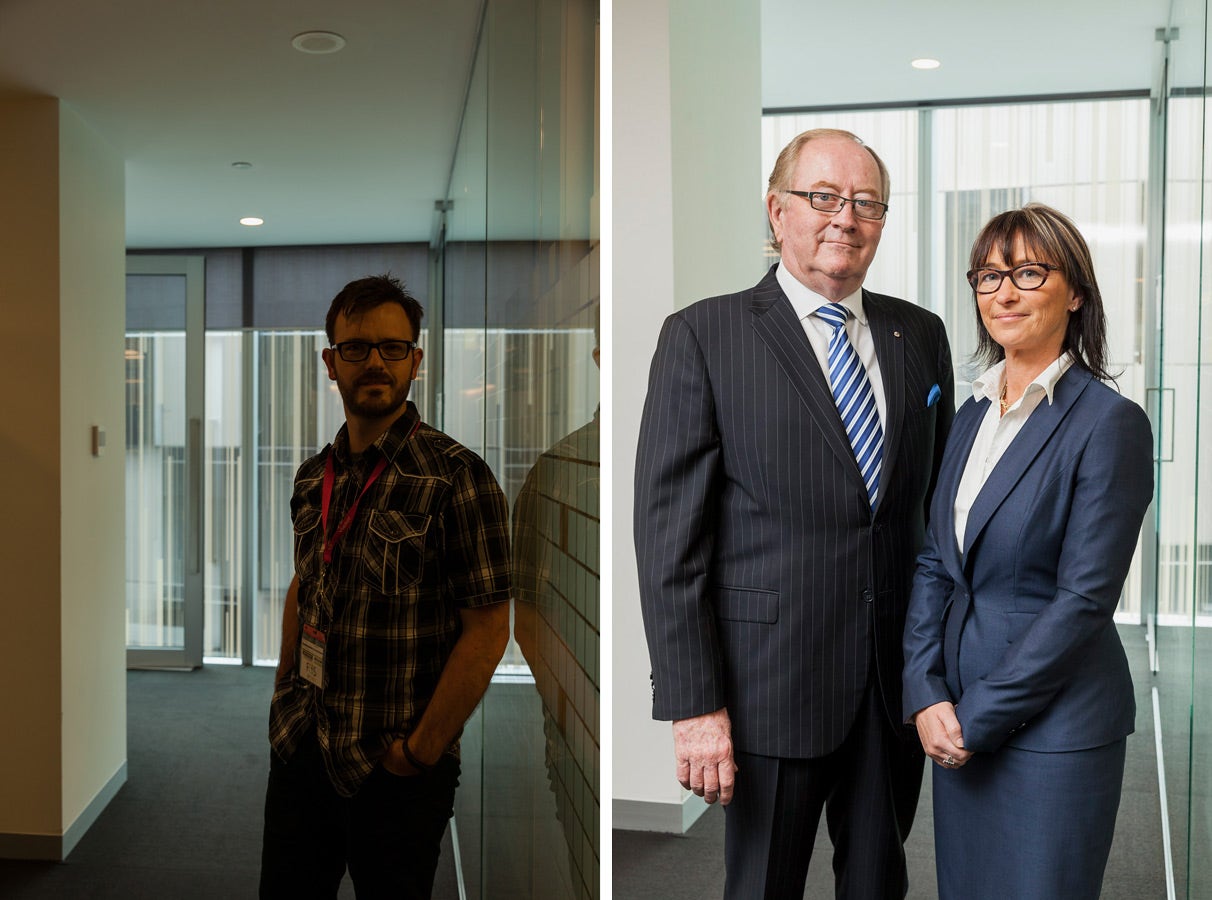
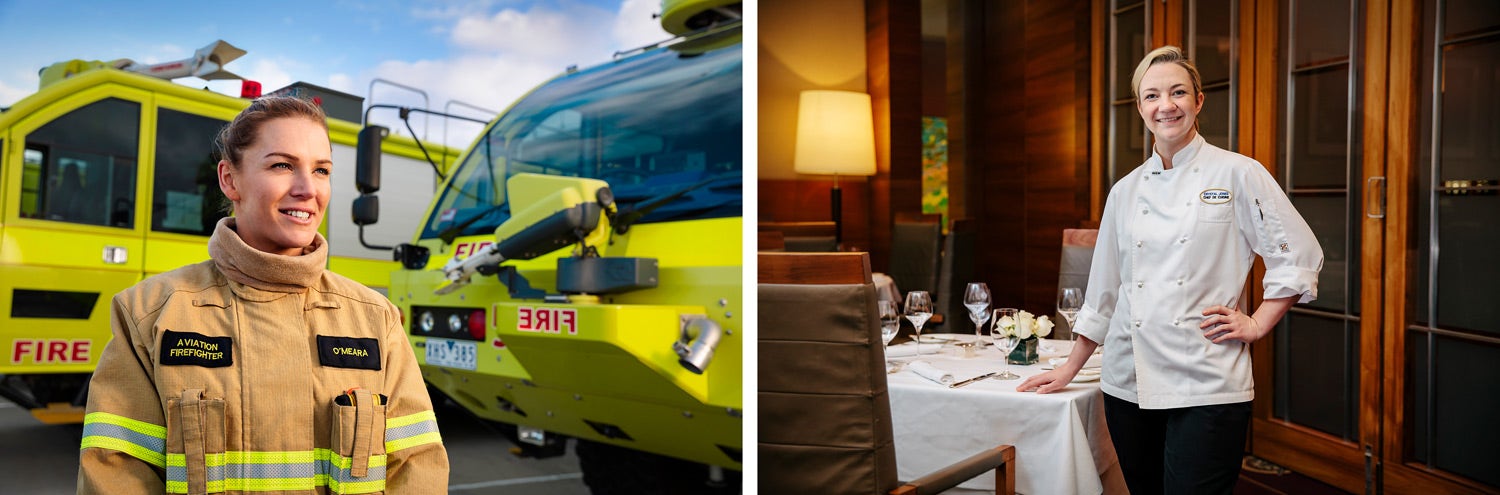
Establishing figure-ground relationship in a one-light portrait - underexposing the scene so the 'correctly lit by flash' figure 'pops' against a darker 'ground'. The left shot is more dramatic, the one on the right is more subtle.
2. We also want to slightly underexpose the scene because we're about to turn on the flash, and even though its purpose is to light the person the flash will probably add a bit of extra brightness to the overall scene as well, so we want to keep the scene on the darker side to allow for any extra 'spill' from the flash to be added.
The million dollar question is then: How much should you underexpose the scene? The answer is: It depends! There's a plethora of factors at play (including how dramatic or subtle you want to be), but as a starting point I'd aim for about a half to a full stop underexposed if you want to keep things in the 'subtle but effective' realm.
Note that if your portrait subject is currently standing in place they'll look underexposed and murky as you find your underexposure settings. That's fine - we're going to sort them out shortly.
Now the fun begins. We've dialled in a little underexposure so that if you take a picture without flash the subject will probably appear underlit and perhaps a little 'muddy' looking. Now we'll add flash to bring the person back up to correct exposure and make them 'pop'.
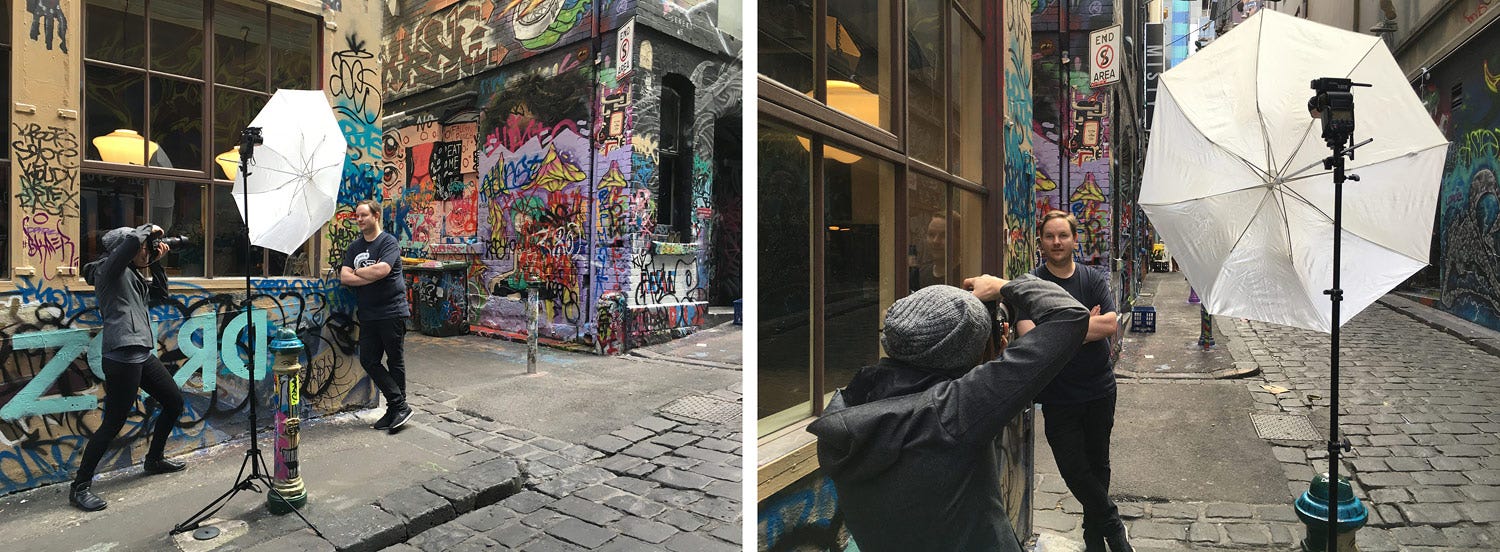
You can use any kind of flash or strobe, even a simple Speedlight is fine. I do recommend using a modifier to diffuse the light. An umbrella is the easiest thing to use and can give great results with minimal fuss. I've shot plenty of stuff with a basic Speedlight-on-a-lightstand-through-an-umbrella setup. Or you can use a softbox or a beauty dish if you're that way inclined. Whatever floats your boat.
You will need a radio trigger to fire the flash. I use PocketWizards, but there are other brands on the market too.
Extend the lightstand so the light is a little taller than the subject - having the light come from slightly above helps throw a shadow under the chin and generally looks better/more natural. Aim the flash at your subject. Positioning it about 30-45 degrees off-axis is a good rule of thumb for most situations. Keep it physically close to your subject - say between 1-2 metres away from them. Often I'll have the modifier just outside the frame (another reason why having the camera on a tripod is useful - it's easier to edge the light to be as close to the person as possible while keeping it out of shot). Keeping the light close to your subject helps the light fall mainly just on them without illuminating the whole room. The flash's main job here is to illuminate the person, not the whole scene.
Think of it in theatre terms again - we've 'built' the set and dimmed the house lights a little by finding the composition and dialling in an underexposure. Now we're going to make the actor stand out by giving them their own spotlight. Our aim in the actual photo is not to have the effect be as dramatic as a theatre spotlight would be, but the general concept is the same.
Switch on the flash and set it to ┬╝ power. Why ┬╝? No real reason, but you've got to start somewhere and I always start here.
Take a test shot and evaluate it. Is the subject too bright? Does it look like a nuclear test site? If yes, then turn the flash power down and take another test shot. Adjust flash power up or down as required until the person looks correctly lit.
That's pretty much it. You're aiming for the subject to look nice and bright and snappy but not overtly 'lit' or deer-in-headlights-y.
The key thing during is to NOT freak out and start madly adjusting camera settings if your subject looks overly bright during those initial flash tests - adjust the flash power on the speedlight up and down and/or move the flash closer/further away from them to control how bright the person is.
Conceptually speaking we're using camera settings to control the overall scene exposure and the flash power on the speedlight/strobe to control the brightness of the subject. Thinking of 'the scene' and 'the subject' as different components helps you tweak each one independently until you get the balance between them looking right.
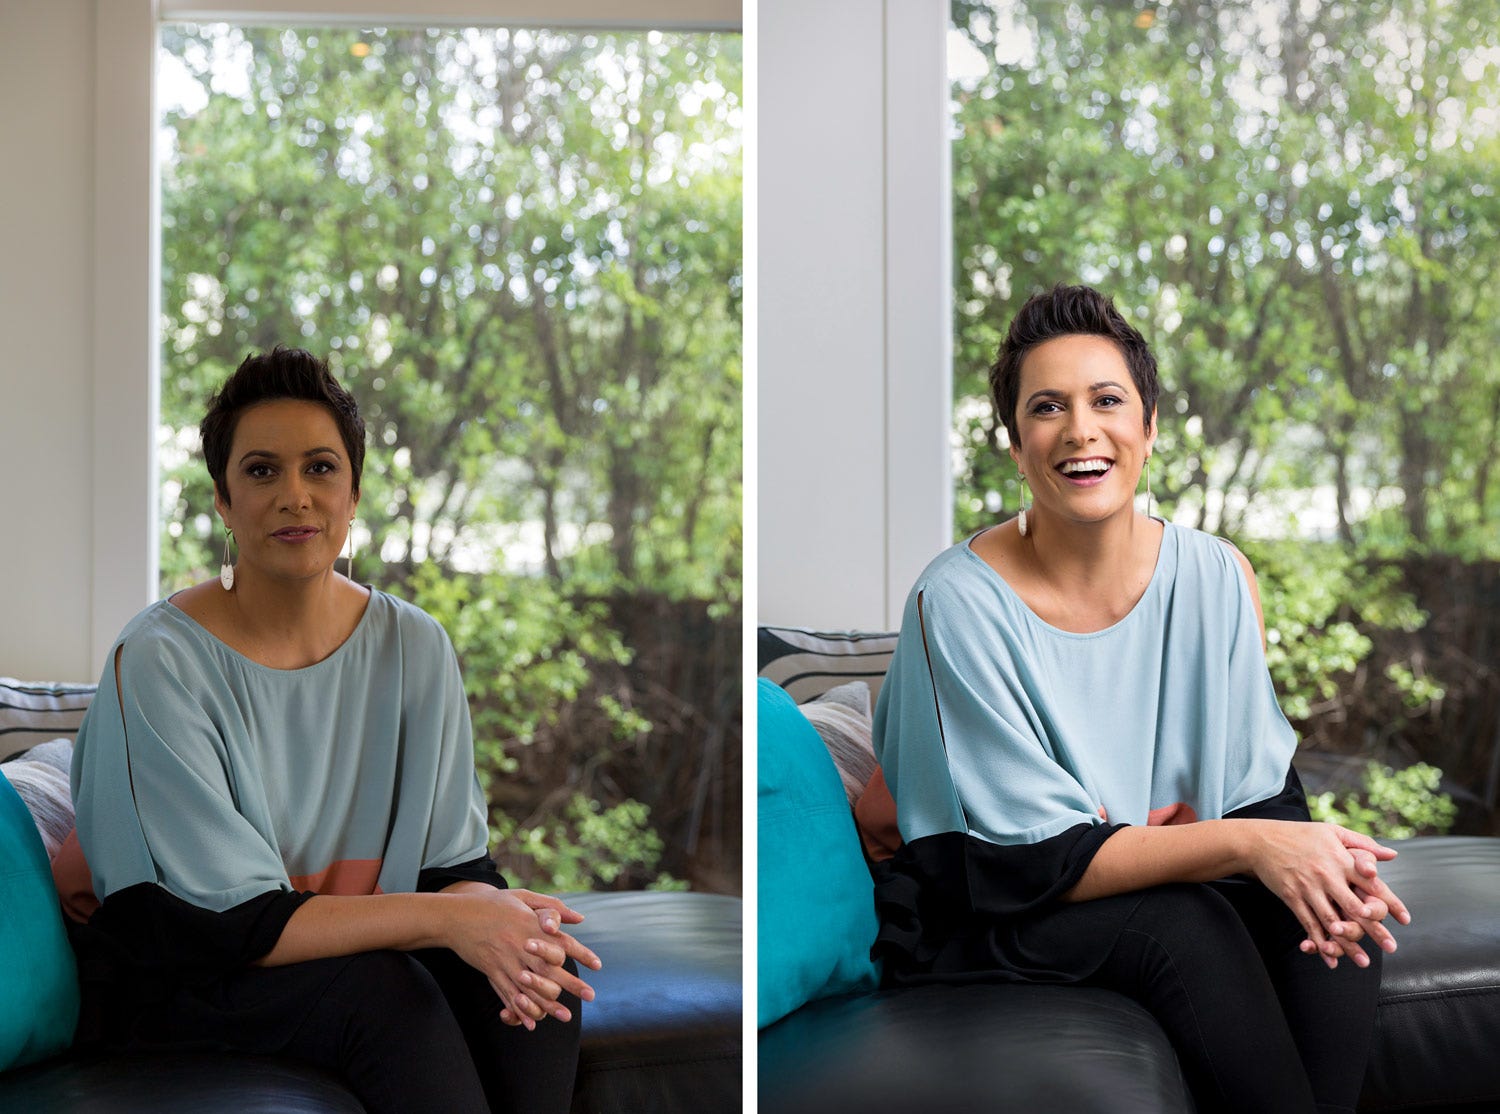
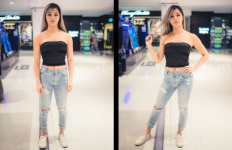
Portrait of CEO Justine Teggelove - on the left is the initial underexposure, on the right I've added flash on Justine so she's nicely lit and pops against those lovely green trees. You can see the wall behind her has brightened up from spill from the flash, but it's still relatively less exposed than Justine is so it still functions as a 'darker' ground.
There could be some fine tuning you need to work through - here's some tips:
It looks like a long convoluted process all written out like this but it's really not. Once you've done it a couple of times it gets very quick to rock out - literally just a few minutes to dial everything in.
The key thing is to have a clear procedure to think through:
Without a methodology to follow it's easy to fall into a hellhole of turning the flash right at the start and then randomly adjusting flash power and camera settings haphazardly trying to get the person and the room to look right and be balanced brightness-wise. This can easily end up with you going in circles chasing your tail.
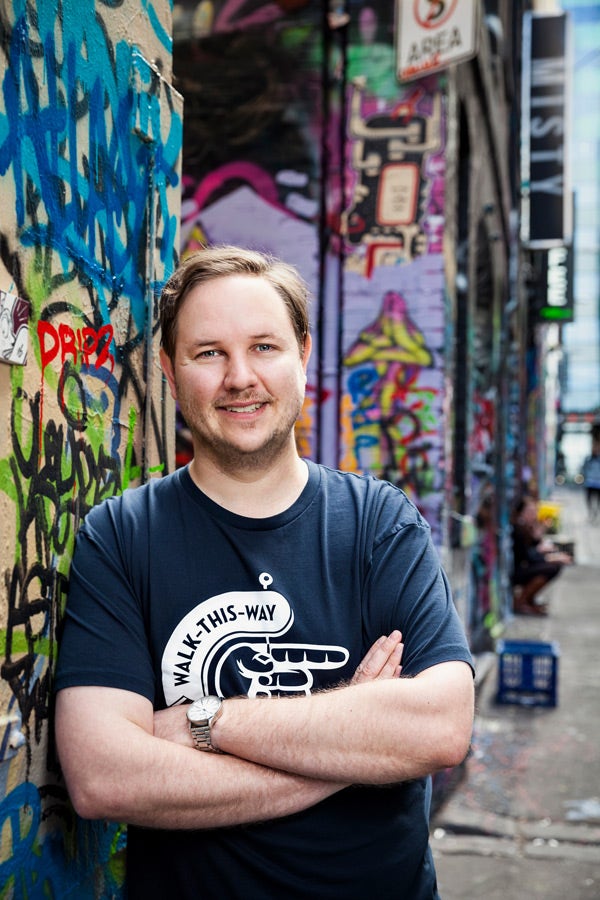
Here's a couple more examples of portraits shot with this one-light approach:
I'm often aiming for a subtle figure-ground relationship, where most people looking at the image won't even realise I've used flash. But you can totally go for more drama by making your scene underexposure more extreme.
If you're new to off-camera flash, have a go at this approach and let me know how you get on in the comments.
Interested in contributing to the digiLife blog? Email community@digidirect.com.au with the subject line "digiLife Contributor", and include links to your photography portfolio and a writing sample.


Comments
No Comments yet. Be the first to comment.