We use cookies to make your experience better. To comply with the new e-Privacy directive, we need to ask for your consent to set the cookies. Learn more.
0
My Cart


Photography is an old technology, and in the nearly two centuries since its discovery a dictionary's worth of terminology has sprung around it. For beginner photographers, this can mean that even picking up a "how-to" guide can be an exercise in frustration. Imagine trying to follow a recipe for hummus not knowing what a chickpea was - that's the position many beginner photographers find themselves in!
To help you take your first step towards mastering your camera and your new hobby, digiDirect has put together definitions for the ten essential terms you need to learn to get started in photography.
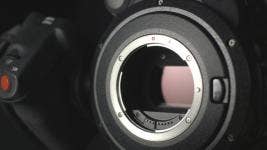
First, learn a little bit about your camera itself. Your image sensor is arguably the most important component in your kit. Functioning as a digital equivalent to the photographic film used in an analogue camera, an image sensor converts light into electronic signals that become the image you see on your screen.
A range of different technologies exist for image sensors, but even entry-level models use what's called a "complementary metal-oxide-semiconductor" (CMOS) sensor - the same type used in top-of-the-line full-frame DSLR cameras.
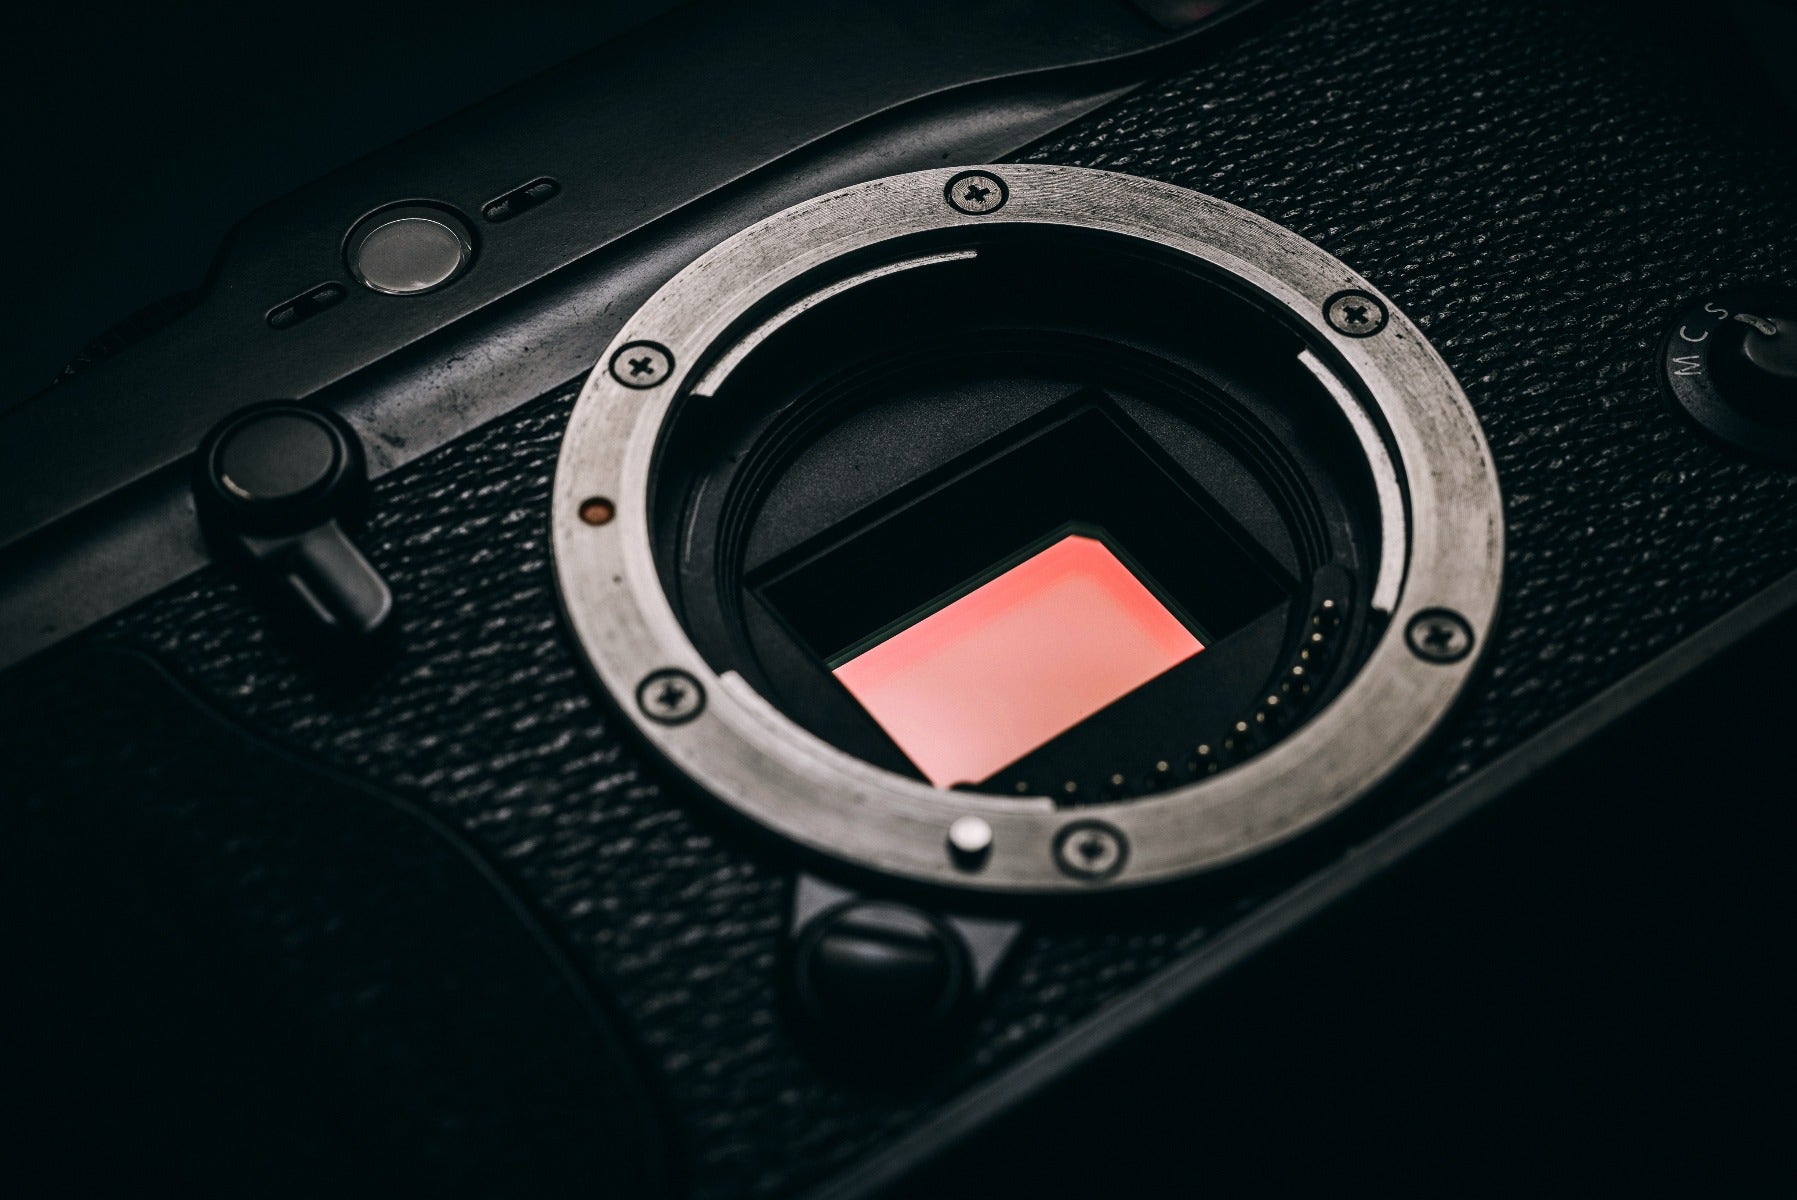
The image sensor is the part of the camera that captures the image. Think of it like the equivalent to the film in a film camera.
In general terms, exposure is the amount of light that hits your digital camera's image sensor. This is controlled by a number of factors, some of which you can control (like aperture, ISO and shutter speed) and some which you can't (environmental factors). If a photo is too dark it is underexposed, and if it is too bright it is overexposed.
 |
 |
Left: an underexposed photo appears dark. Right: an overexposed photo blows out highlights
Exposure can be further manipulated to achieve specific niche effects. A frequently seen example is the use of long exposures. This is a situation where there is very little light which would normally result in an underexposed photograph, but by having a much slower shutter speed than normal enough light is let in to have the final image be properly exposed. The result can create interesting effects like star trails or making cars look like streaks of light.
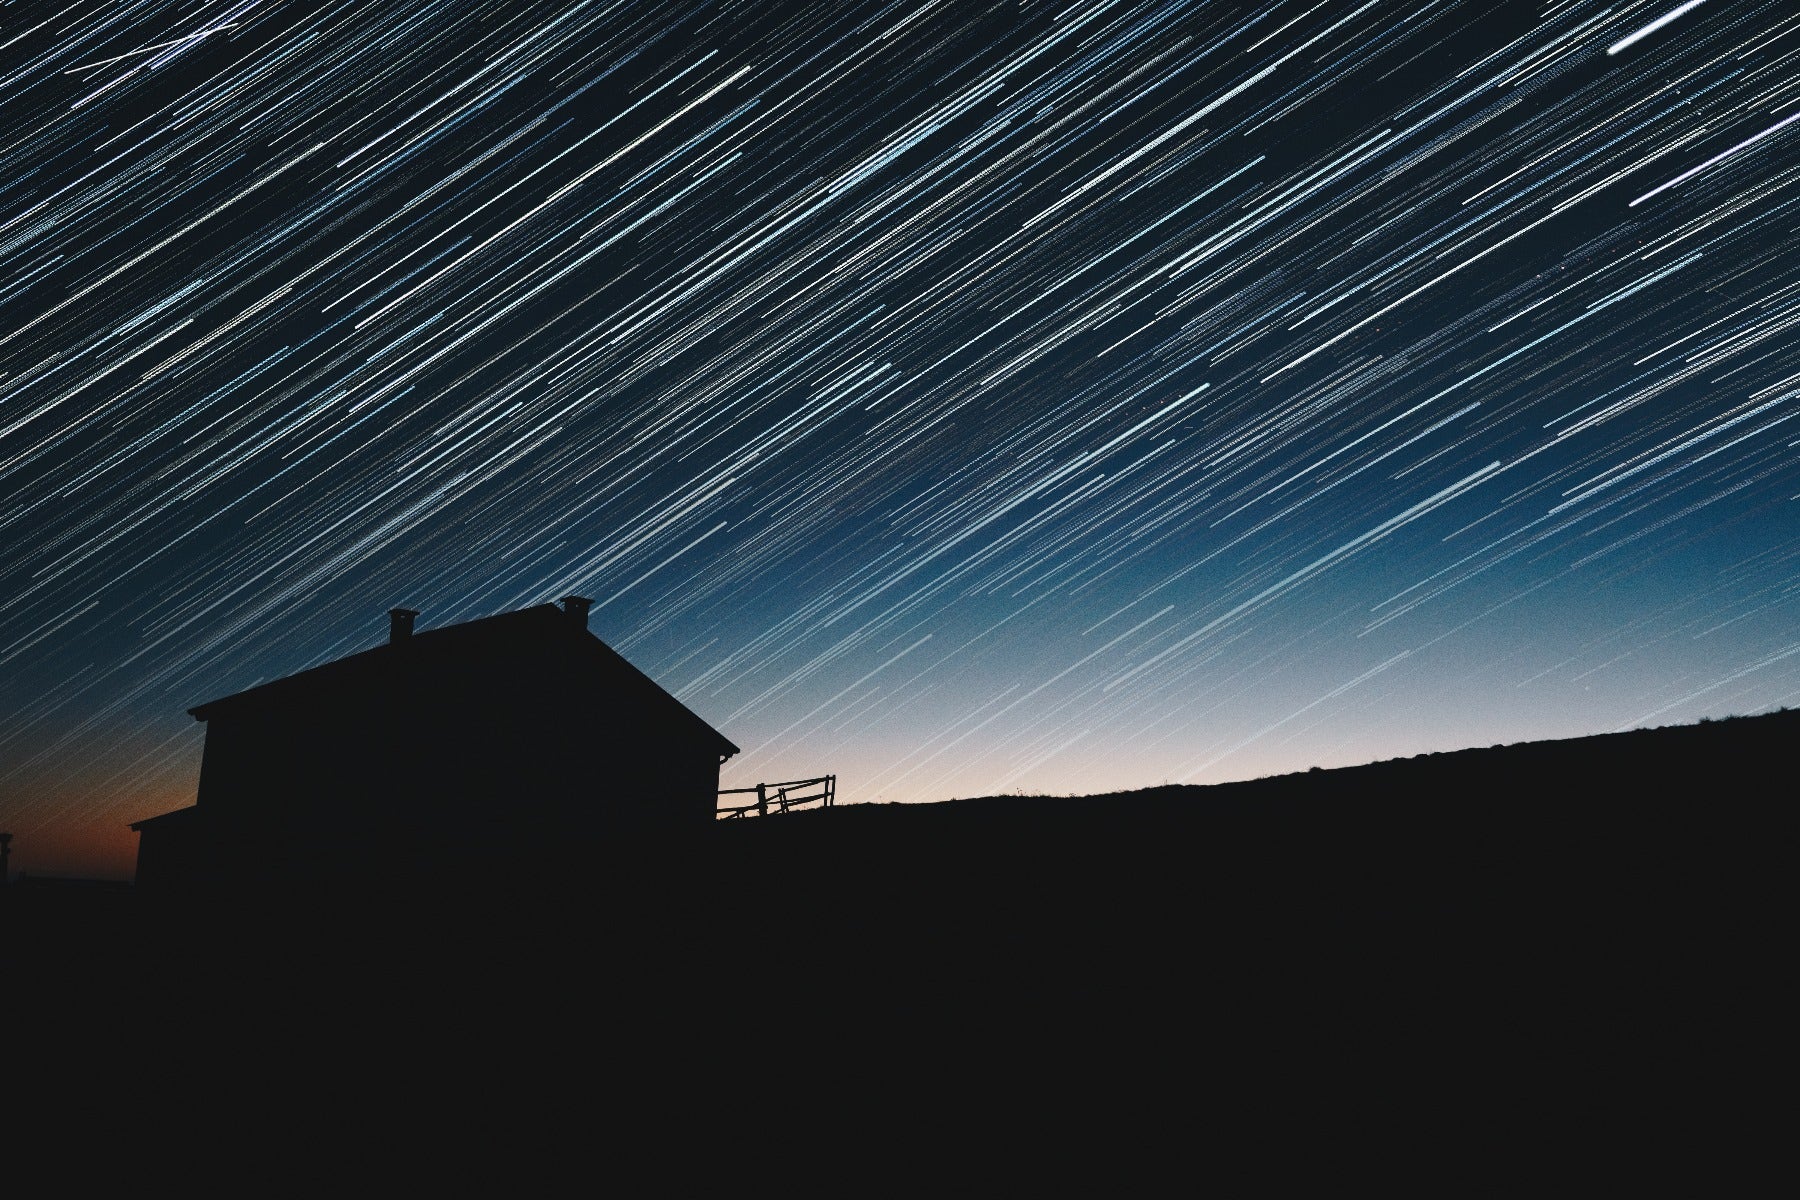
Star trails captured via long exposure photography. This photo would have featured a shutter speed as long as 30 minutes or more to capture the stars' movement across the sky.
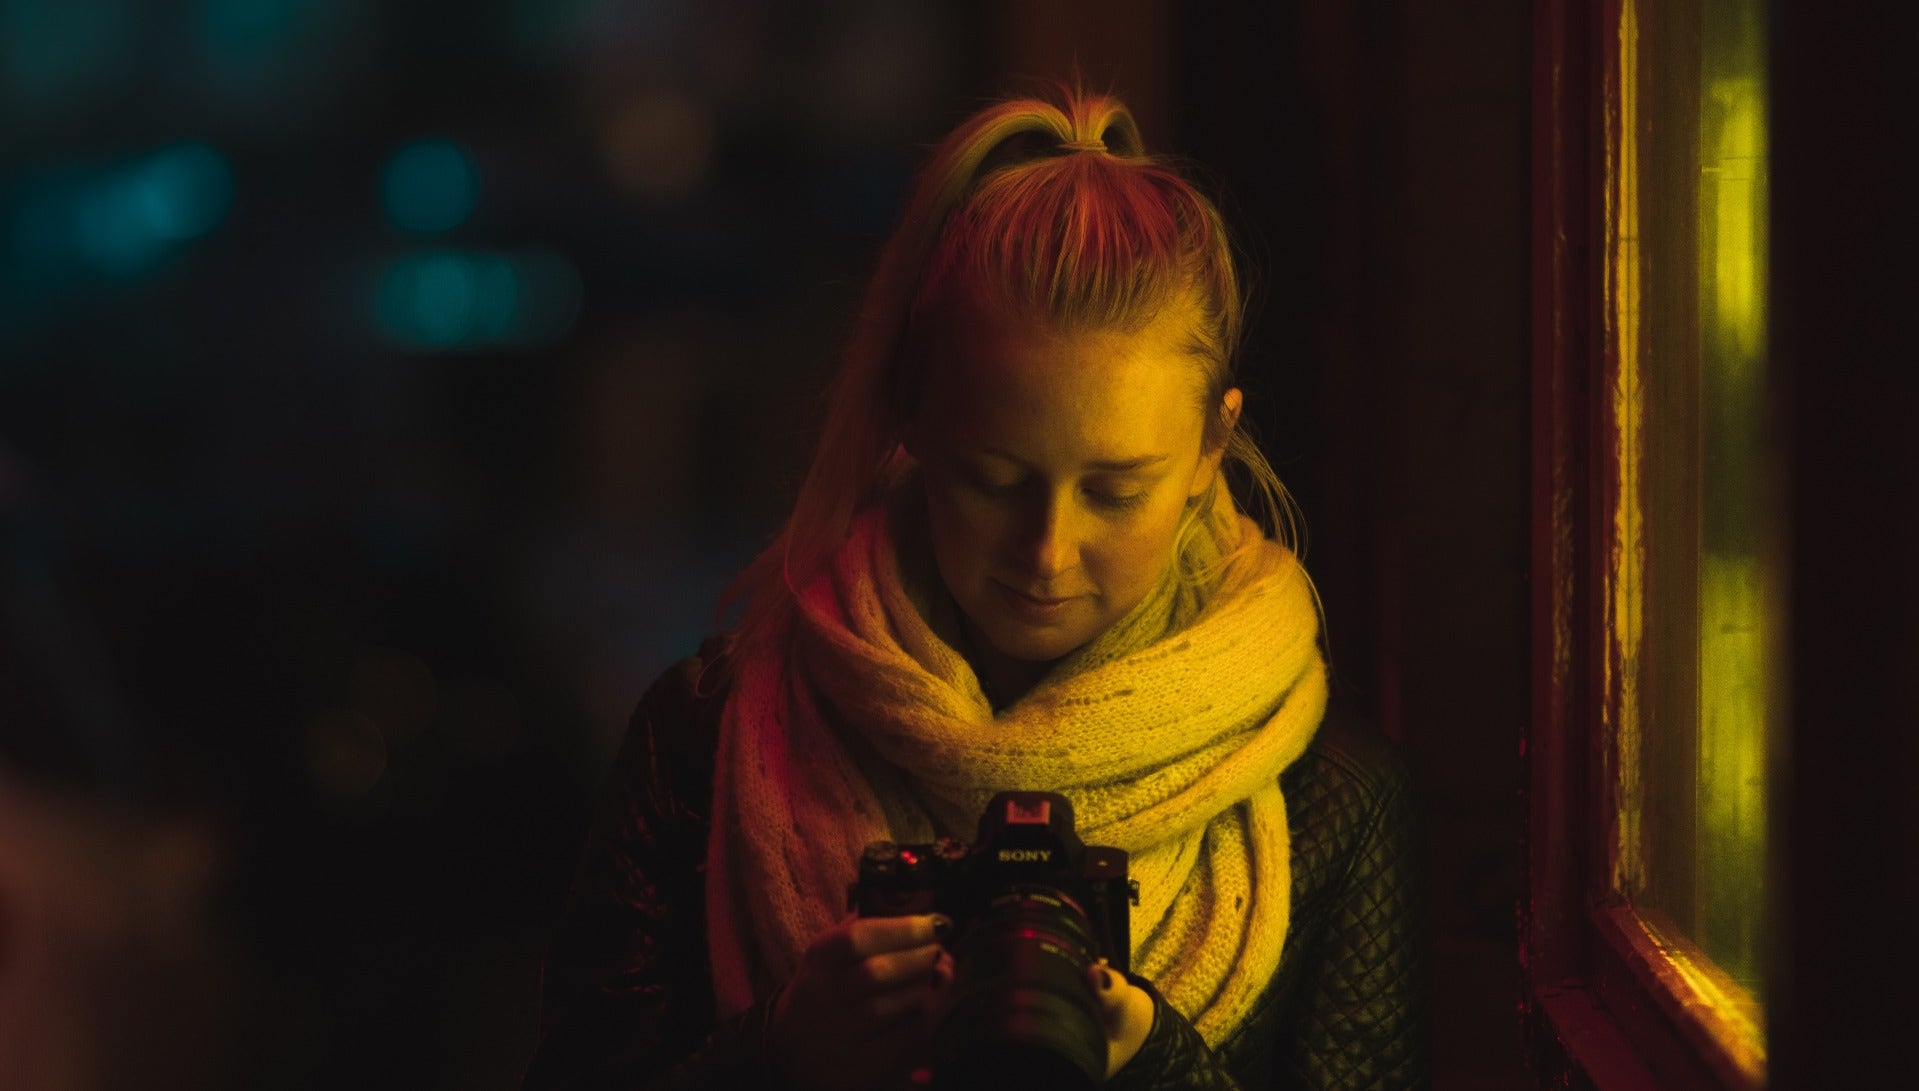
In general terms, an aperture is an opening or gap in something. When used in the context of photography, it refers to both the diameter of an opening that artificially limits the amount of light that hits the lens as well as the mechanism that allows the user to change this diameter. This mechanism opens and closes, resembling a pupil dilating and constricting in response to changing light conditions.
Different diameters of aperture are specified using an f-number or f-stop. The side of your lens will have a series of numbers along the side notated with 'f/', generally running from below 5 (as in 'f/4') to above 20 ('f/22'). The higher the number, the smaller the aperture and the less light is let onto the image sensor. Your aperture setting will greatly depend on available lighting and decisions on shallow depth of field.
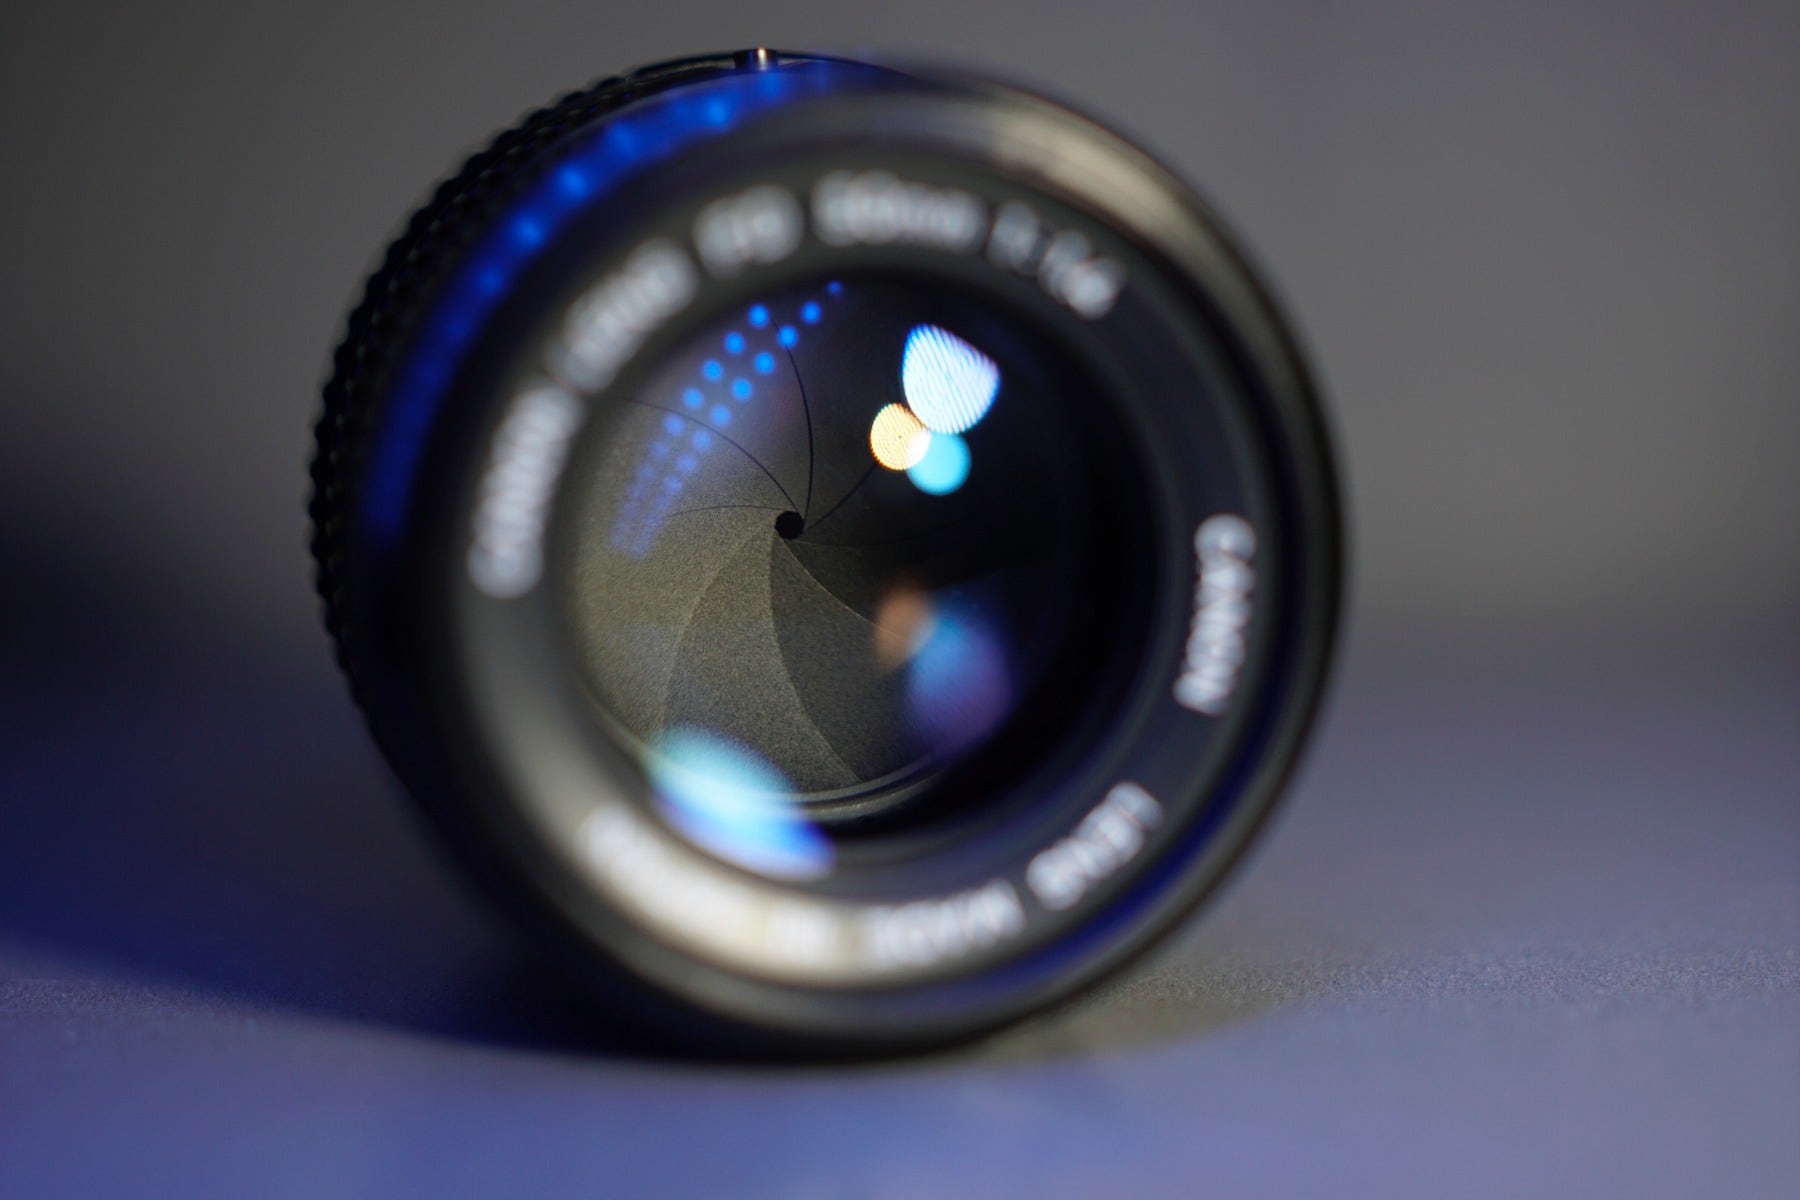
The pictured lens is set to a small aperture (the aperture blades only leave a very small hole for which light to pass through the lens). The aperture could be set to be wider, which would create a larger hole.
Where the aperture controls how much light reaches the image sensor, ISO determines the sensitivity of the sensor itself to light. Different sensitivities are referred to as differing ISO numbers, with higher numbers denoting greater sensitivity.
Setting the ISO too high will result in noise (described below) on an image, so the challenge is always to use the lowest ISO possible for each and every shot to minimise the chance of noise. When using film cameras, the term film speed was also used to describe this.
Remember when we talked about long exposure photography? Changes to your shutter speed are what allow that. Your camera's image sensor is not constantly exposed to light - most of the time it is blocked by the shutter. When taking a photo, the shutter opens - typically for only an extremely short period - to expose the sensor to light. The sensor only needs to be exposed for a fraction of a second - most commonly 1/500 or 1/250 of a second.
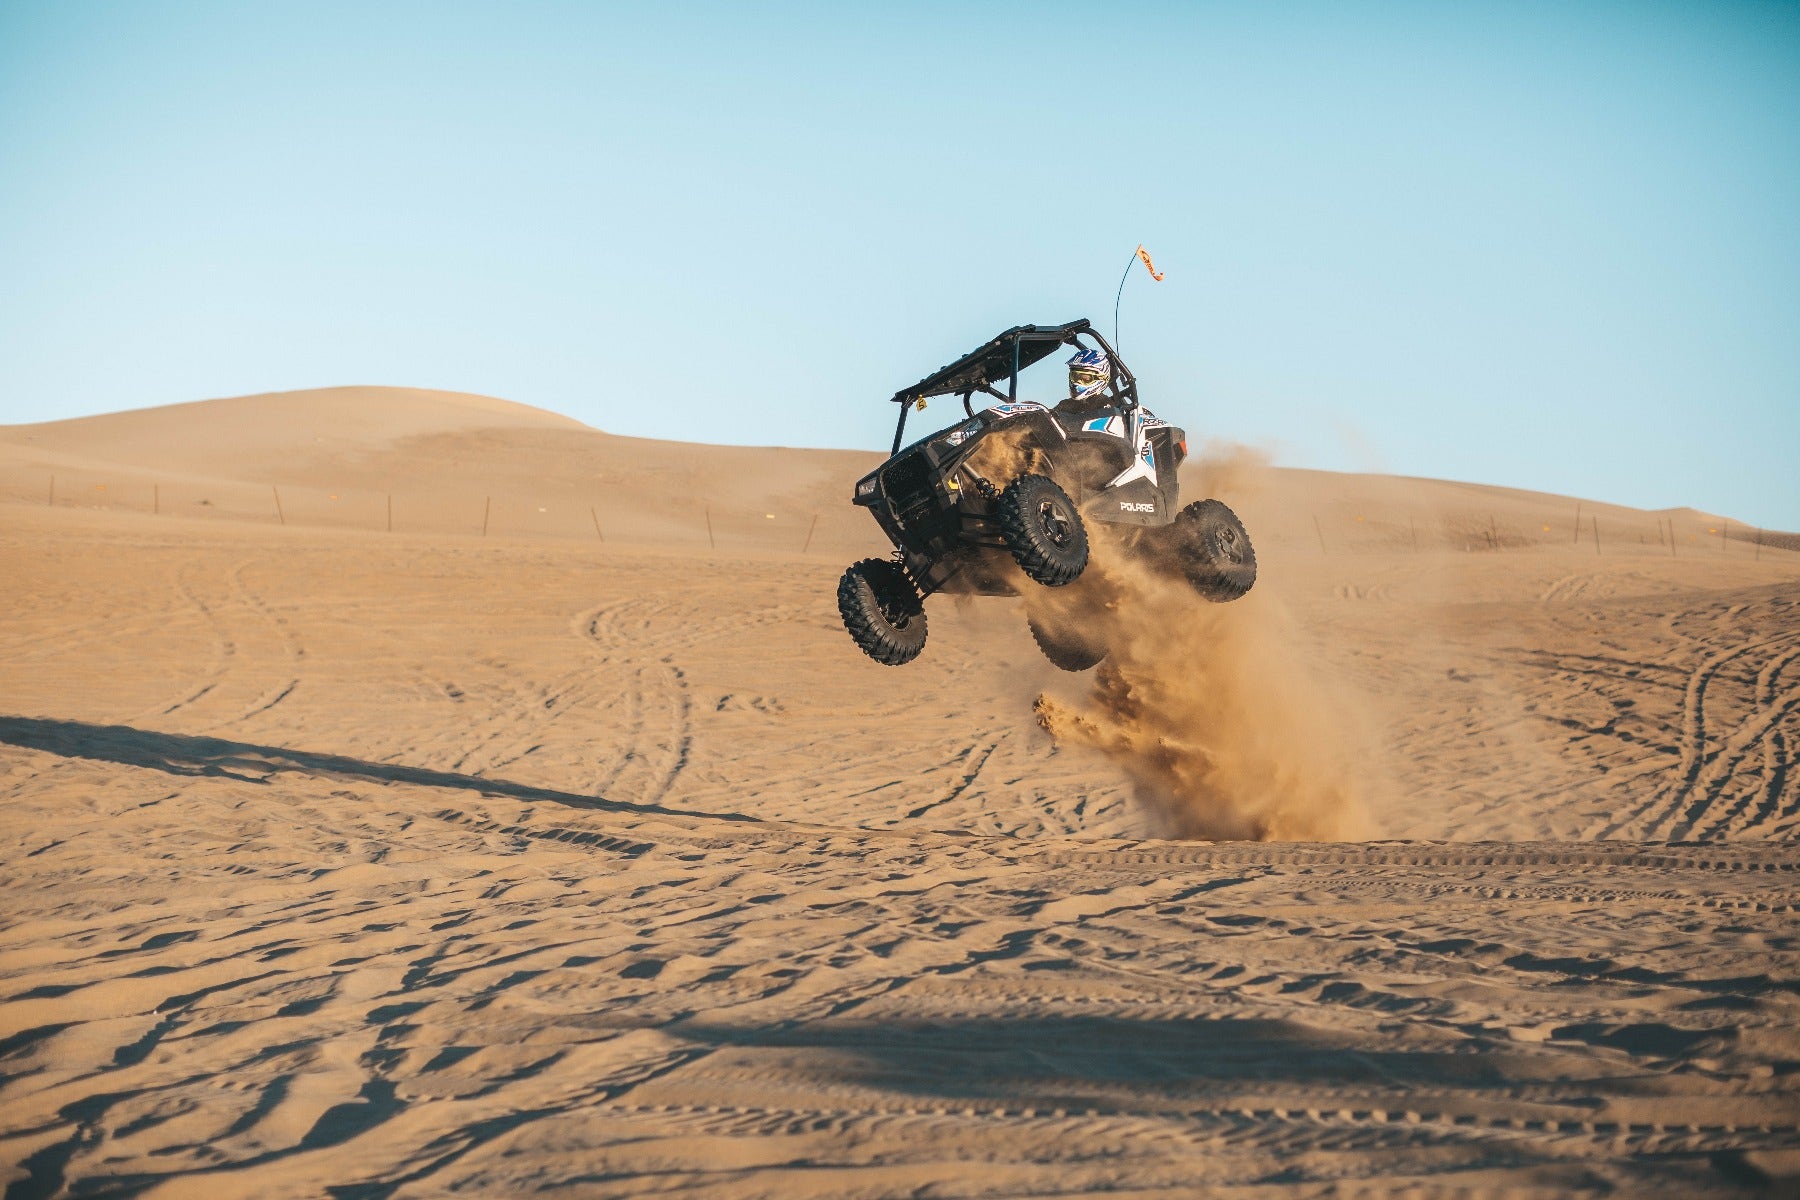
Since the shutter speed determines how long light is hitter the sensor, slow shutter speeds = longer exposures = more light in your image. Using too fast of a shutter speed can lead to images being too dark. Photographing fast-moving objects will require a faster shutter-speed in order to freeze movement - if the shutter speed is slower than the action being photographed then the movement will appear blurred together. Therefore runners and athletes are often photographed at high shutter speeds like 1/4000 while static landscape shots can often be taken at 1/125 and below.
 |
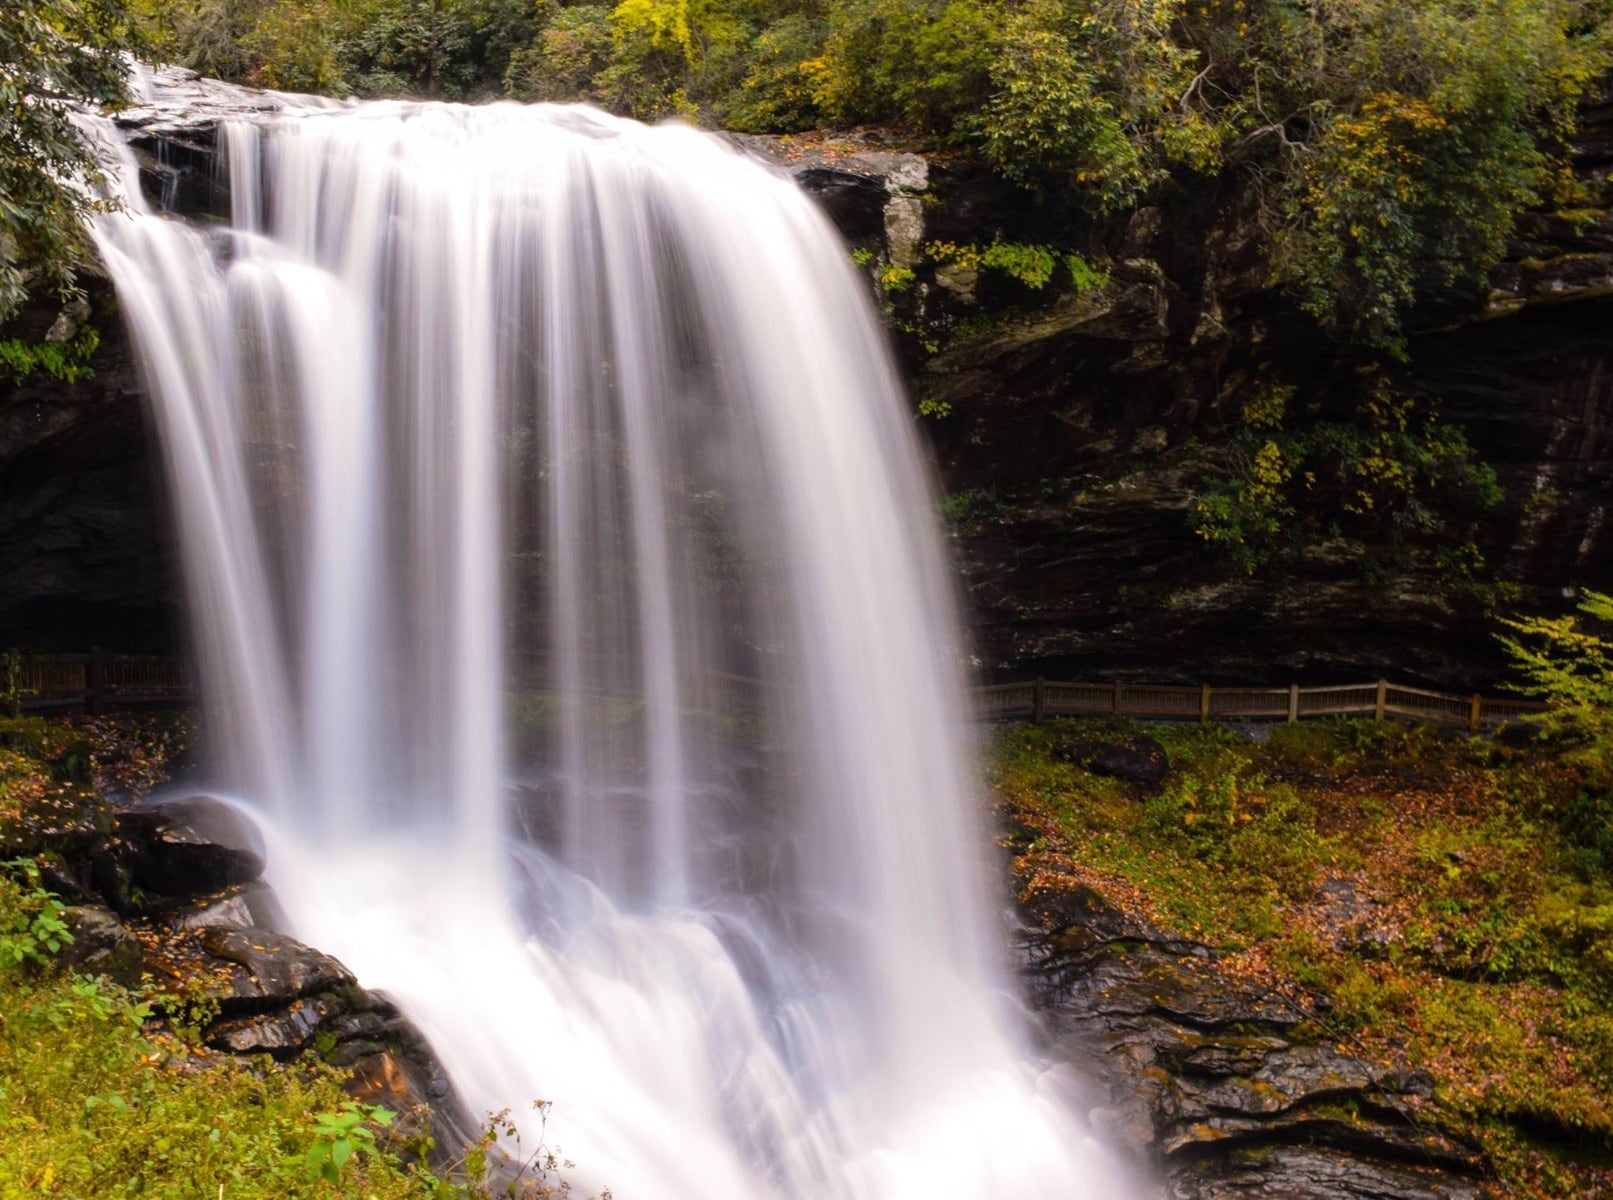 |
Left: Sports and other high speed subjects benefit from a fast shutter speed to freeze the motion. Right: A slow shutter speed makes the waterfall appear more smooth - usually a desired trait when photographing moving water
The white (or colour) balance is a setting that allows the user to compensate for different colour lighting in different coloured situations.
An object photographed under orange incandescent bulbs will look drastically different when photographed outside on a clear day. White balance allows you to compensate for this variation in ambient lighting, ensuring that a wedding dress looks the same as the ceremony moves from inside the church to an outdoor reception.
Different lighting conditions can result in white balance issues.
An object in focus appears clear and sharp with visible details, while an object out of focus appears blurry and indistinct. Depending on your camera, you may have a choice of manually focusing your images, or relying on a computer-controlled autofocus that - in some cameras - can accurately track moving objects between shots.
Either way, it's good practice to familiarise yourself with manually setting focus. Not only will it help you produce a wider variety of shots, it'll give you a greater understanding of how your camera works.
Depth of field (DOF) refers to the point at which an object appears sharp and clear in a photograph, beyond which the image appears blurry. A larger aperture (which is indicated by a lower f-stop number) will give a narrower DOF, while a smaller aperture (a larger f-stop number) will result in a larger DOF. Described in metres, it can range from fractions of a millimetre (in the case of macro photography of very small objects) to infinite (wherein an entire landscape or mountain range would be in focus).
DOF is an artistic as well as a practical choice. For example, a shallow DOF emphasises the subject of the photograph while blurring out and therefore de-emphasising things in front and behind it, focusing the viewer's attention more sharply.
 |
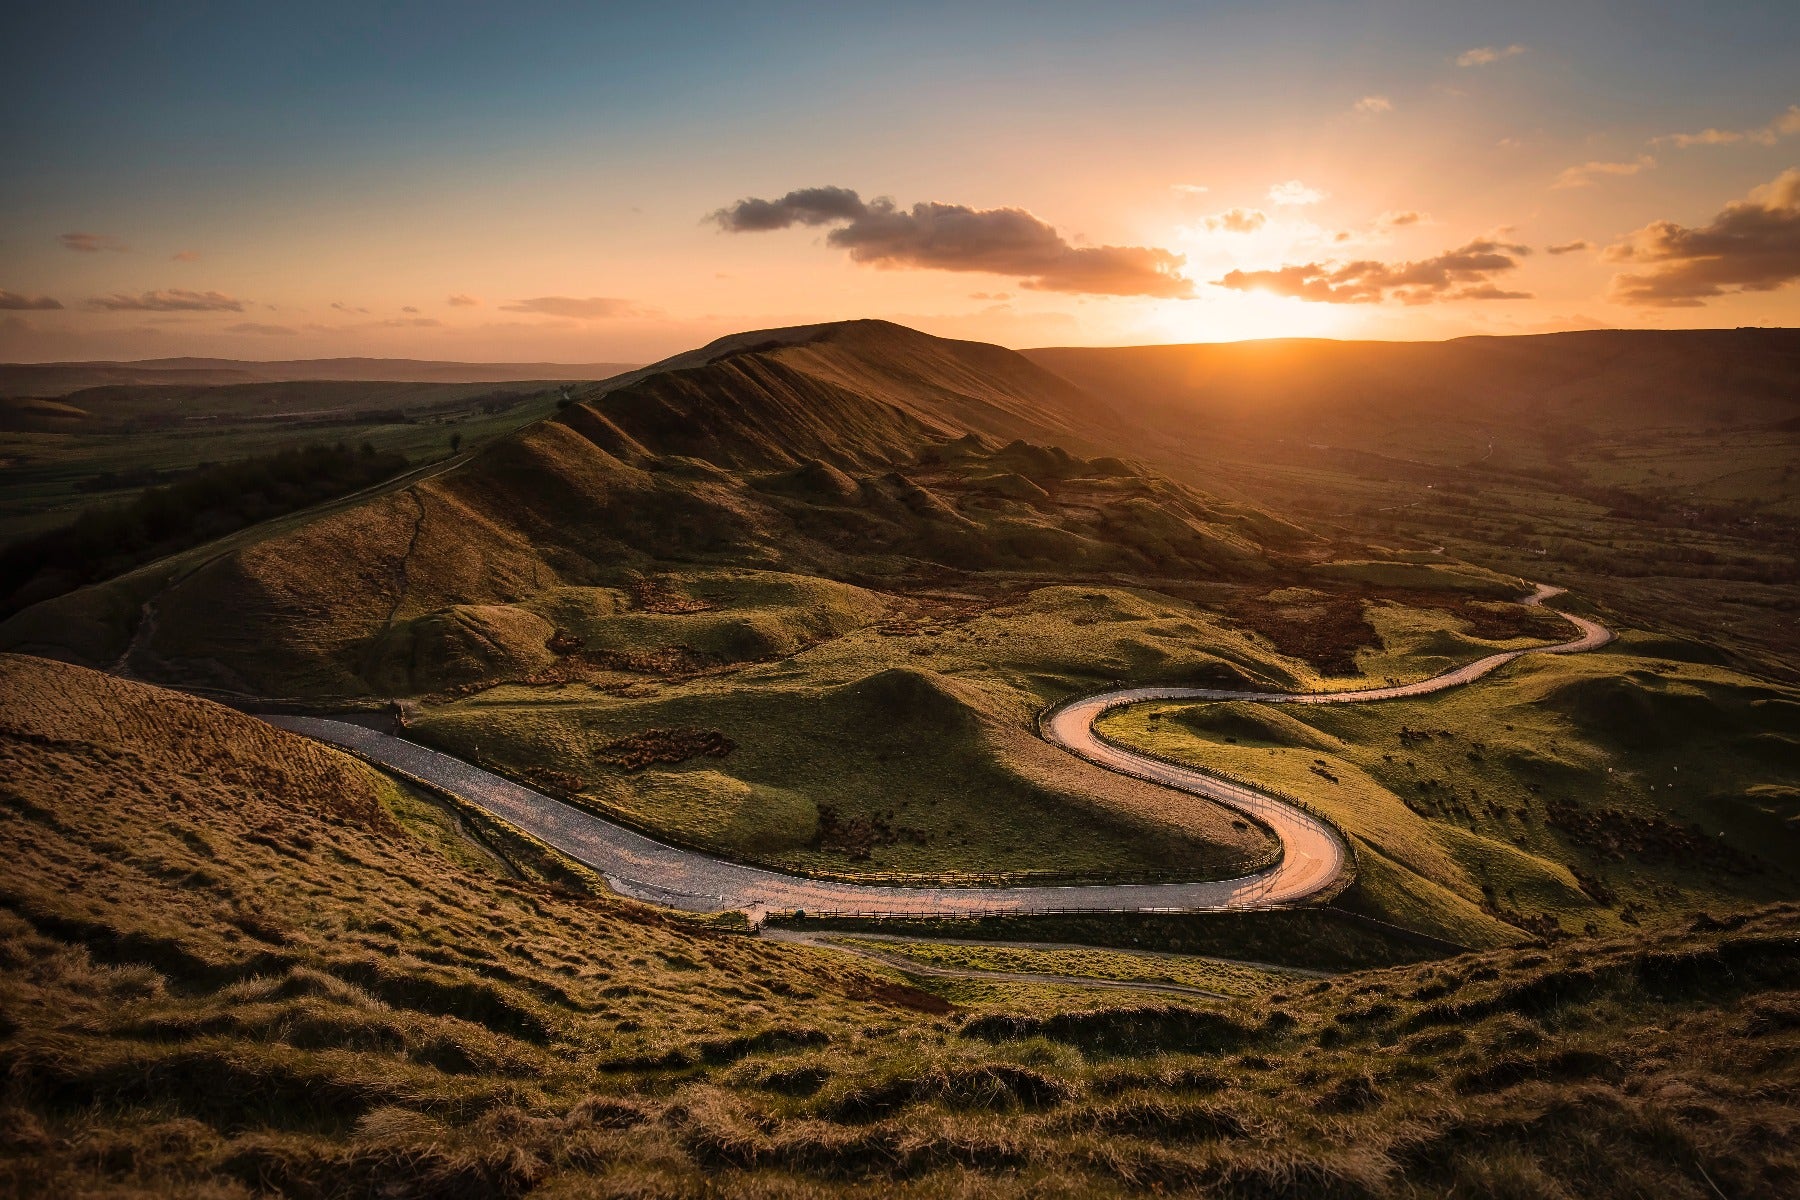 |
Left: Shallow depth of field (wide aperture, low f-stop) is used to blur the background to put more emphasis on the subject. Right: A deep depth of field (small aperture, high f-stop) is often used in landscape photography, when you want everything in focus.
Noise refers to variations in colour or brightness in images that do not appear in the subject itself. These variations occur for a variety of reasons, but most result from improper setting of ISO - too high and images will appear grainy.
Additionally, smaller image sensors are more susceptible to noise. Cameras equipped with larger sensors can take photographs at a much higher ISO without producing detectable noise. If you plan to do a lot of low-light or high-speed photography, factor this into your purchasing decision. Learn more about sensor sizing in our Sensor Size Explained article.

Image noise often makes a photograph appear to be low quality
A lot happens between you pushing the shutter release button and viewing an image on the camera's LCD screen. Between the image sensor capturing the light and you being able to see the photo you've taken, most cameras by default will perform a series of functions on the image such as reducing noise, scaling the image, correcting colour and encoding it into a file that your computer can read, such as a JPEG. This is referred to as an image pipeline.
For beginner photographers, then image pipeline should not be tampered with and the above series of functions will improve the quality of the photo. As you gain experience and confidence, you may want to deactivate the image pipeline, forcing the camera to output what's referred to as a raw image. Most regular image viewers can't process RAWs, so you typically need to use specialised programs (like Adobe Lightroom) to edit them and export them as JPGs which are more easily viewed. During the editing process, the RAW photos offer experienced photographers more options in how they edit their photographs.
We hope this guide has helped you understand your camera a bit more. If you're looking to upgrade your kit, digiDirect offers a full range of camera bodies and lenses for the beginner photographer, helping you get started the right way.
Interested in contributing to the digiLife blog? Email community@digidirect.com.au with the subject line "digiLife Contributor", and include links to your photography portfolio and a writing sample.


Comments
No Comments yet. Be the first to comment.