We use cookies to make your experience better. To comply with the new e-Privacy directive, we need to ask for your consent to set the cookies. Learn more.
Photolab
0
My Cart


A very common question that I encounter when discussing portraiture is "How do I pose a model?" It seems that many photographers struggle with posing models when they are in the early stages of their portraiture journey. This is important, because you want to avoid saying things like, "Sorry, I'm so bad at telling people what to do," or "I'm still getting comfortable with posing people." You want to achieve photos where your model looks as natural as possible, and avoid making them look robotic or uncomfortable! Quite simply, knowing how to pose someone properly can make or break an image.
One of the most important general tips when posing someone is communication - you need to make sure that your model is comfortable. If they AREN'T comfortable it will show in their poses, especially if the model is inexperienced. Note that being 'comfortable' extends to more then just being physically comfortable. They also need to be comfortable in their environment, and they need to be comfortable in their relationship with you - this includes your demeanour, communication, direction, and more. Do not be afraid to direct your model, and be explicit in explaining the type of look you are after and what you would like to achieve. If done correctly this will put the two of you on the same page, which is where you want to be! A good idea can be to put together an inspiration board to send your model in advance so they have an idea of the type of style you are looking to achieve.
You also want to avoid being shy when talking to your model, as this will make the model feel uncomfortable or make them doubt your ability as a photographer. If a model starts doubting your ability it will show in her poses and emotion and not give you the final result you are after. Confidence is king!
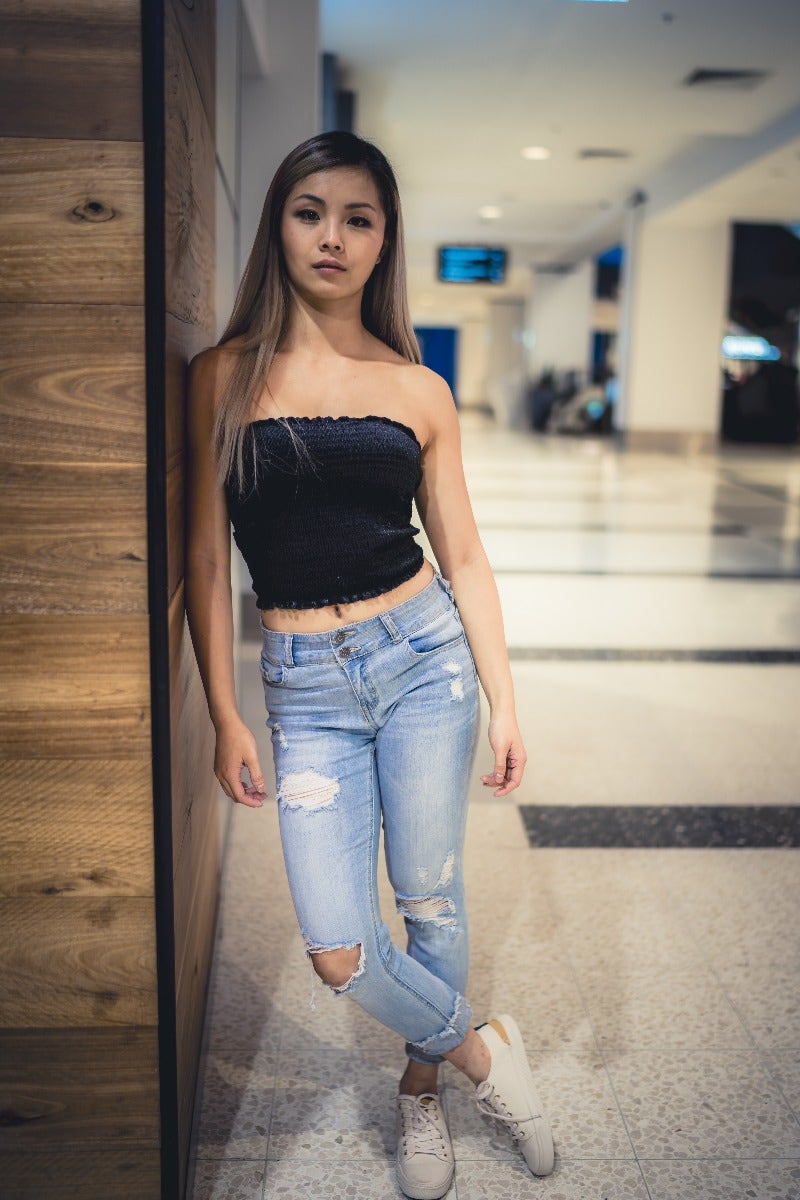
I will now discuss some specific tips on posing a model, and illustrate how it only takes very small changes to create a big difference in your photos. Let's begin from a neutral place, in a front facing pose. The below image is a great example of a model who doesn't know what she should be doing - she looks uncomfortable, unnatural and has a stiff posture. This I would call a 'snap shot' or 'tourist shot', as there is no emotion or interest in the image in terms of it's posing.
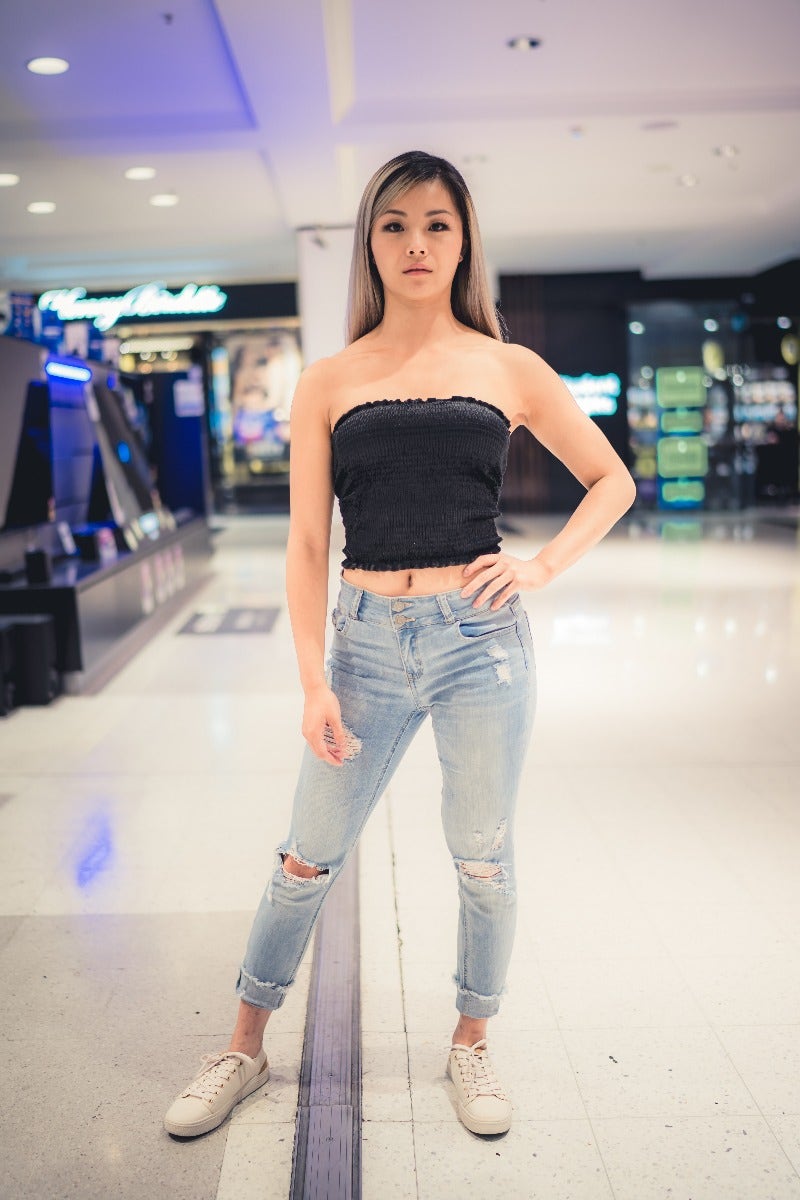
Let's look at some simple movements that can change the overall image drastically. For now we will ignore the upper body and just focus on the lower body. In the image below the model is in the exact same position as the above image, the only difference is that I asked the model to put her weight onto her left side and pop her hip slightly. This is only a start, but already we can see a big difference. Just by shifting her weight her body looks a bit more relaxed, natural and comfortable. Her upper body certainly is still looking stiff and unnatural in comparison, but this is just the start.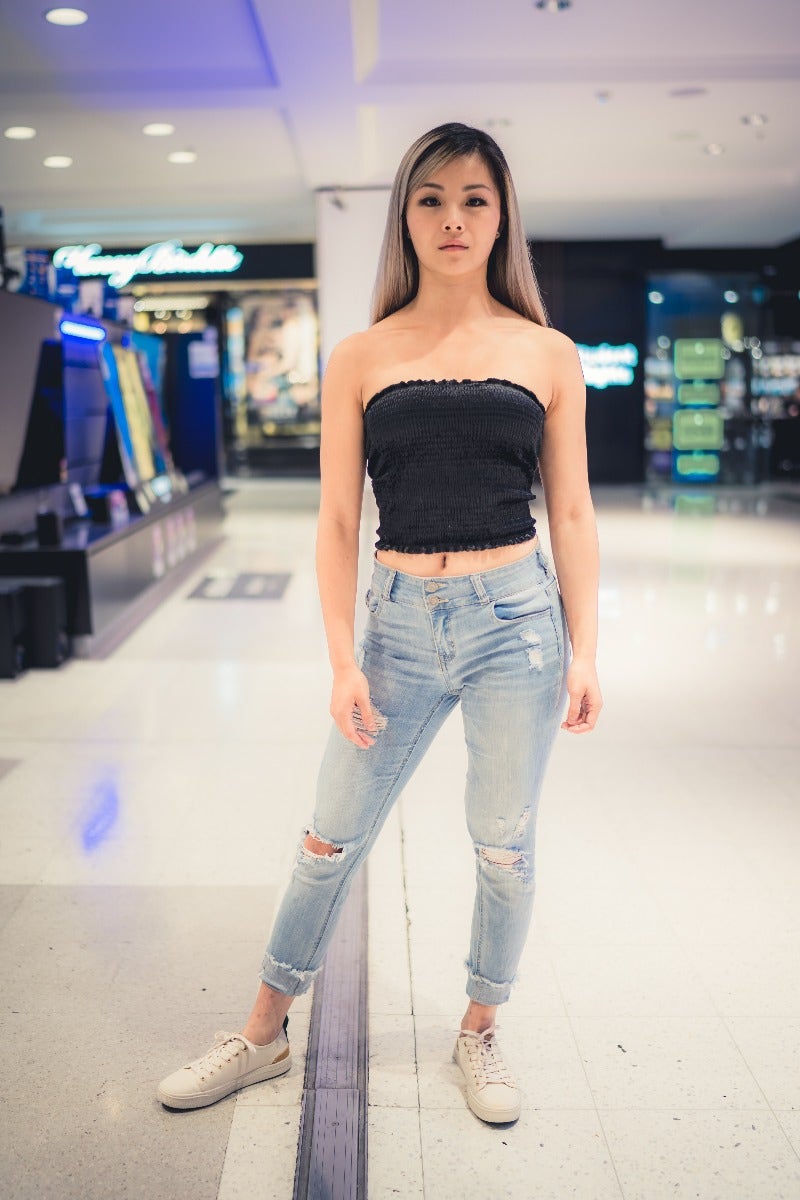
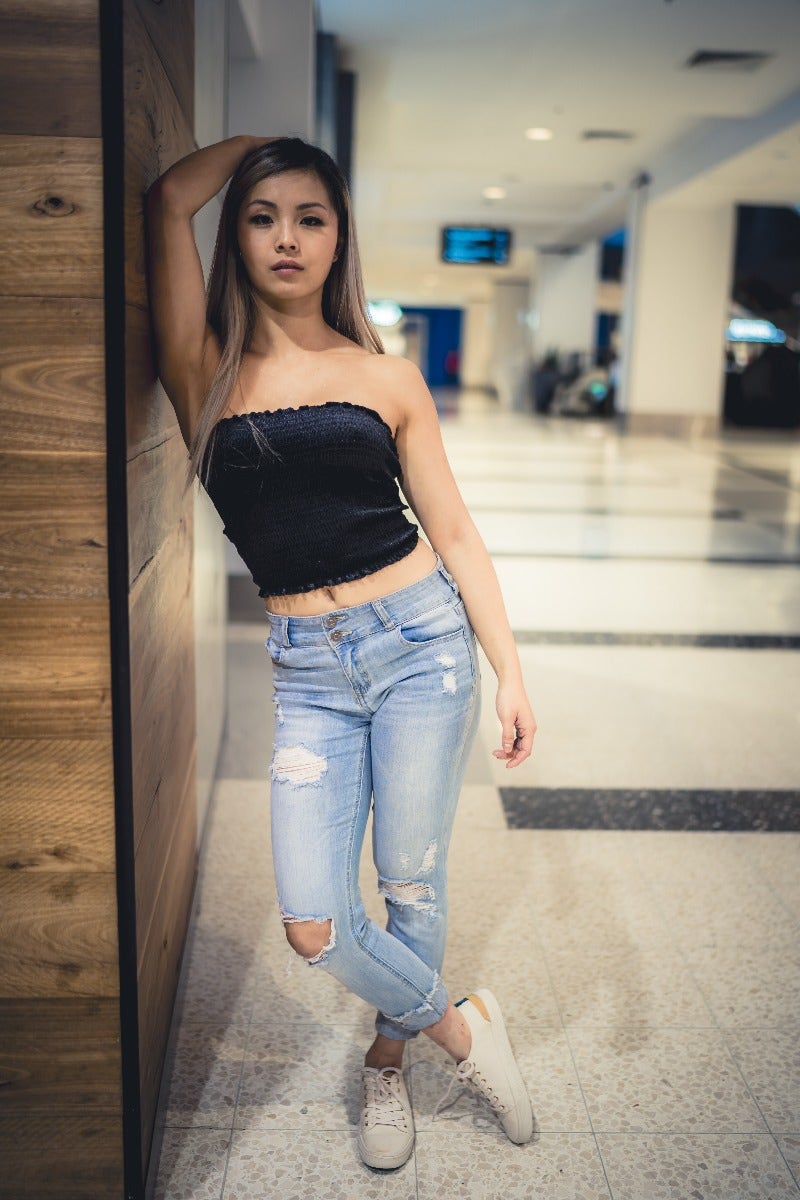
So letÔs address that upper body now. I always try to ensure that my model's arms and hands are doing something going with the flow of the pose - we want this to look completely comfortable and natural as well. If you look at the below image here I had asked the model to put her left arm on her hip. That goes a long way towards making her look more natural, but we're not quite there yet!
Before we finish with this pose though, let's look at where posing can go wrong. We still need to address her right hand, and one thing I could do is ask her to do is raise her elbow and put her hands around her neck, as depicted in the photo below. This seems like a very 'model-esque' type of pose and you might be tempted to try something like this, but in reality this is a very unflattering pose. The reason for this is that an elbow facing the camera always results in a somewhat awkward looking image - it's simply not an angle that we're used to seeing. In this particular example it also makes her arms and head look stiff and not relaxed.

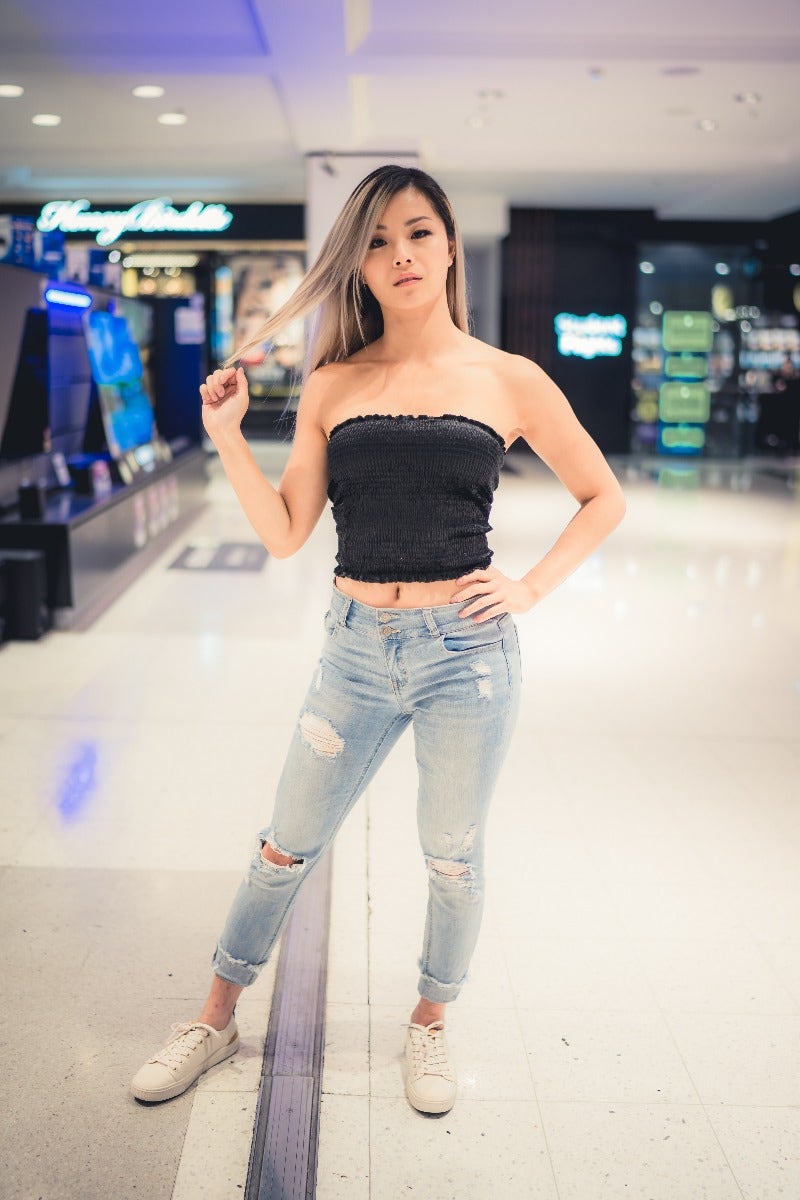
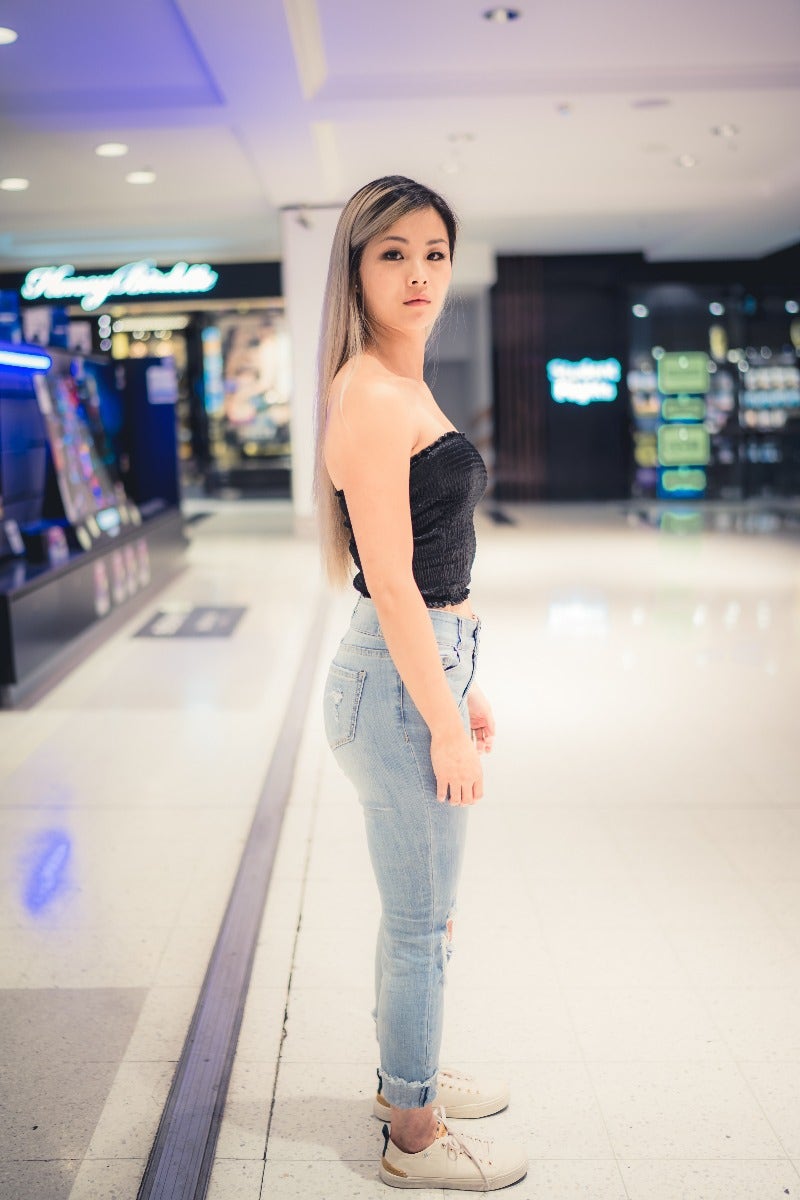
So let's drop the elbow look, but we still need to address the right arm, because it looks awkward if it's just hanging there. One trick you can employ is to have you model brush their hands through their hair until they reaches a position that you are happy with, and then tell them to stop. By doing this action their body will be relaxed, and once stopped it will be at a place where she looks natural, as opposed to just placing her directly in that position. This is a tip that can apply to more than just brushing their hair, you can utilise it in a wide range of situations. Generally speaking if you directly tell a model to take a specific position, it may look forced. But if the position involves some movement, just tell them to complete the movement and stop them in the position you want, and it will look much more natural. This works because their body instinctively knows how to complete movements naturally, but when they have to actively think about it there is the potential to look forced. I've utilised this tip in the image below, and would consider this to be a completed pose. Overall we haven't changed the initial posing incredibly radically, but it's evident how a number of small changes can go a long way to improving your final image.
Let's use 5 simple steps similar to what we used in the last series.
Just by applying these simple steps the overall image changes and becomes much more flattering. Certainly you won't want to use these exact steps all the time, as you want variety in your posing. But what I am trying to instill here is to have you think granularly about the elements of the pose and how you can break it down by limb or element to build something overall that is effective and unique.

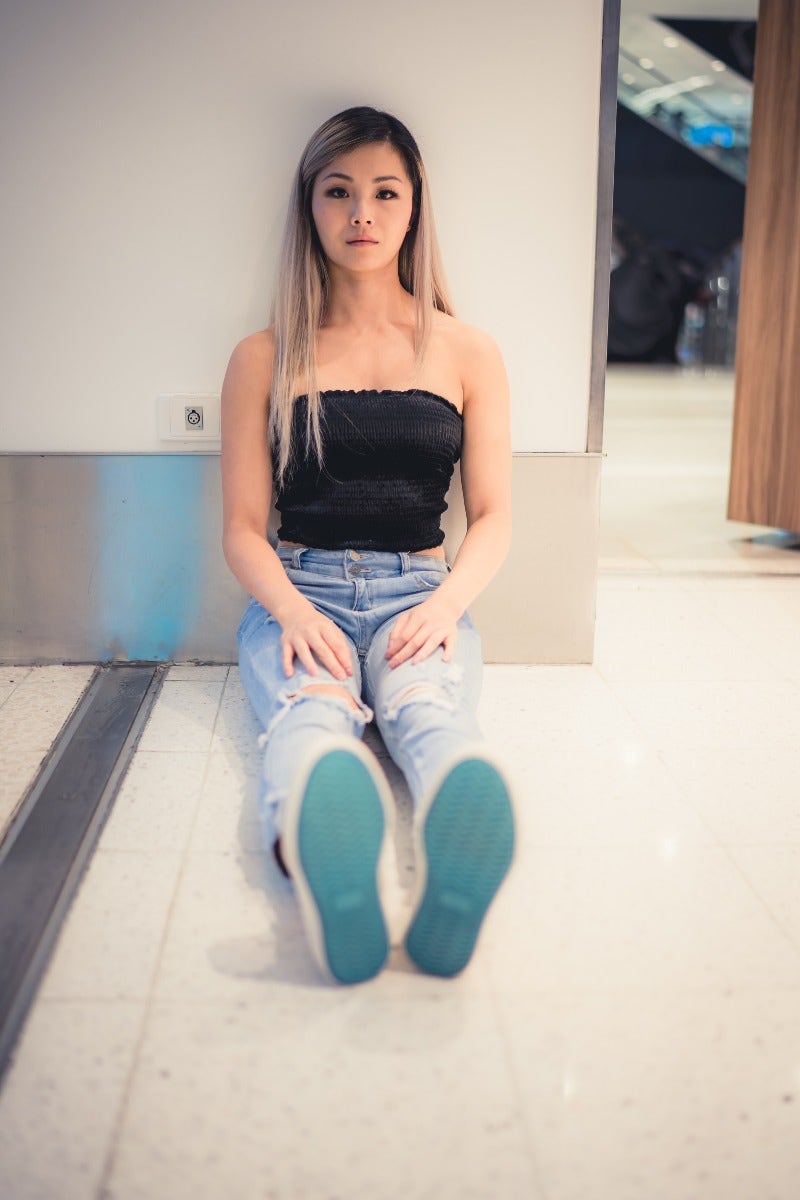
Let's try another example, this time from a sitting position. As always, let's start with an unflattering neutral position, as evidenced in the image below. One thing I always tell new photographers is that, if your model is sitting on the floor, never have them sit in a way where the bottom of their feet are facing the camera. This is because this moves the focal point of the image to their feet, and the face and body become drowned in the background. Again, this is a classic 'snap shot' style of image, not something we want to achieve in proper portraiture.
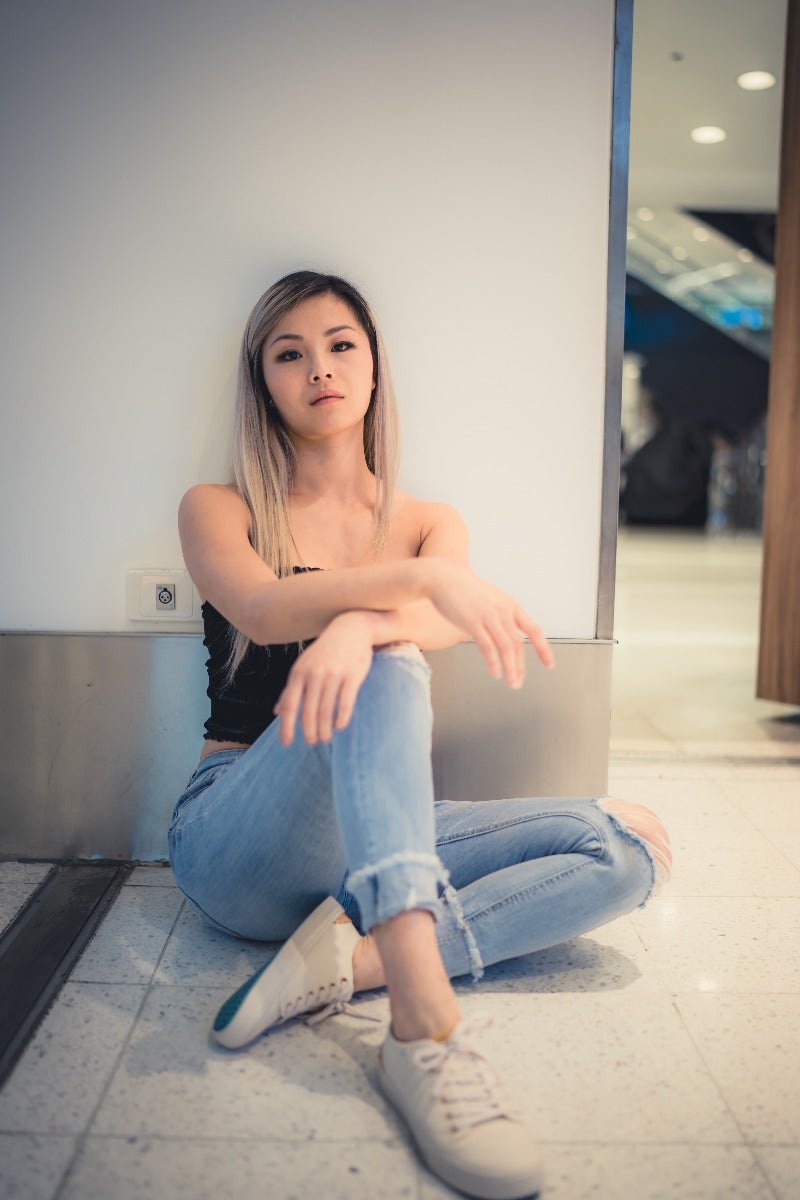
As we've seen before, let's apply a series of small adjustments to the image to create an overall more professional look. In this case I applied 4 steps:
With these simple steps the image suddenly becomes a lot more appealing. It conveys a lot more emotion and style, and will make the viewer feel a lot more connected to the image. And all off this just through a few simple changes!
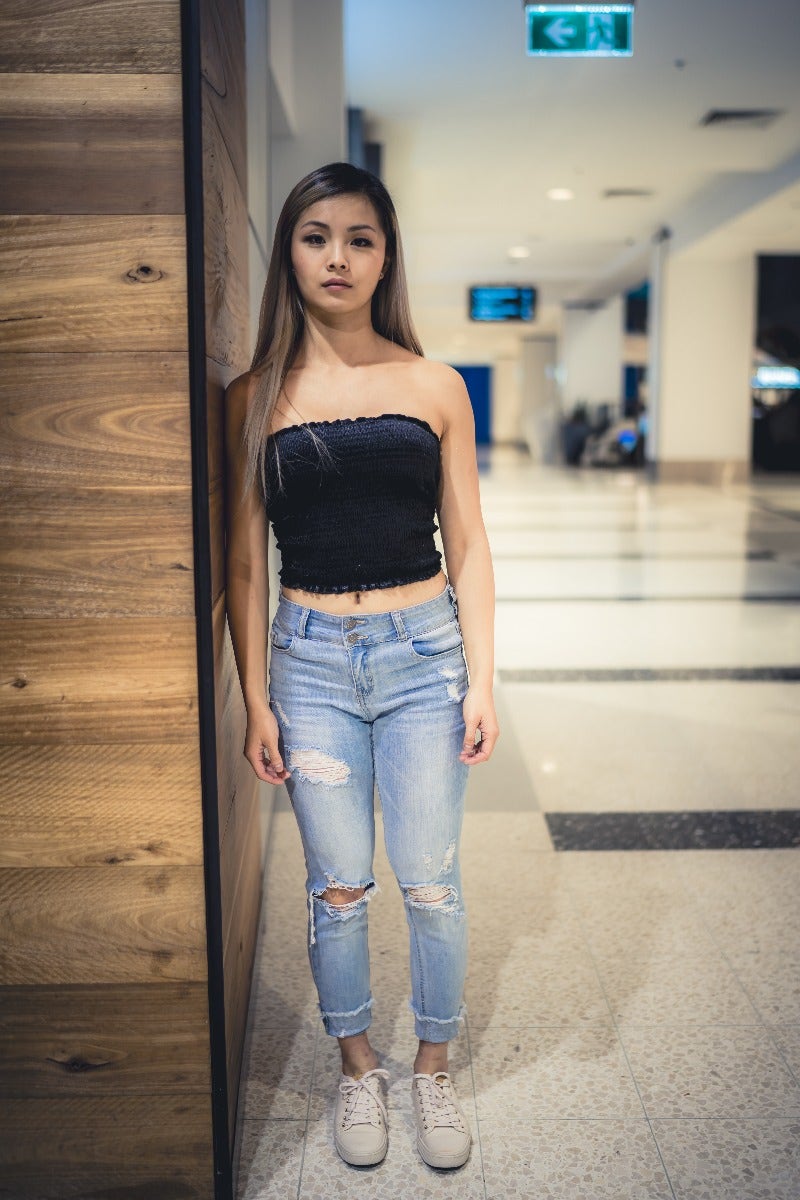
Let's take a look at one final example, this time incorporating the model leaning against a wall. Again, to start her body language looks very stiff, and she looks uncomfortable. Her body doesn't show any emotion or tell any story (other than maybe that she doesn't want to be there!). We're also losing the chance to take advantage of the model's shape - a straight standing position will minimise the curves and lines in your model's body that showcases a more dramatic image. This is true for both female and male models, you want to accentuate the lines of their body and avoid making them look lifeless and shapeless.
As before, let's employ a series of small changes to improve the image. First we will have the model cross her right leg over left leg and pop her left hip out (notice the hip-popping is a recurring theme). This shows more of her curves and makes her look less lifeless, as discussed above.
Second, I asked the model to raise her right arm and lean it against the wall, resting her hand on the back of her head. You'll note that this does result in her elbow facing the camera, which breaks the rule about this that I made in the first example. This just goes to show that with some experience you can learn to bend or break the rules. However I did make particular care to make sure that the elbow was not right up against her face and that it was at a more oblique angle.
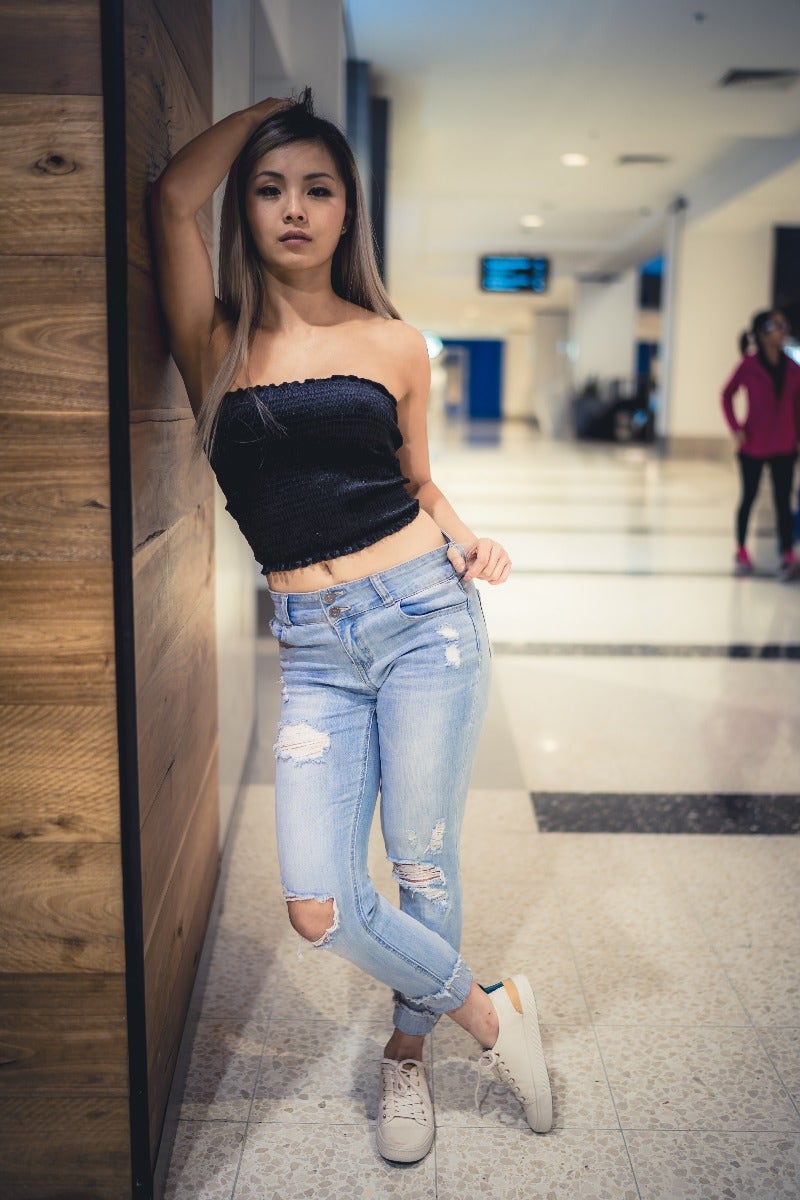
Finally, for the third step we'll address her left arm. I had the model put her thumb in one of her belt loops and relax her arms. That's it! If you compare the below completed image to the original, we can again see the huge difference that a few simple steps can achieve.
There are many other ways that you can achieve natural poses. One is to have your model walk towards or away from you and then spin around to face the camera. Adding that organic movement can add a lot of energy in the still frame, although you'll have to have good timing in order to capture it properly. You can also have your model utilise their hands in a variety of different movements, whether softly tucking their hair behind their ear, playing with a necklace, or grazing a finger across their lips. The hands makes a big impact and add to the story, so you want to avoid poses that will leave their hands hidden (unless you are capturing a head shot).
There are hundreds of creative ways to pose a model, and listing them all would be impossible. But the key is to learn to break the pose down piece by piece and understand how different elements can be combined to make an exciting and dramatic pose. A great way to test out some of those elements is to stand in front of a mirror and experiment - it may feel silly, but it will both let you try new positions and give you some insight to what it feels like to be the model, both of which are valuable! The key here is practice. The more you are familiar with the human body the more quickly and easily you will be able to recognise strong posing opportunities for your situation and execute them effectively. Good luck!
Interested in contributing to the digiLife blog? Email community@digidirect.com.au with the subject line "digiLife Contributor", and include links to your photography portfolio and a writing sample.


Comments
No Comments yet. Be the first to comment.